La CLI de Quickwit comme agent web IA pour CWCloud et Gitlab
qwctl est Open Source, mais pour les instances on-premises de CWCloud, vous devez disposer de l'Enterprise Edition (EE) pour utiliser les fonctionnalités d'agent IA. Merci de nous contacter pour plus d'informations.
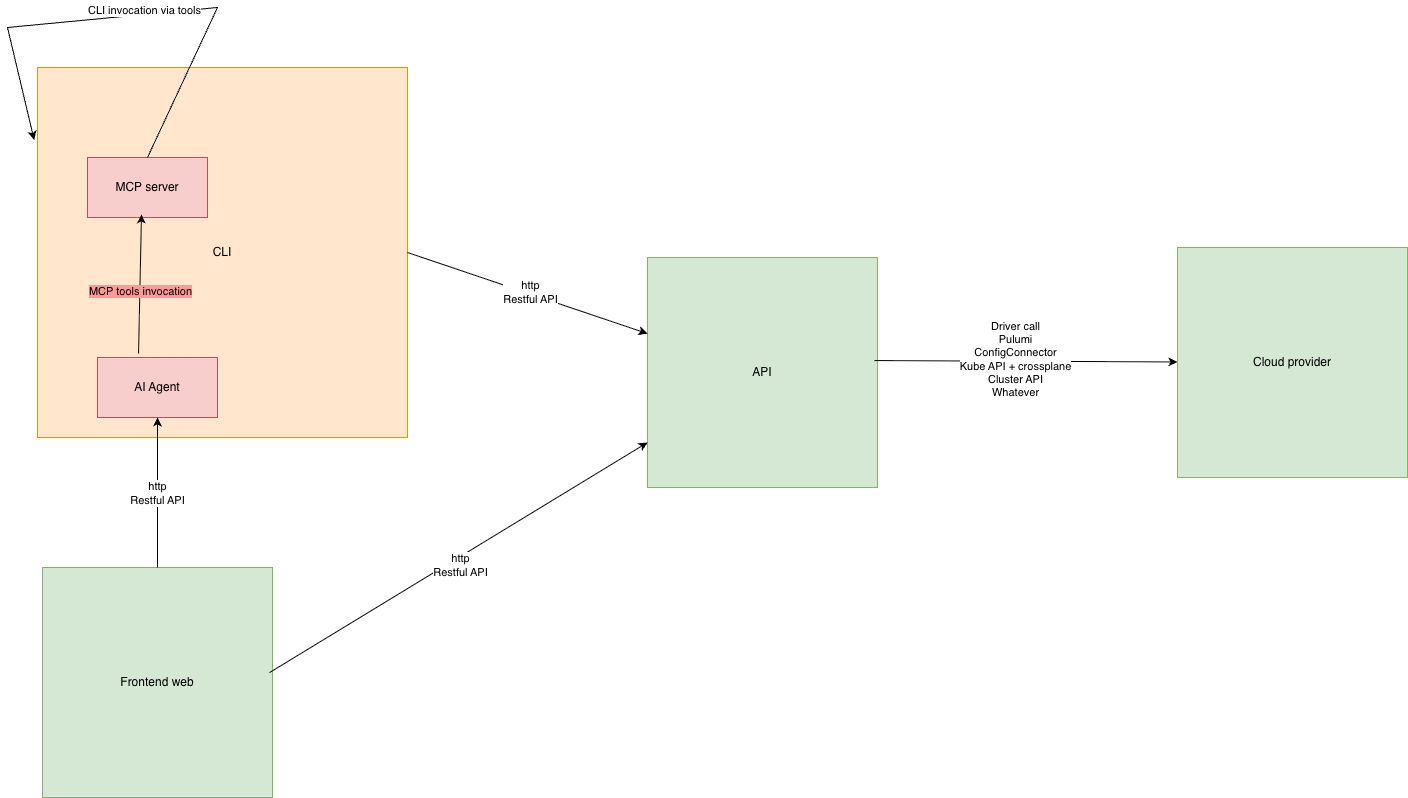
Comme expliqué dans notre précédent blogpost, nous continuons à agentiser chaque pilier du platform engineering afin de pouvoir interagir via le chat, les fonctions serverless ou des webhooks de tickets qui déclenchent des prompts. Et l'un de ces piliers est l'observabilité.
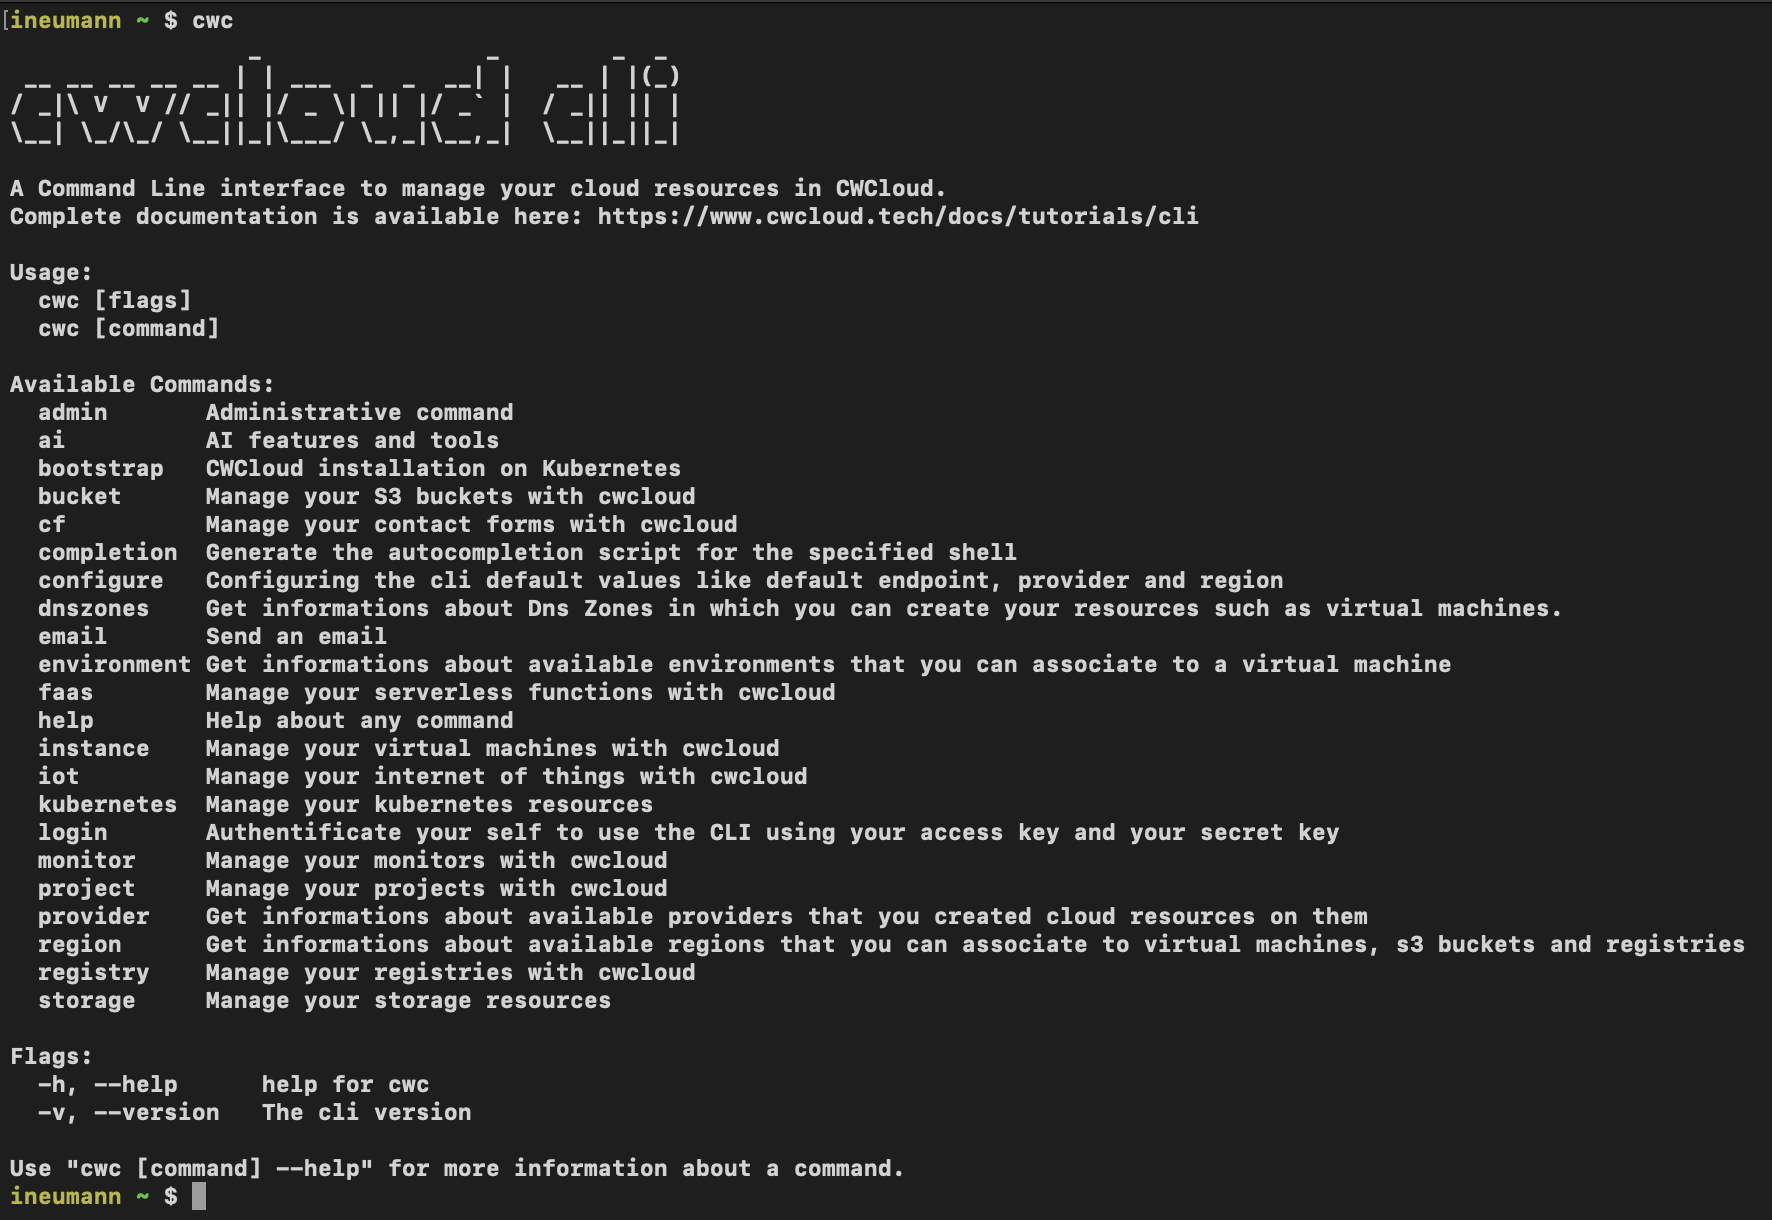
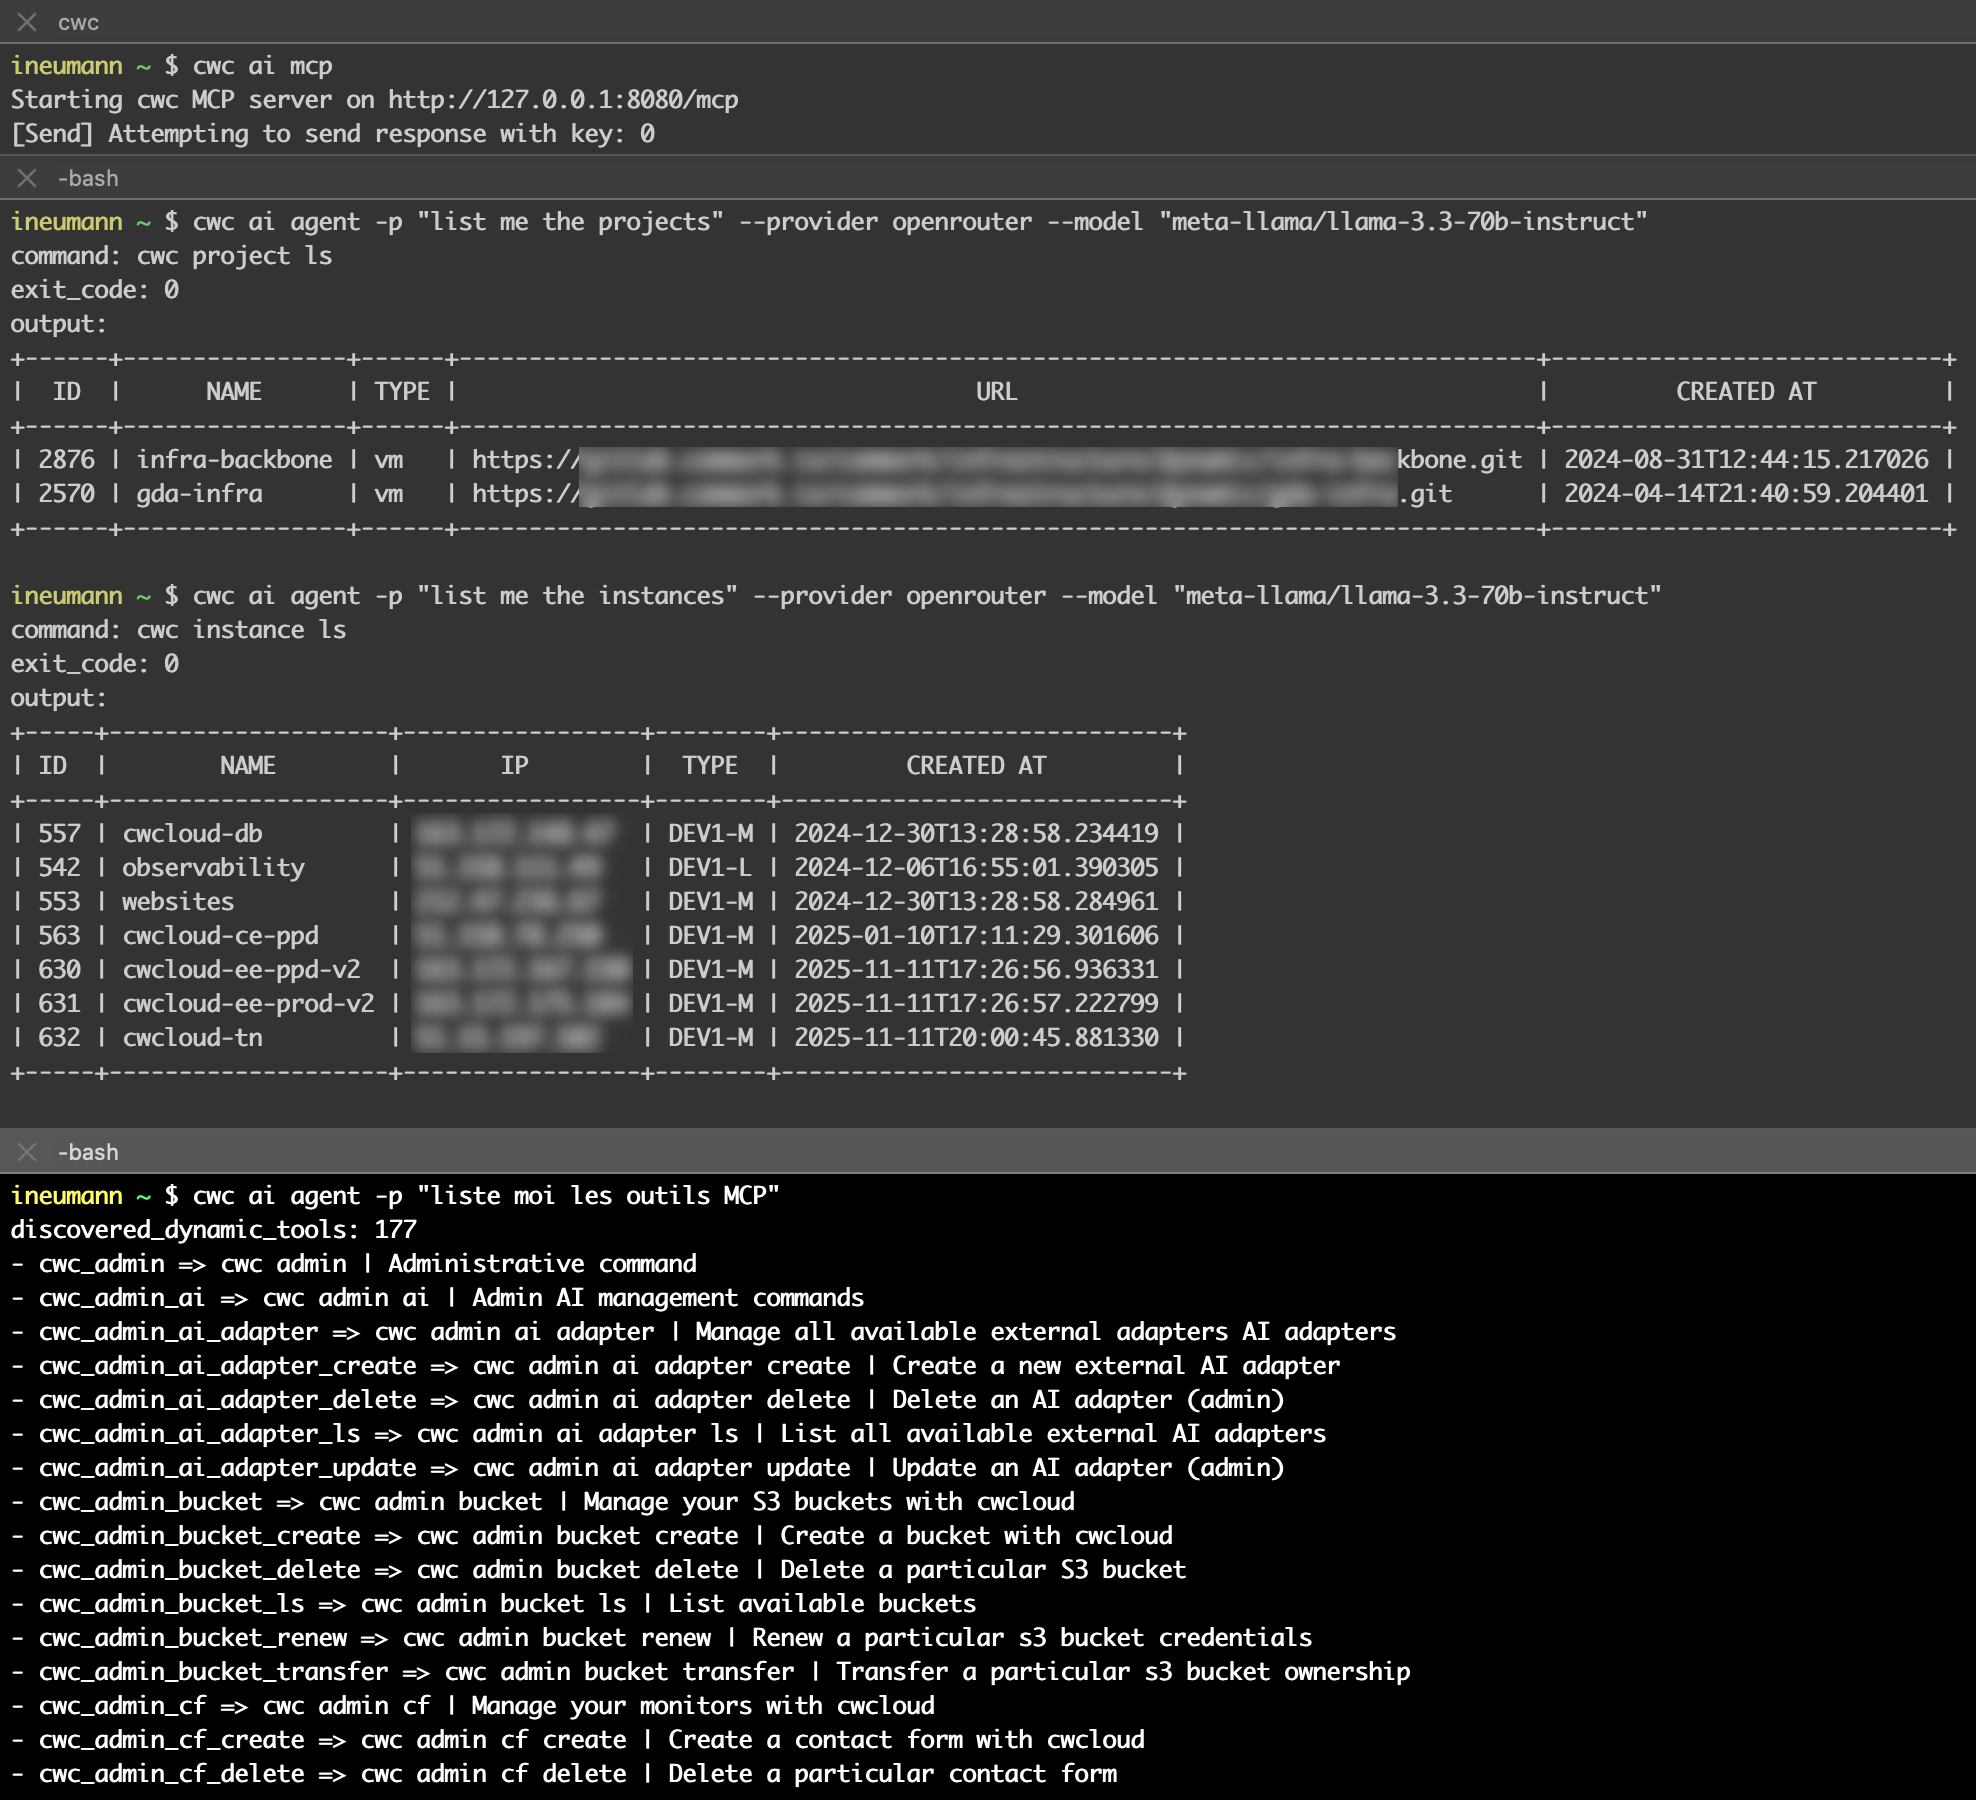
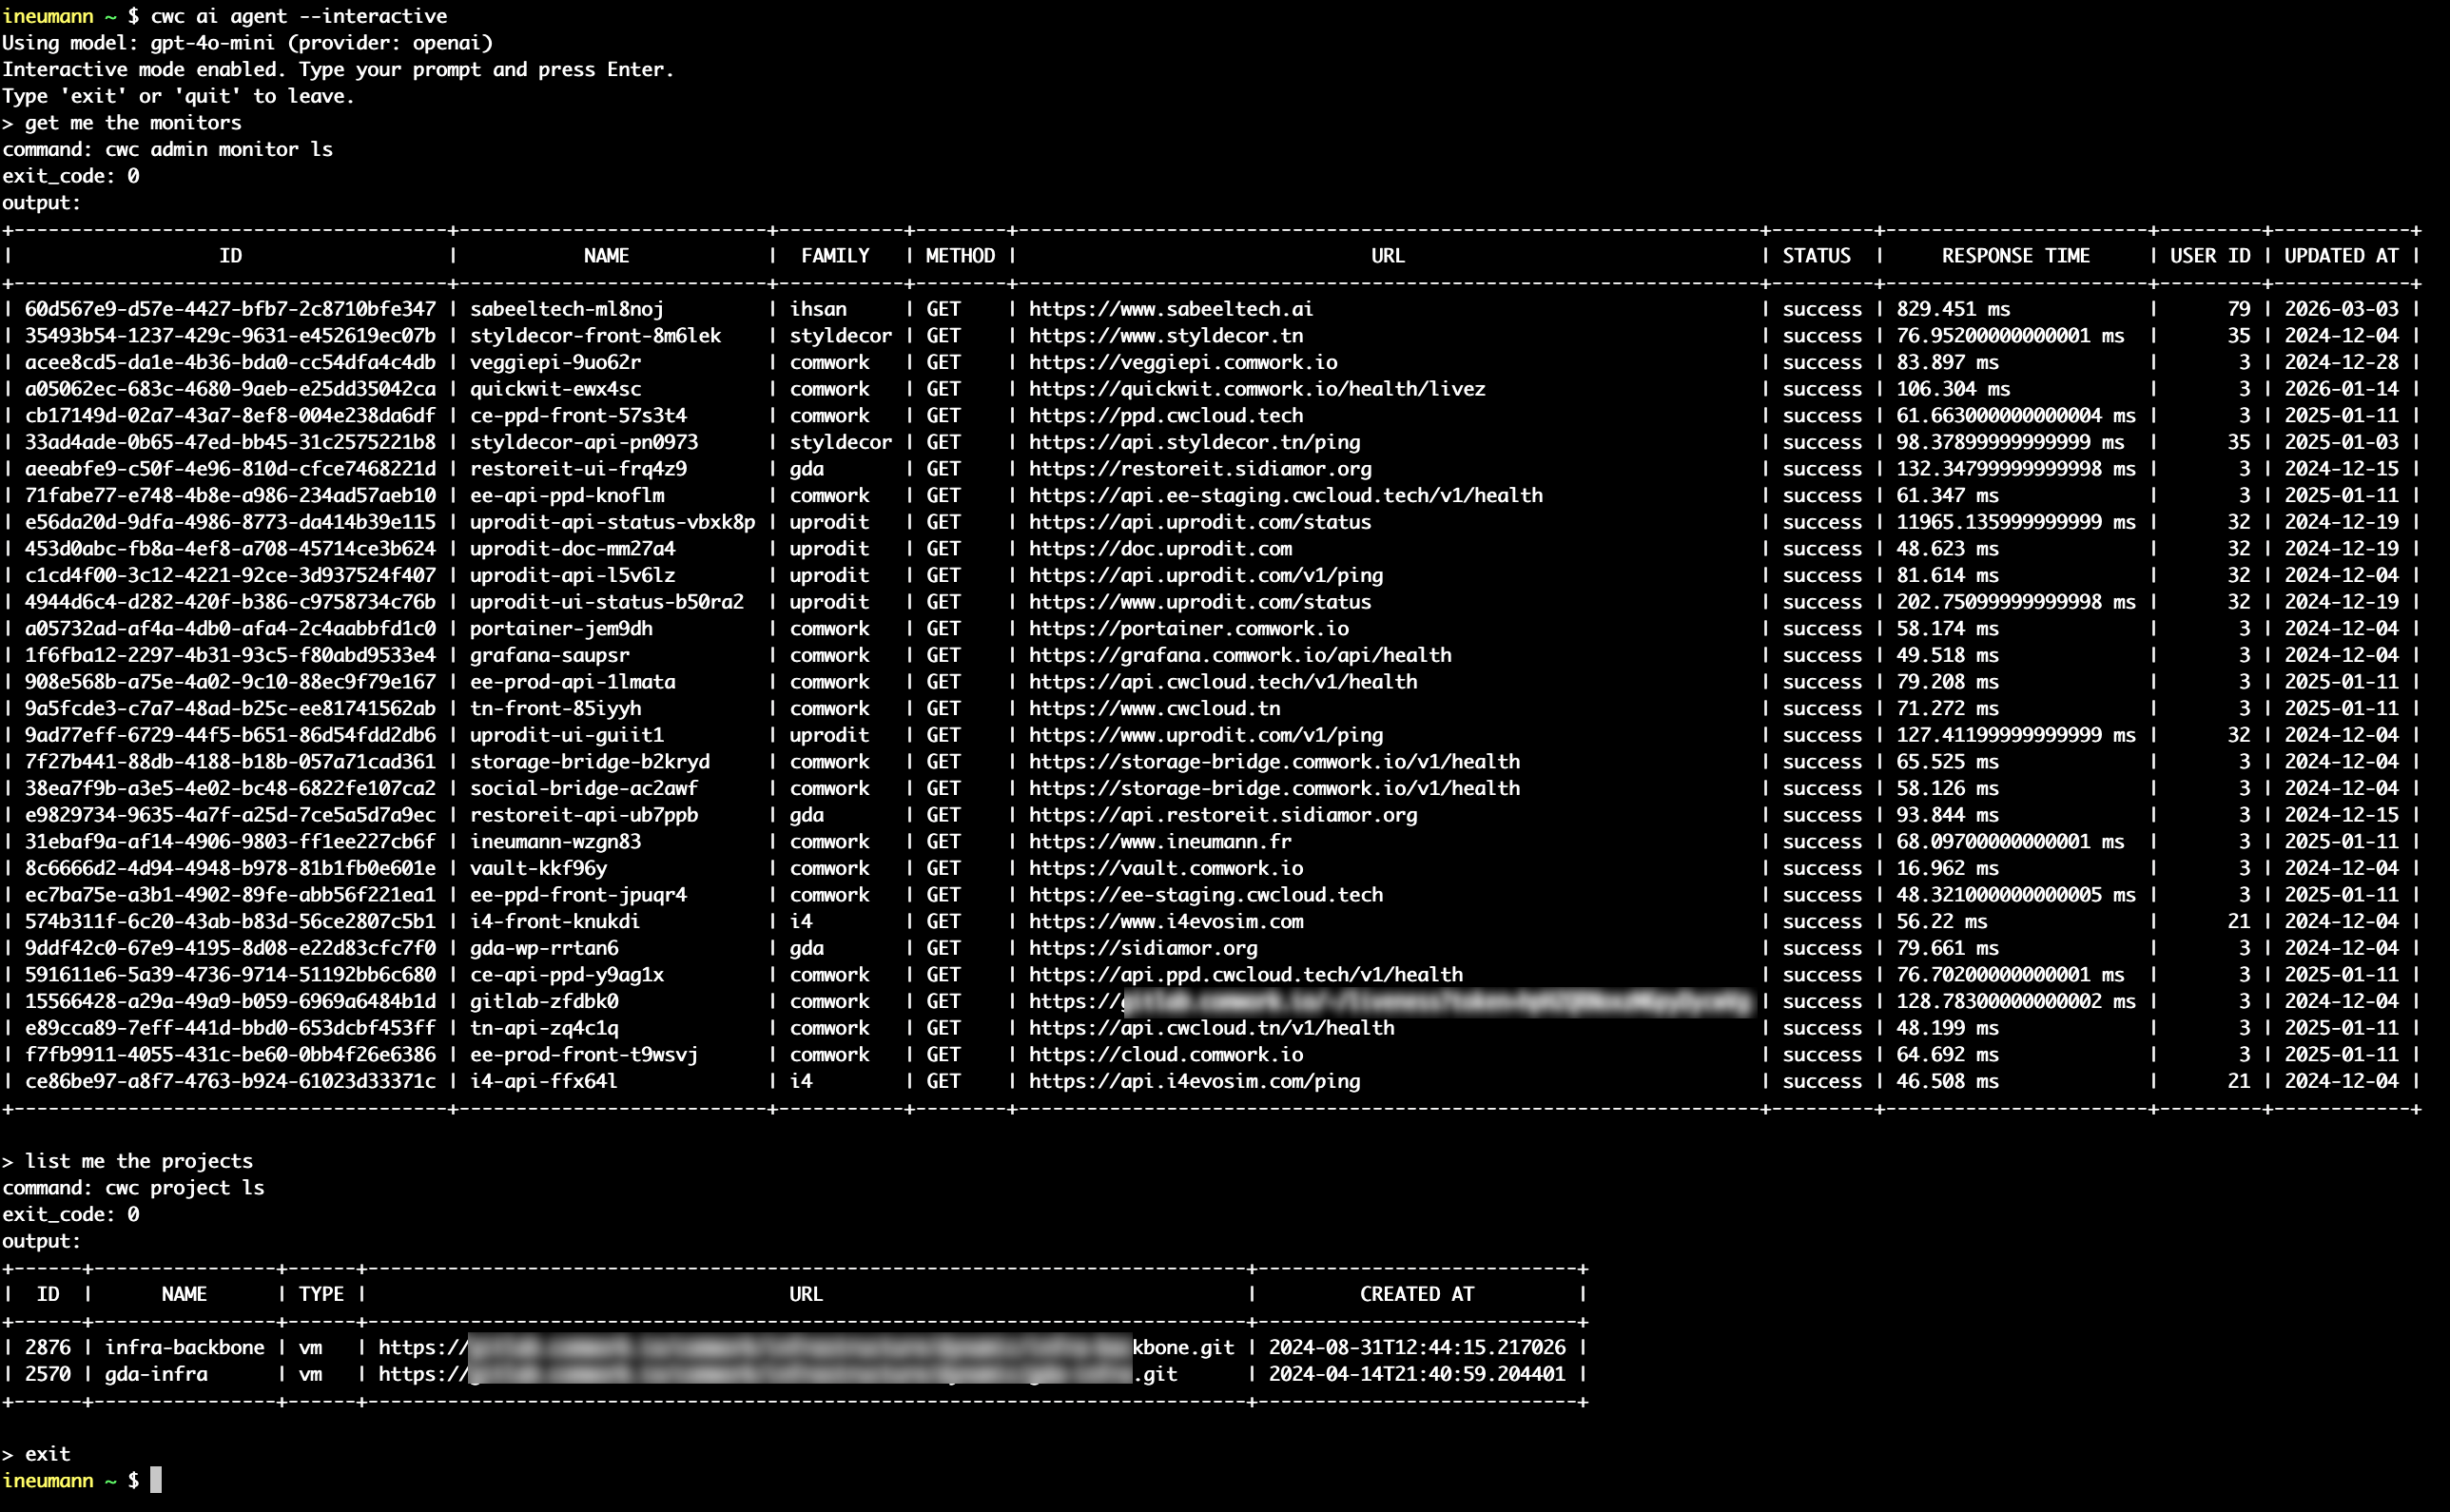
Comme vous avez pu le voir dans plusieurs blogposts, nous travaillons aussi étroitement avec Quickwit depuis quelques années et nous contribuons à leur CLI, qwctl. Cette CLI est construite sur le modèle de notre propre CLI cwc, avec un serveur MCP et un agent interactif embarqué.
Voici une démo de l'utilisation de qwctl comme serveur MCP et agent web :
Dans ce blogpost, nous allons voir comment utiliser qwctl comme agent web externe compatible avec l'API CWAI, ainsi que comme webhook GitLab.
D'abord, voici comment lancer la CLI qwctl en mode agent web :
$ qwctl ai web-agent
Nous pouvons aussi spécifier le port et l'adresse d'écoute :
$ qwctl ai web-agent -a 0.0.0.0 -p 8081 -s http://localhost:8080/mcp
Ensuite, nous pouvons envoyer une requête HTTP POST vers l'agent web :
$ curl -X POST http://localhost:8081 -H "Content-Type: application/json" -d '{ "settings": { "max_tokens": 500 }, "message": "Hello"}'
L'agent web répondra ainsi (en respectant le contrat external adapter) :
{
  "status": "ok",
  "message": "Hello! How can I assist you today?",
  "usage": {
    "prompt_tokens": 8,
    "completion_tokens": 10,
    "total_tokens": 18
  }
}
Pour héberger la CLI comme serveur MCP et agent web en même temps, voici un exemple de fichier docker compose :
services:
  qwctl_mcp:
    image: "rg.fr-par.scw.cloud/cwcloud-ce-u7u1q0/cwc:1.19.13"
    restart: always
    container_name: qwctl_mcp
    env_file:
      - .env.qwctl
    volumes:
      - "/etc/ssl/certs/ca-bundle.crt:/etc/ssl/certs/ca-bundle.crt:ro"
      - "/etc/ssl/certs/ca-bundle.trust.crt:/etc/ssl/certs/ca-bundle.trust.crt:ro"
    command: ["ai", "mcp", "-l", "0.0.0.0", "-p", "8080"]
    networks:
      - cwc_network
  qwctl_agent:
    image: "rg.fr-par.scw.cloud/cwcloud-ce-u7u1q0/cwc:1.19.13"
    restart: always
    container_name: qwctl_agent
    env_file:
      - .env.qwctl
    volumes:
      - "/etc/ssl/certs/ca-bundle.crt:/etc/ssl/certs/ca-bundle.crt:ro"
      - "/etc/ssl/certs/ca-bundle.trust.crt:/etc/ssl/certs/ca-bundle.trust.crt:ro"
    command: ["ai", "web-agent", "-a", "0.0.0.0", "-p", "8081", "-s", "http://qwctl_mcp:8080"]
    ports:
        - "8081:8081"
    networks:
      - qwctl_network

networks:
  qwctl_network:
    driver: bridge
Dans le .env.qwctl, vous pouvez définir toutes les variables d'environnement nécessaires pour la CLI qwctl, comme la clé API et le modèle par défaut à utiliser. Vous pouvez consulter cette documentation pour plus de détails.
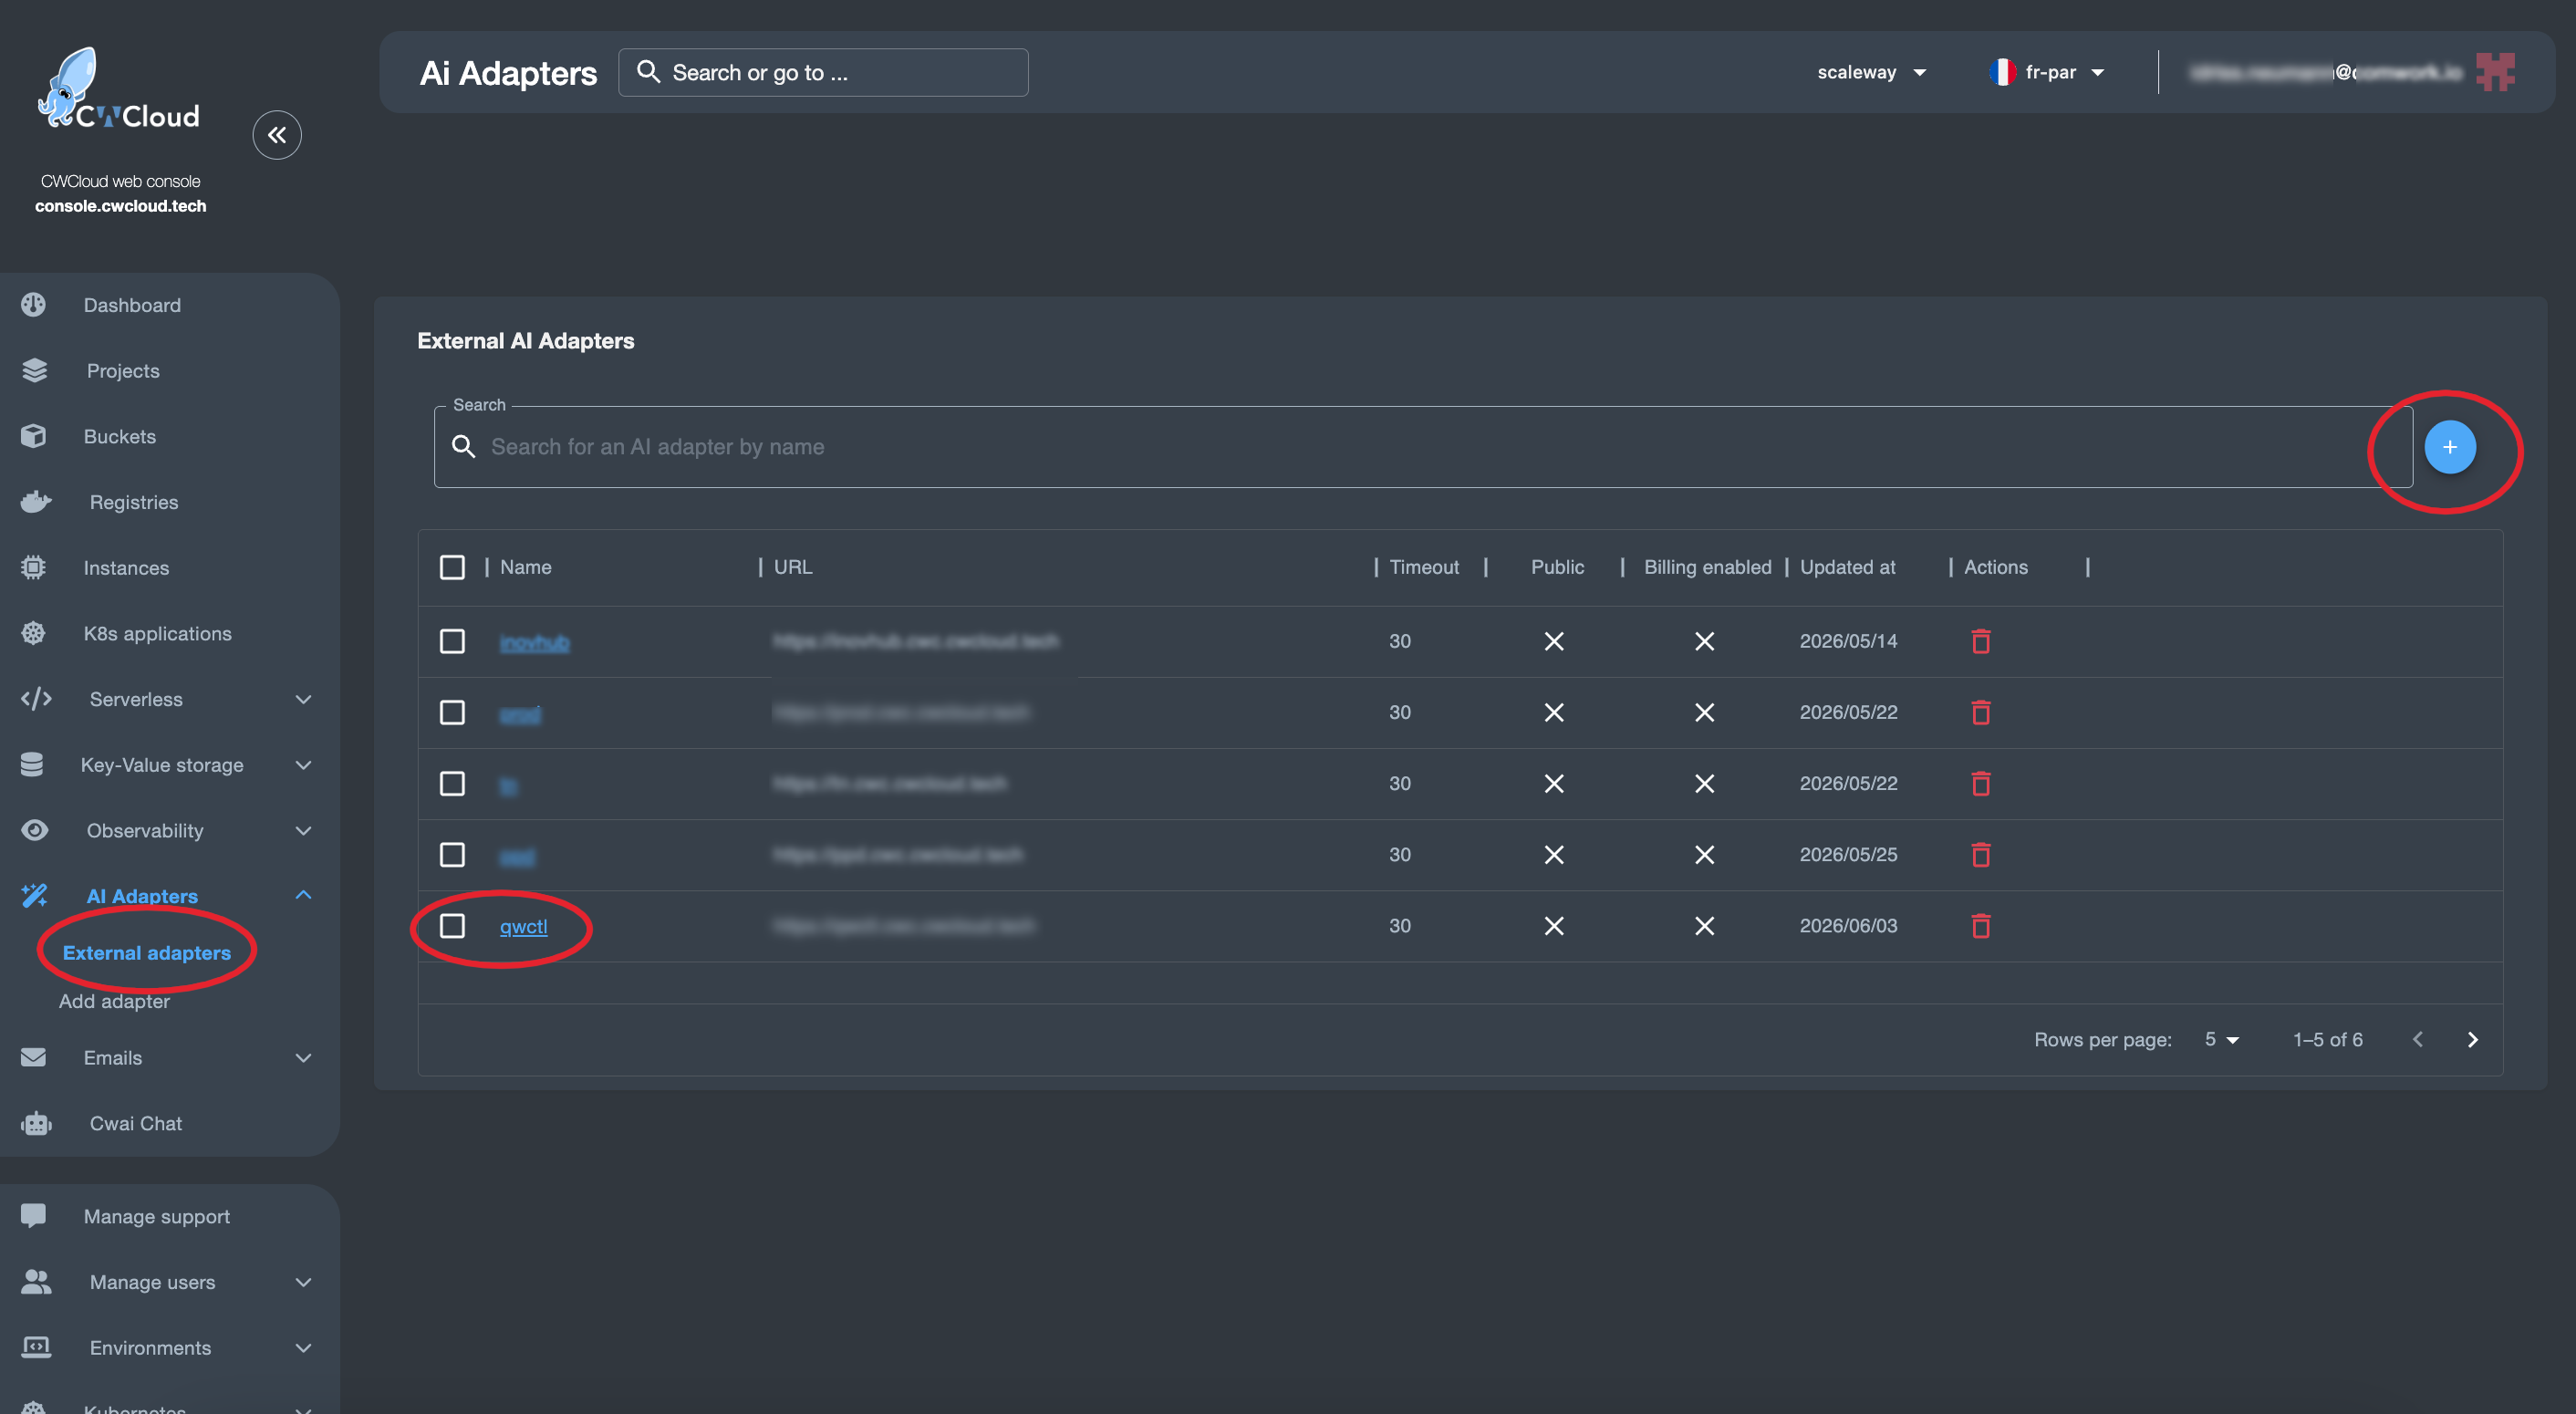
Adaptateur IA externe pour CWCloud
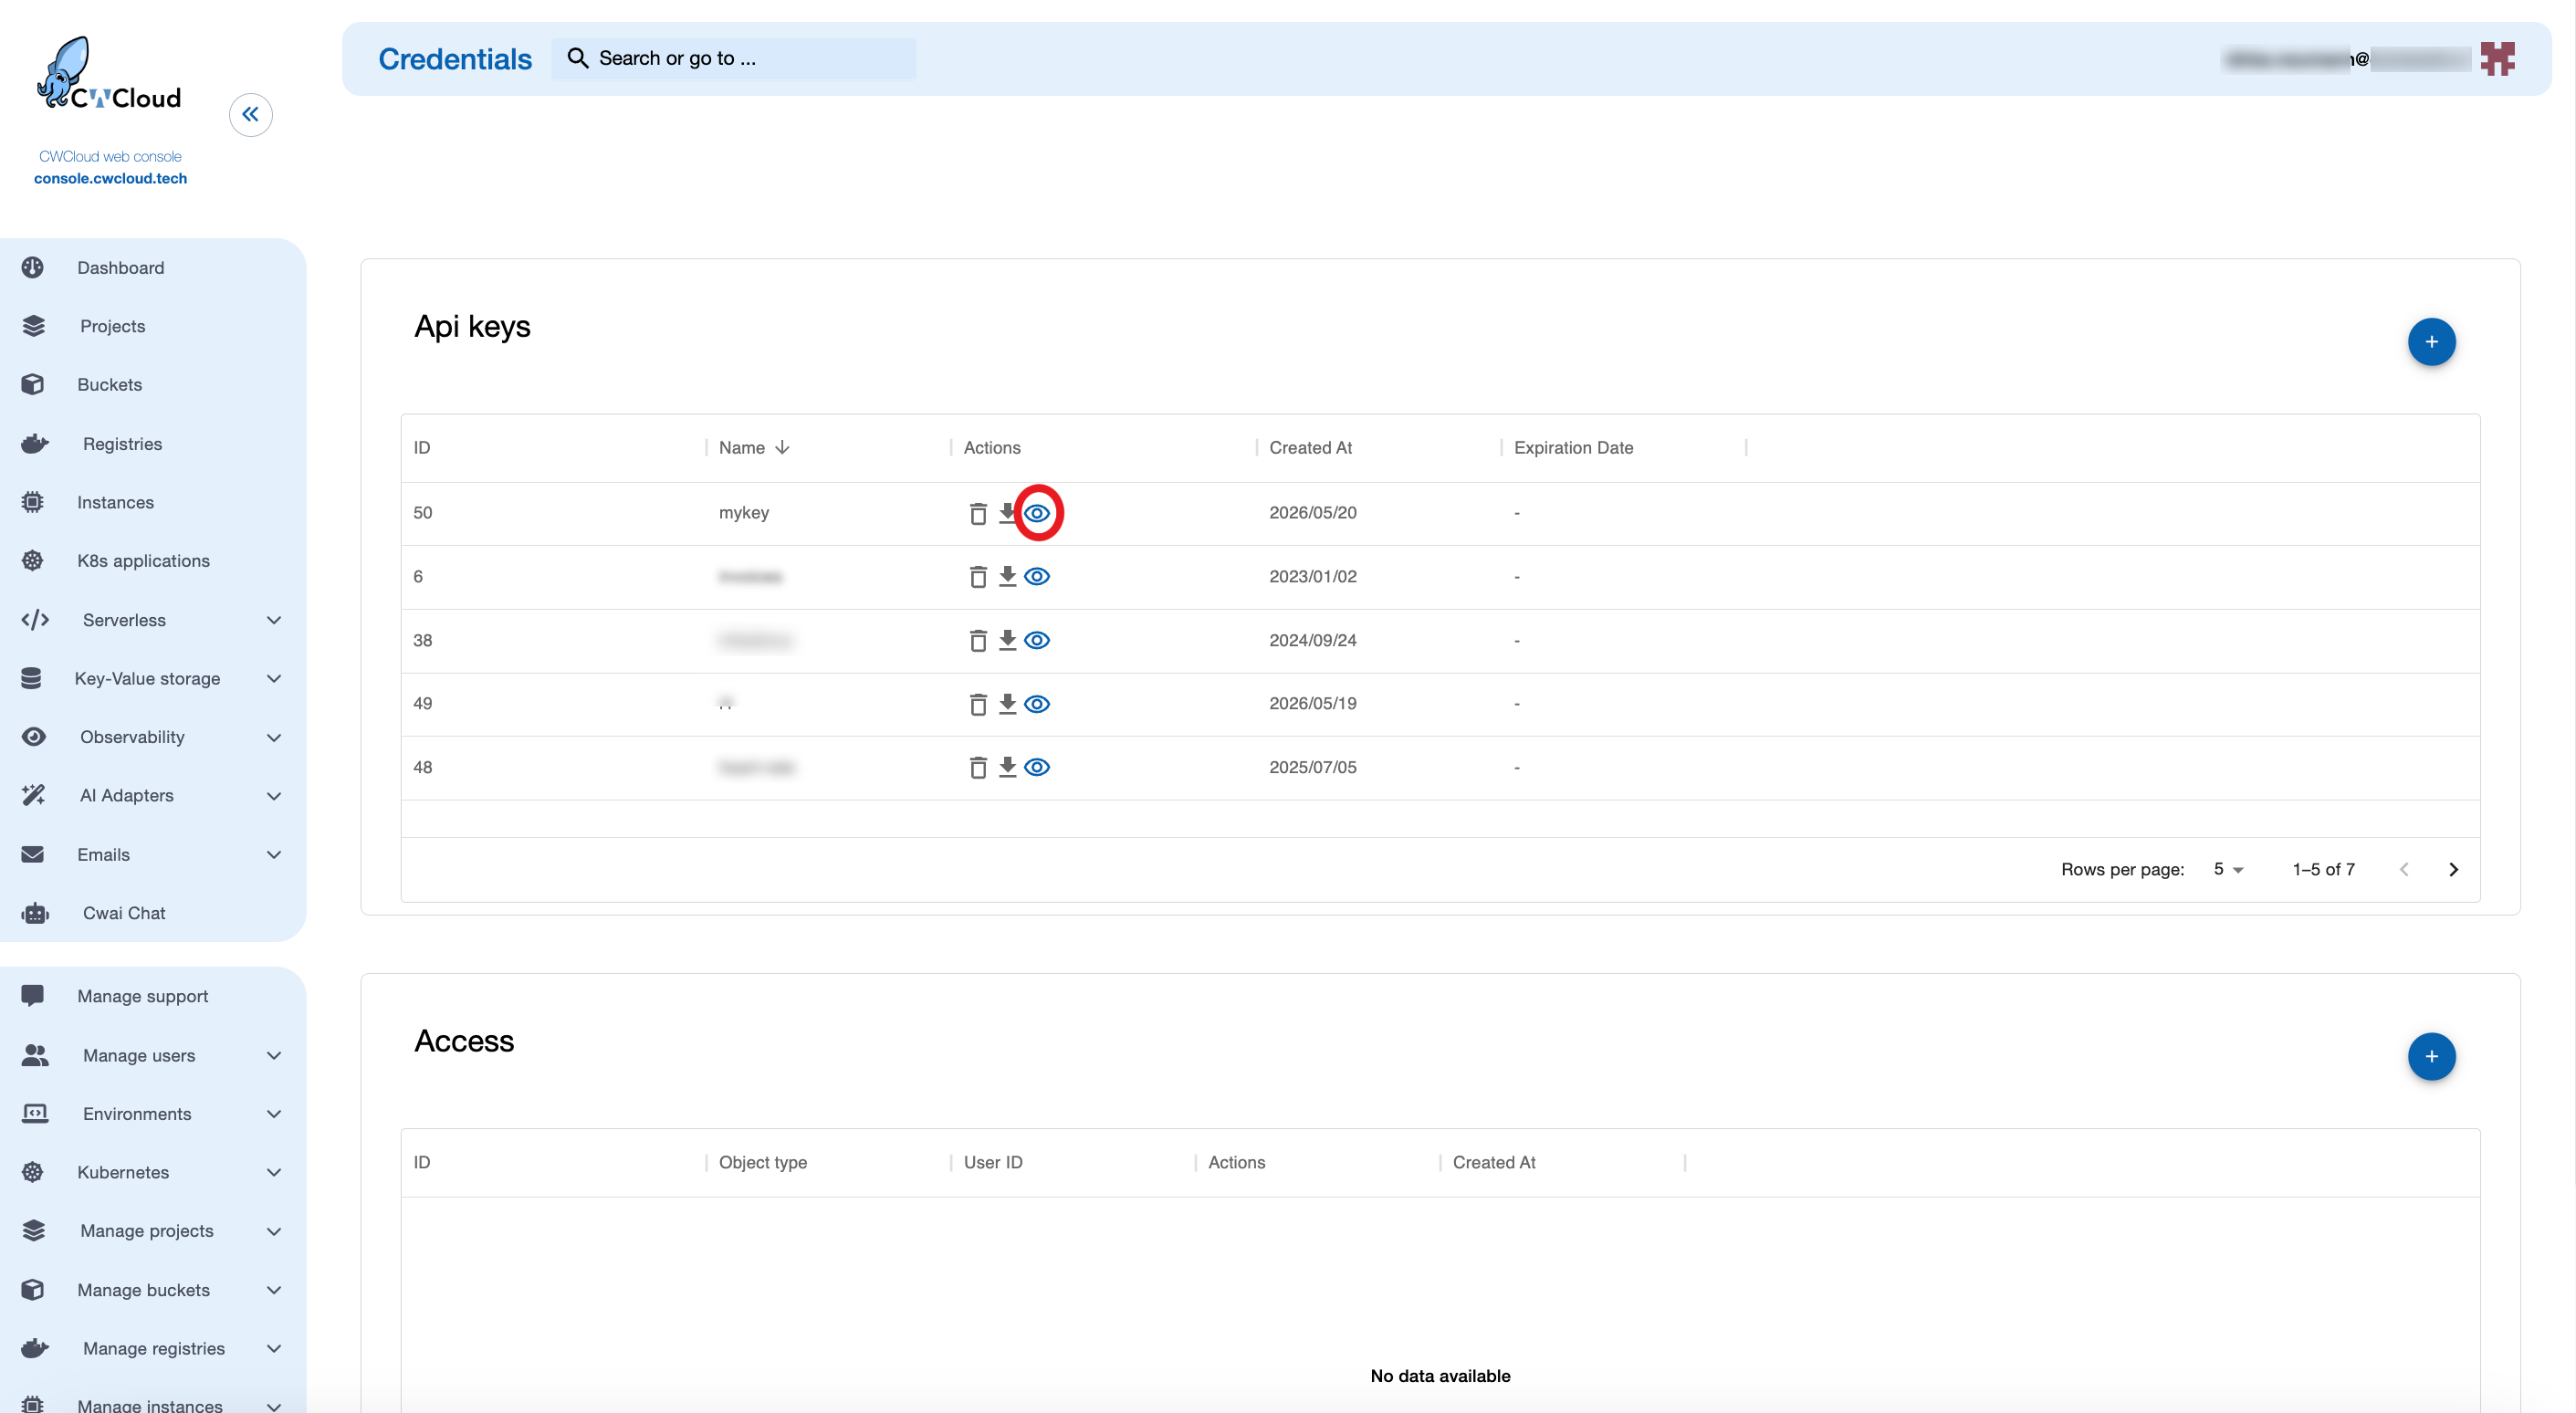
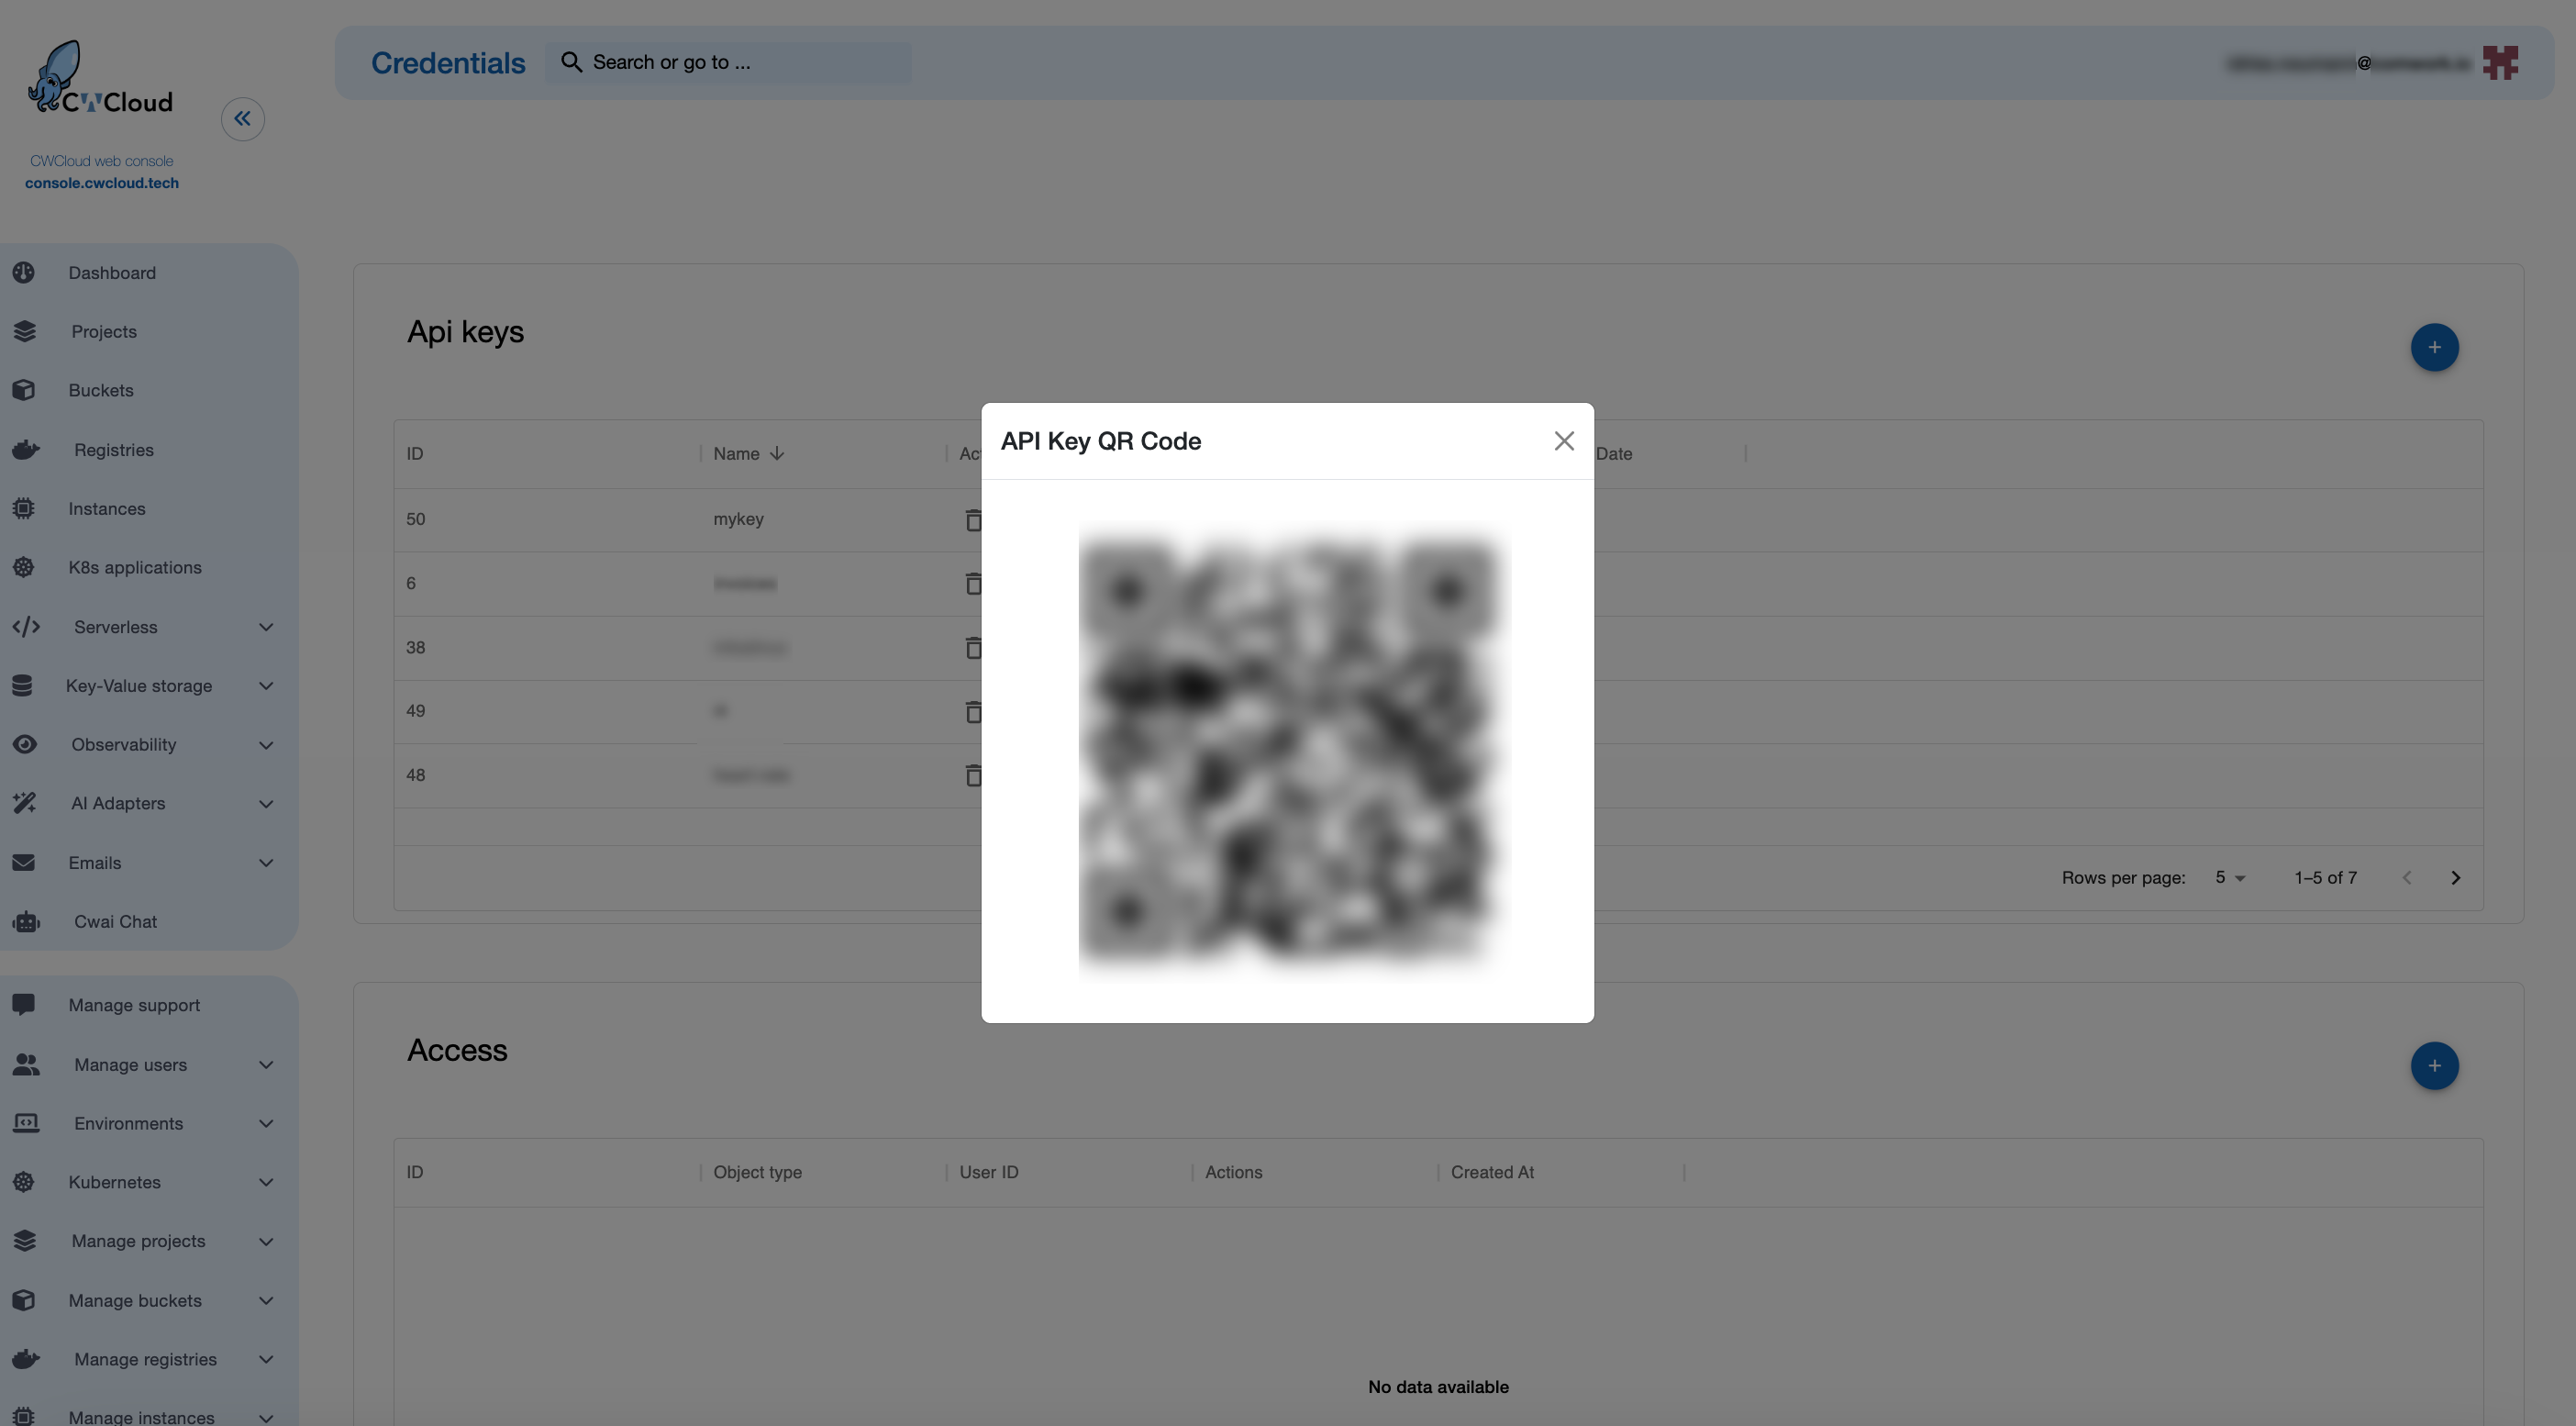
Nous pouvons ensuite ajouter l'agent web en tant qu'external adapter :
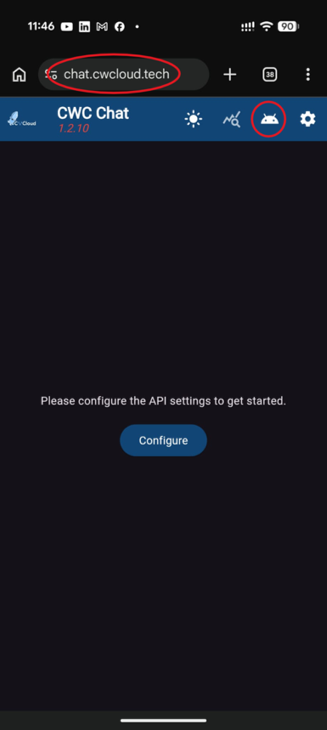
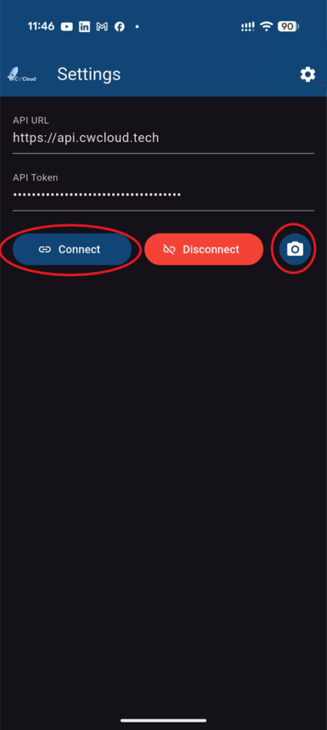
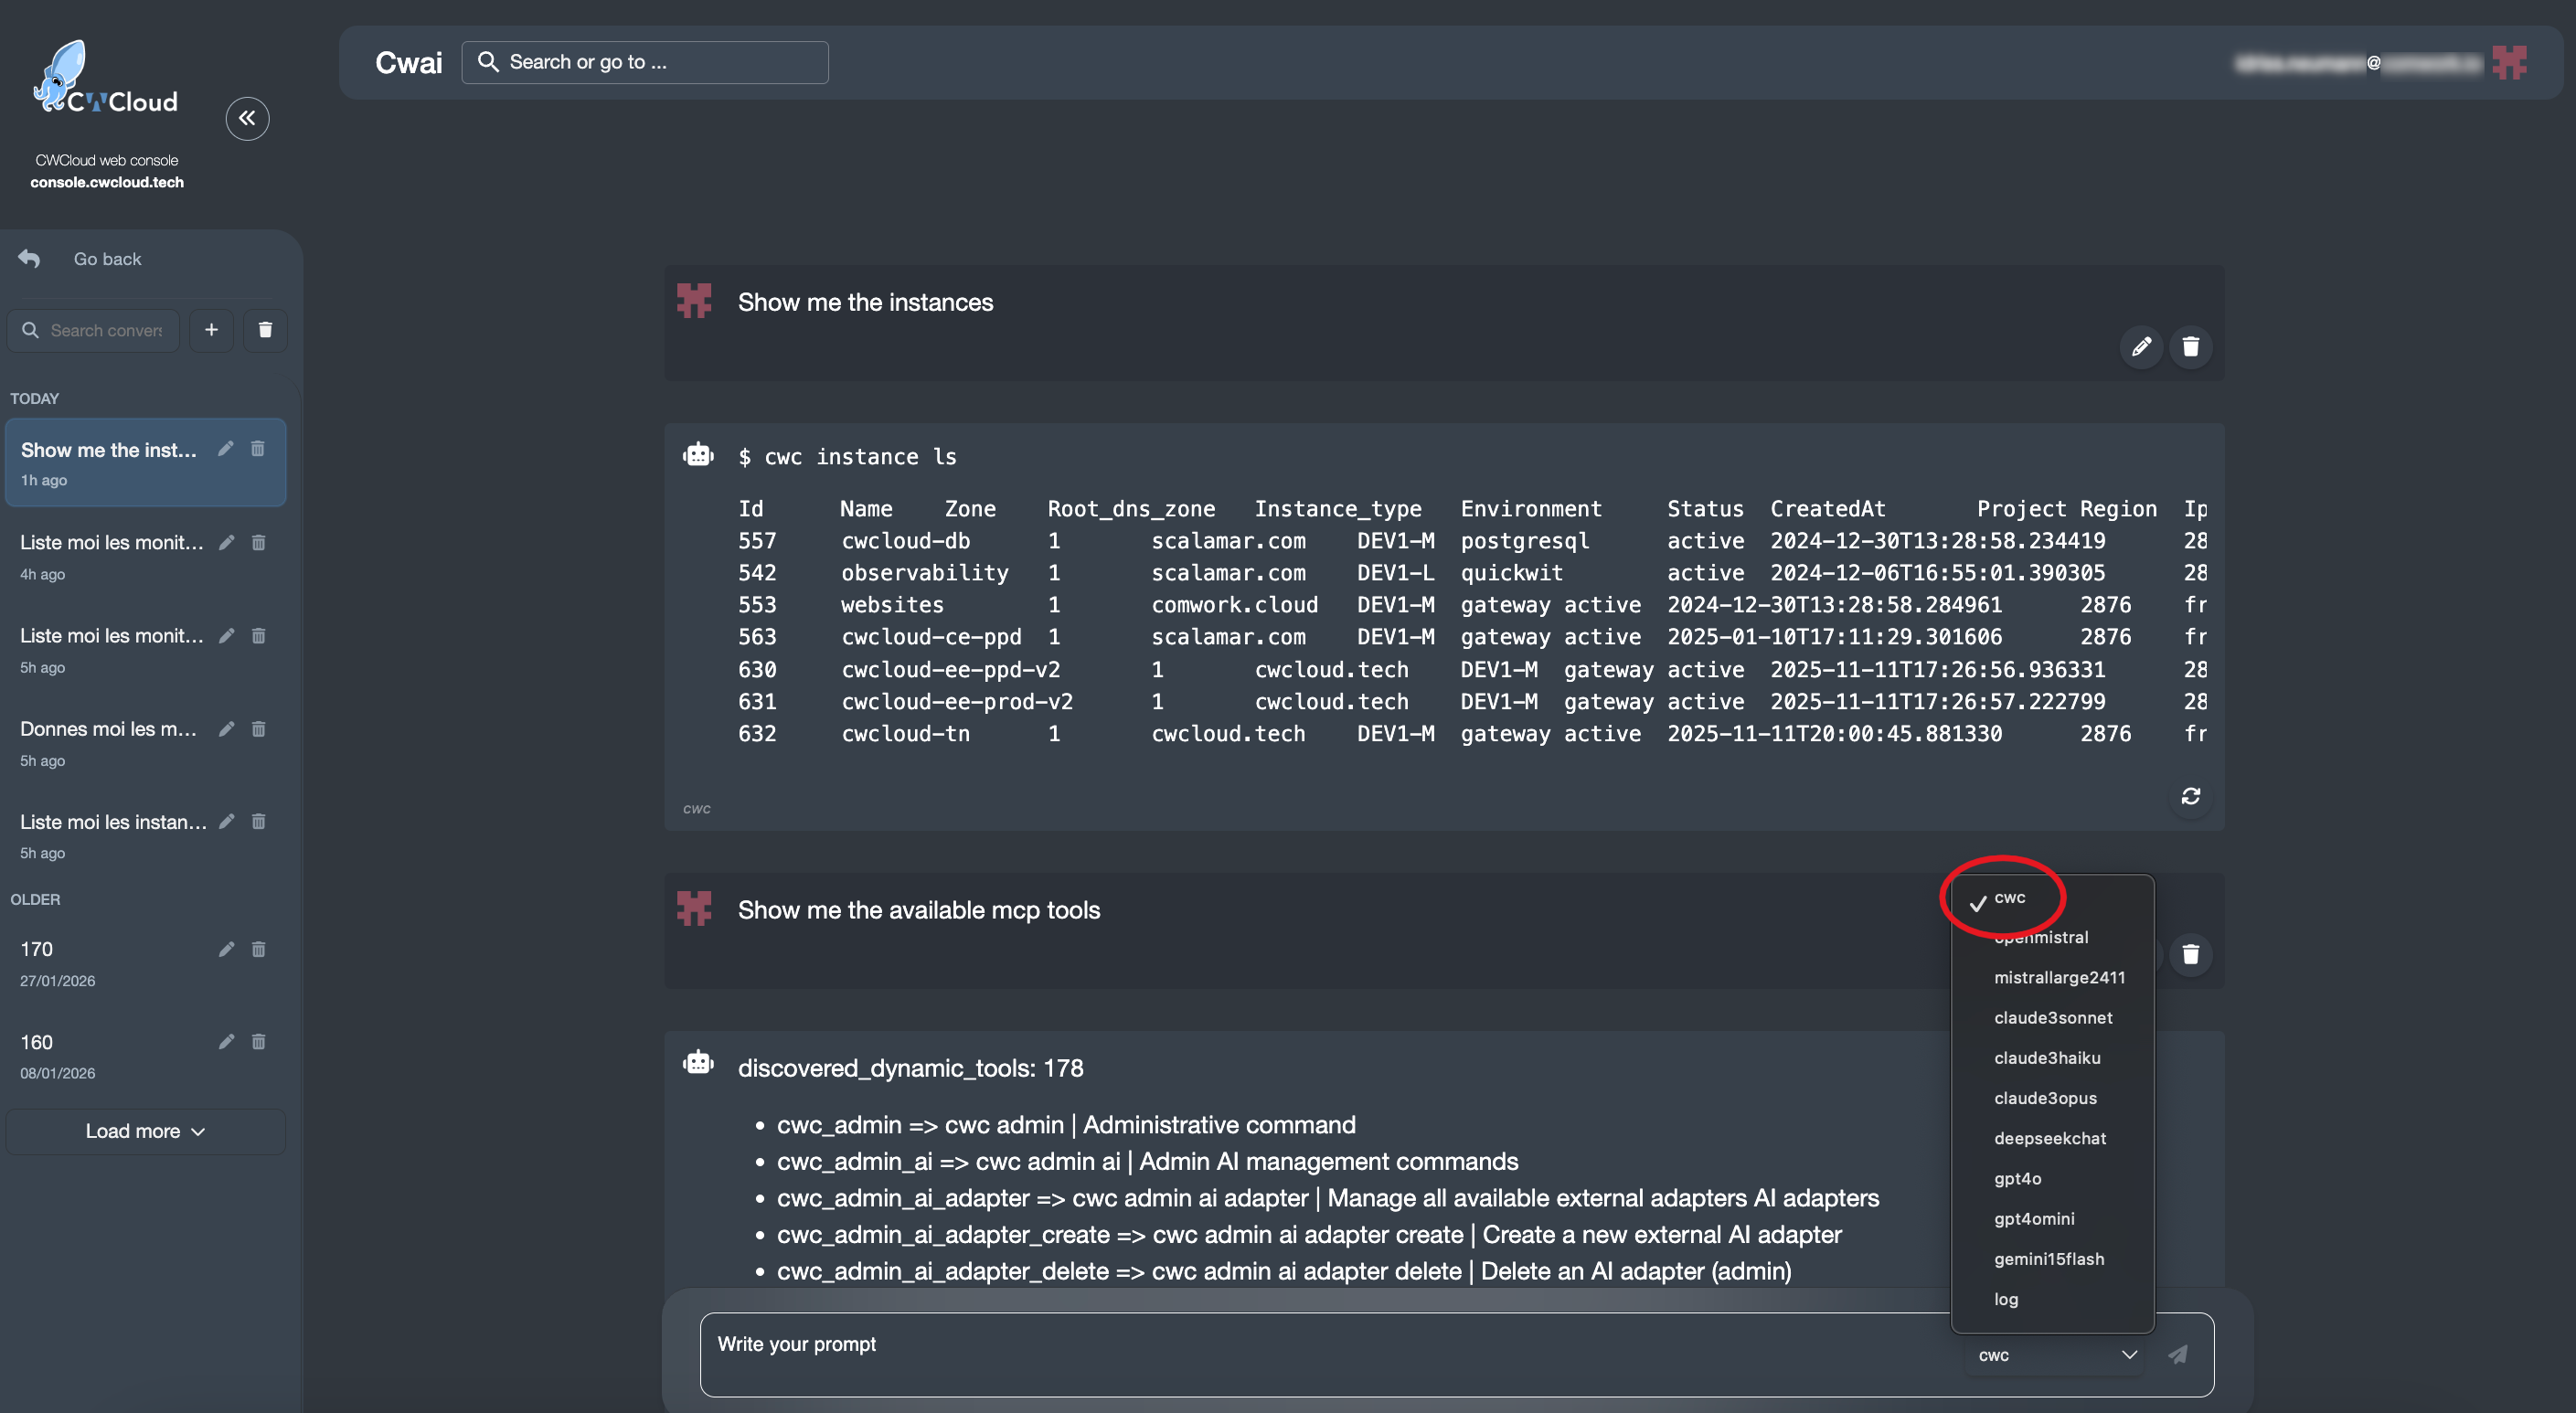
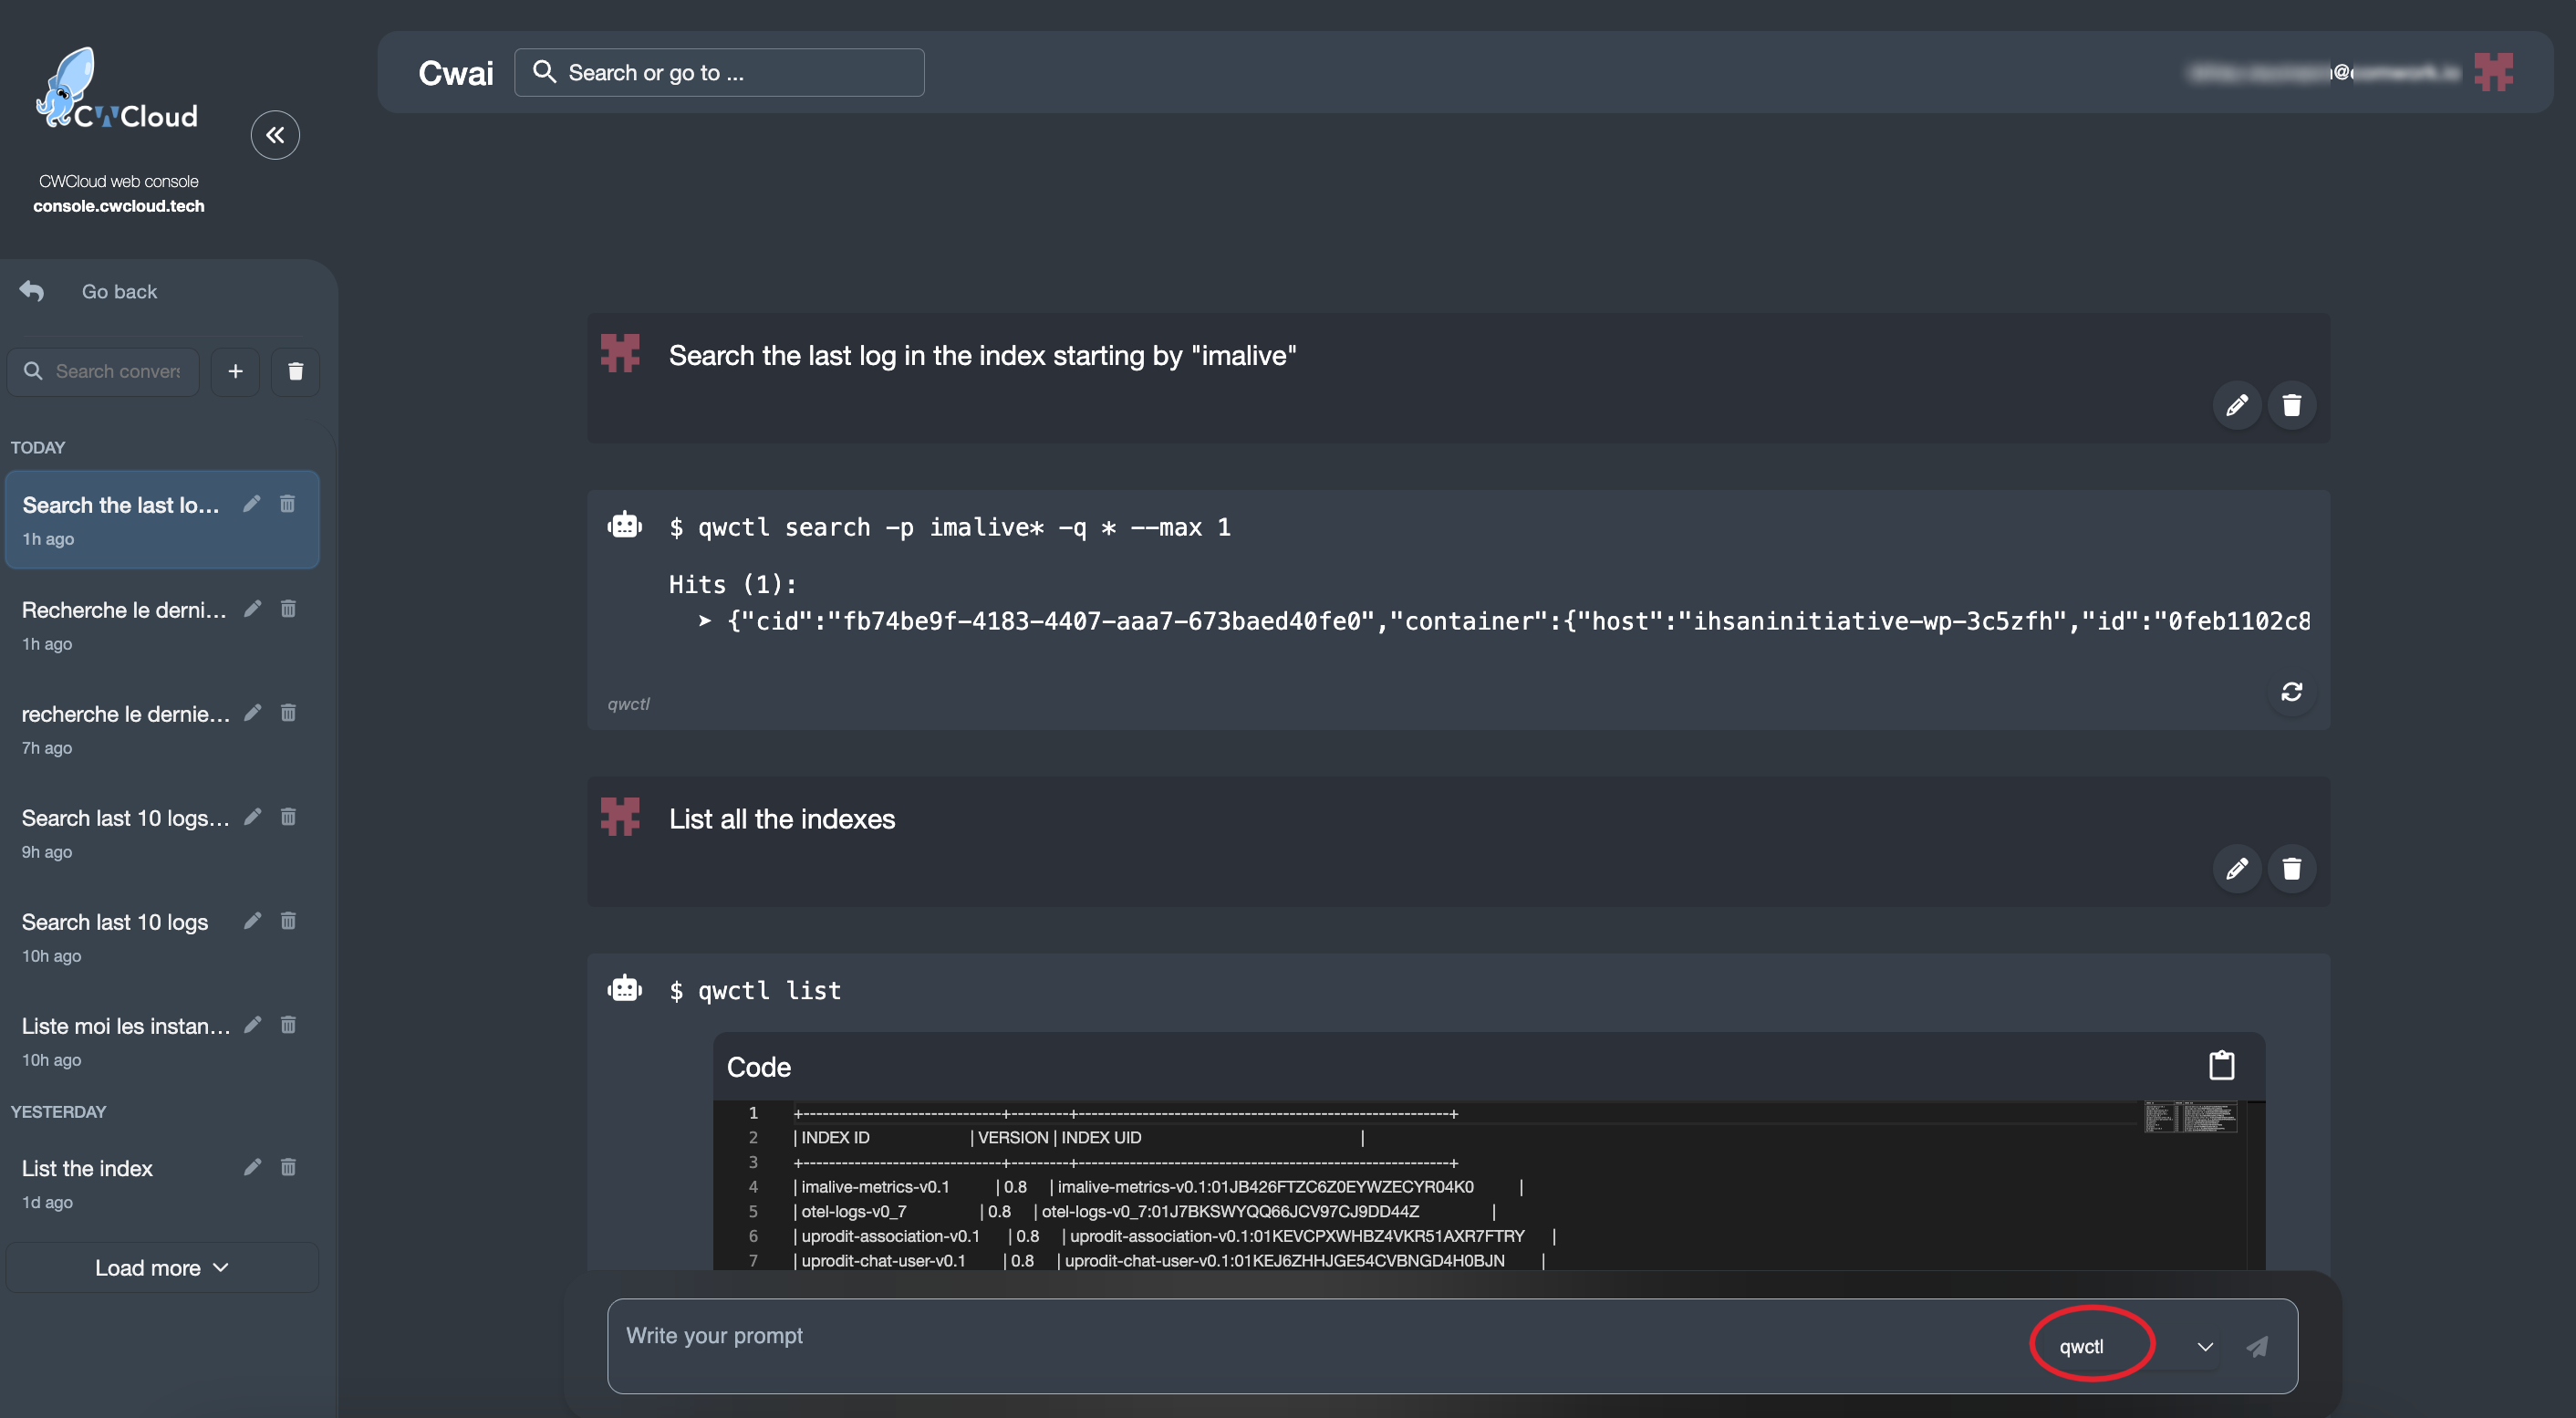
Puis l'utiliser avec le chat de CWAI :
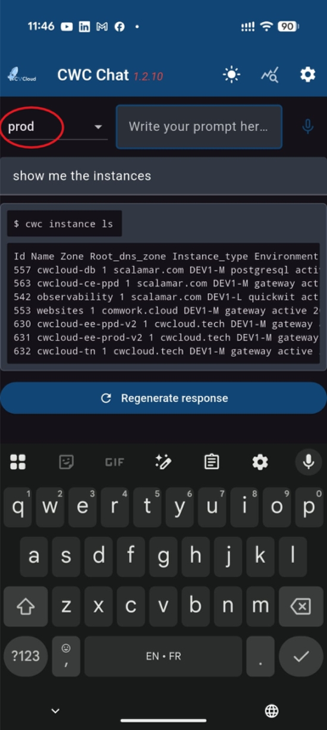
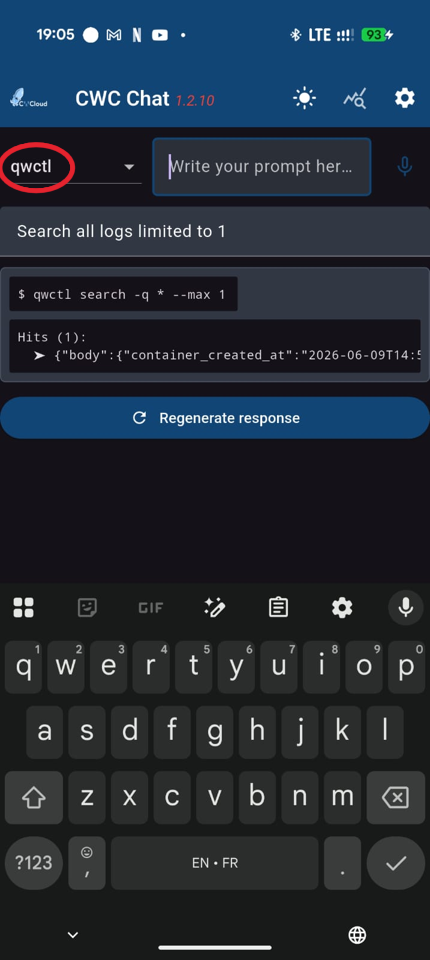
Ou avec l'application mobile :
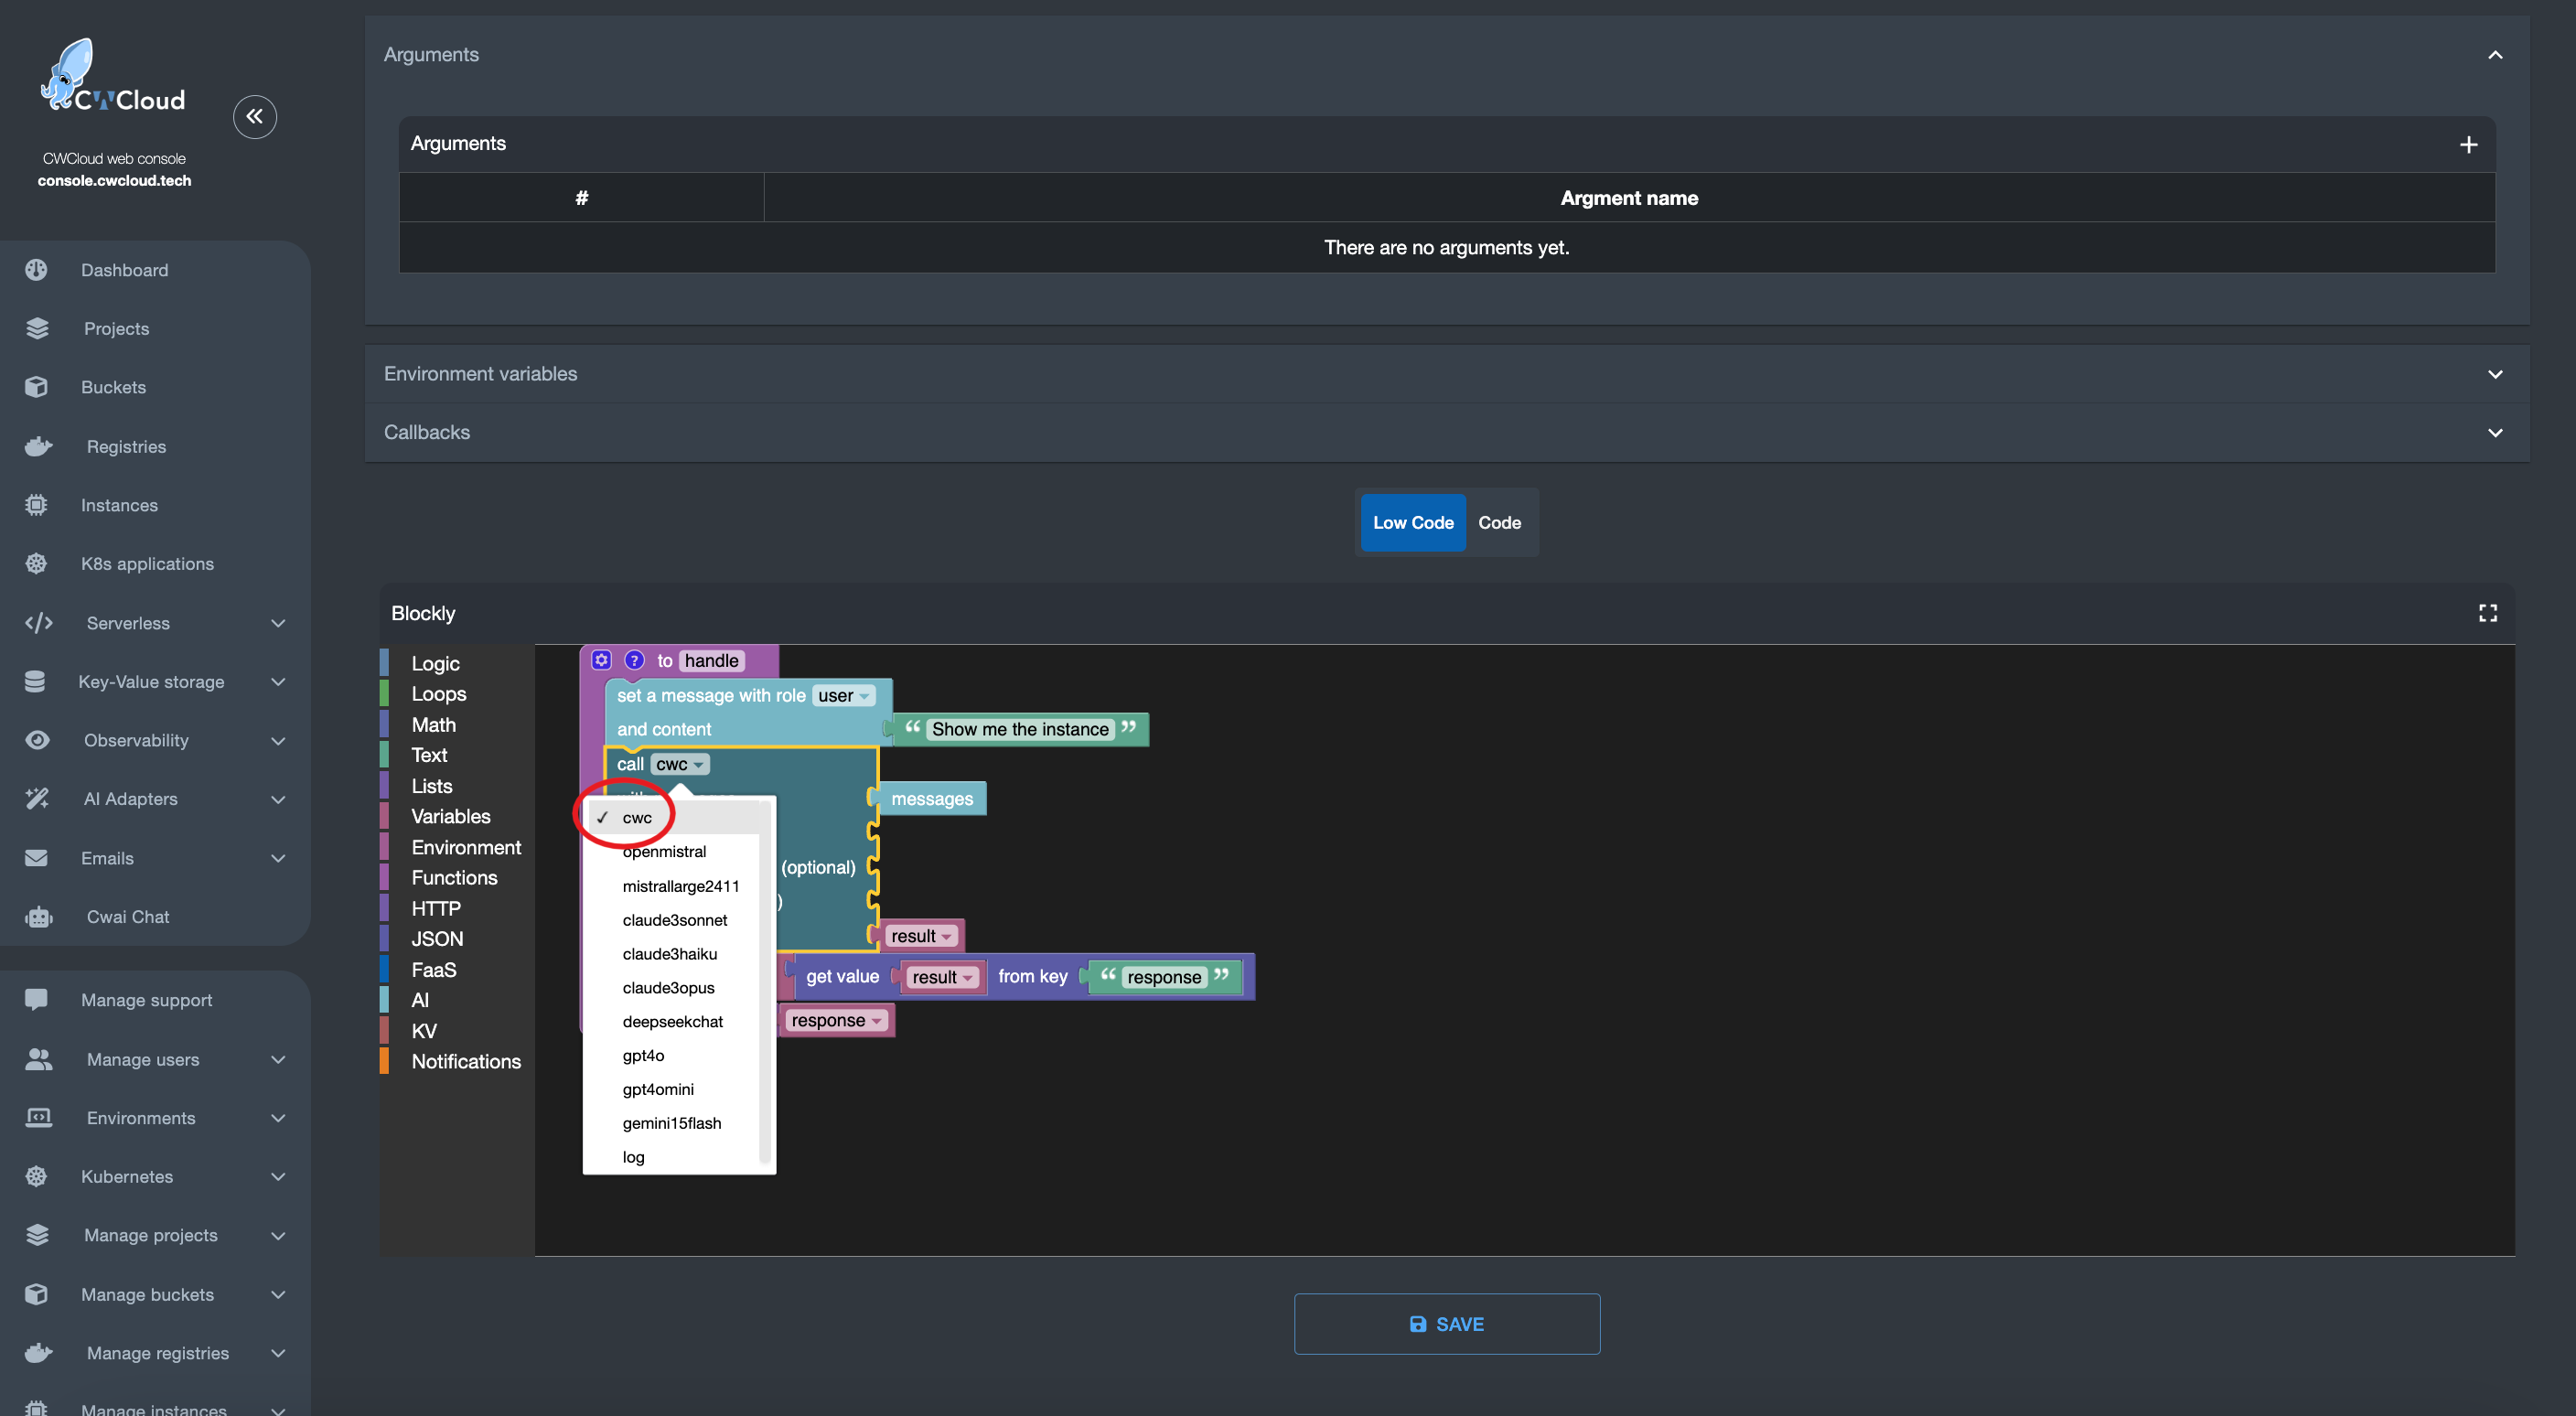
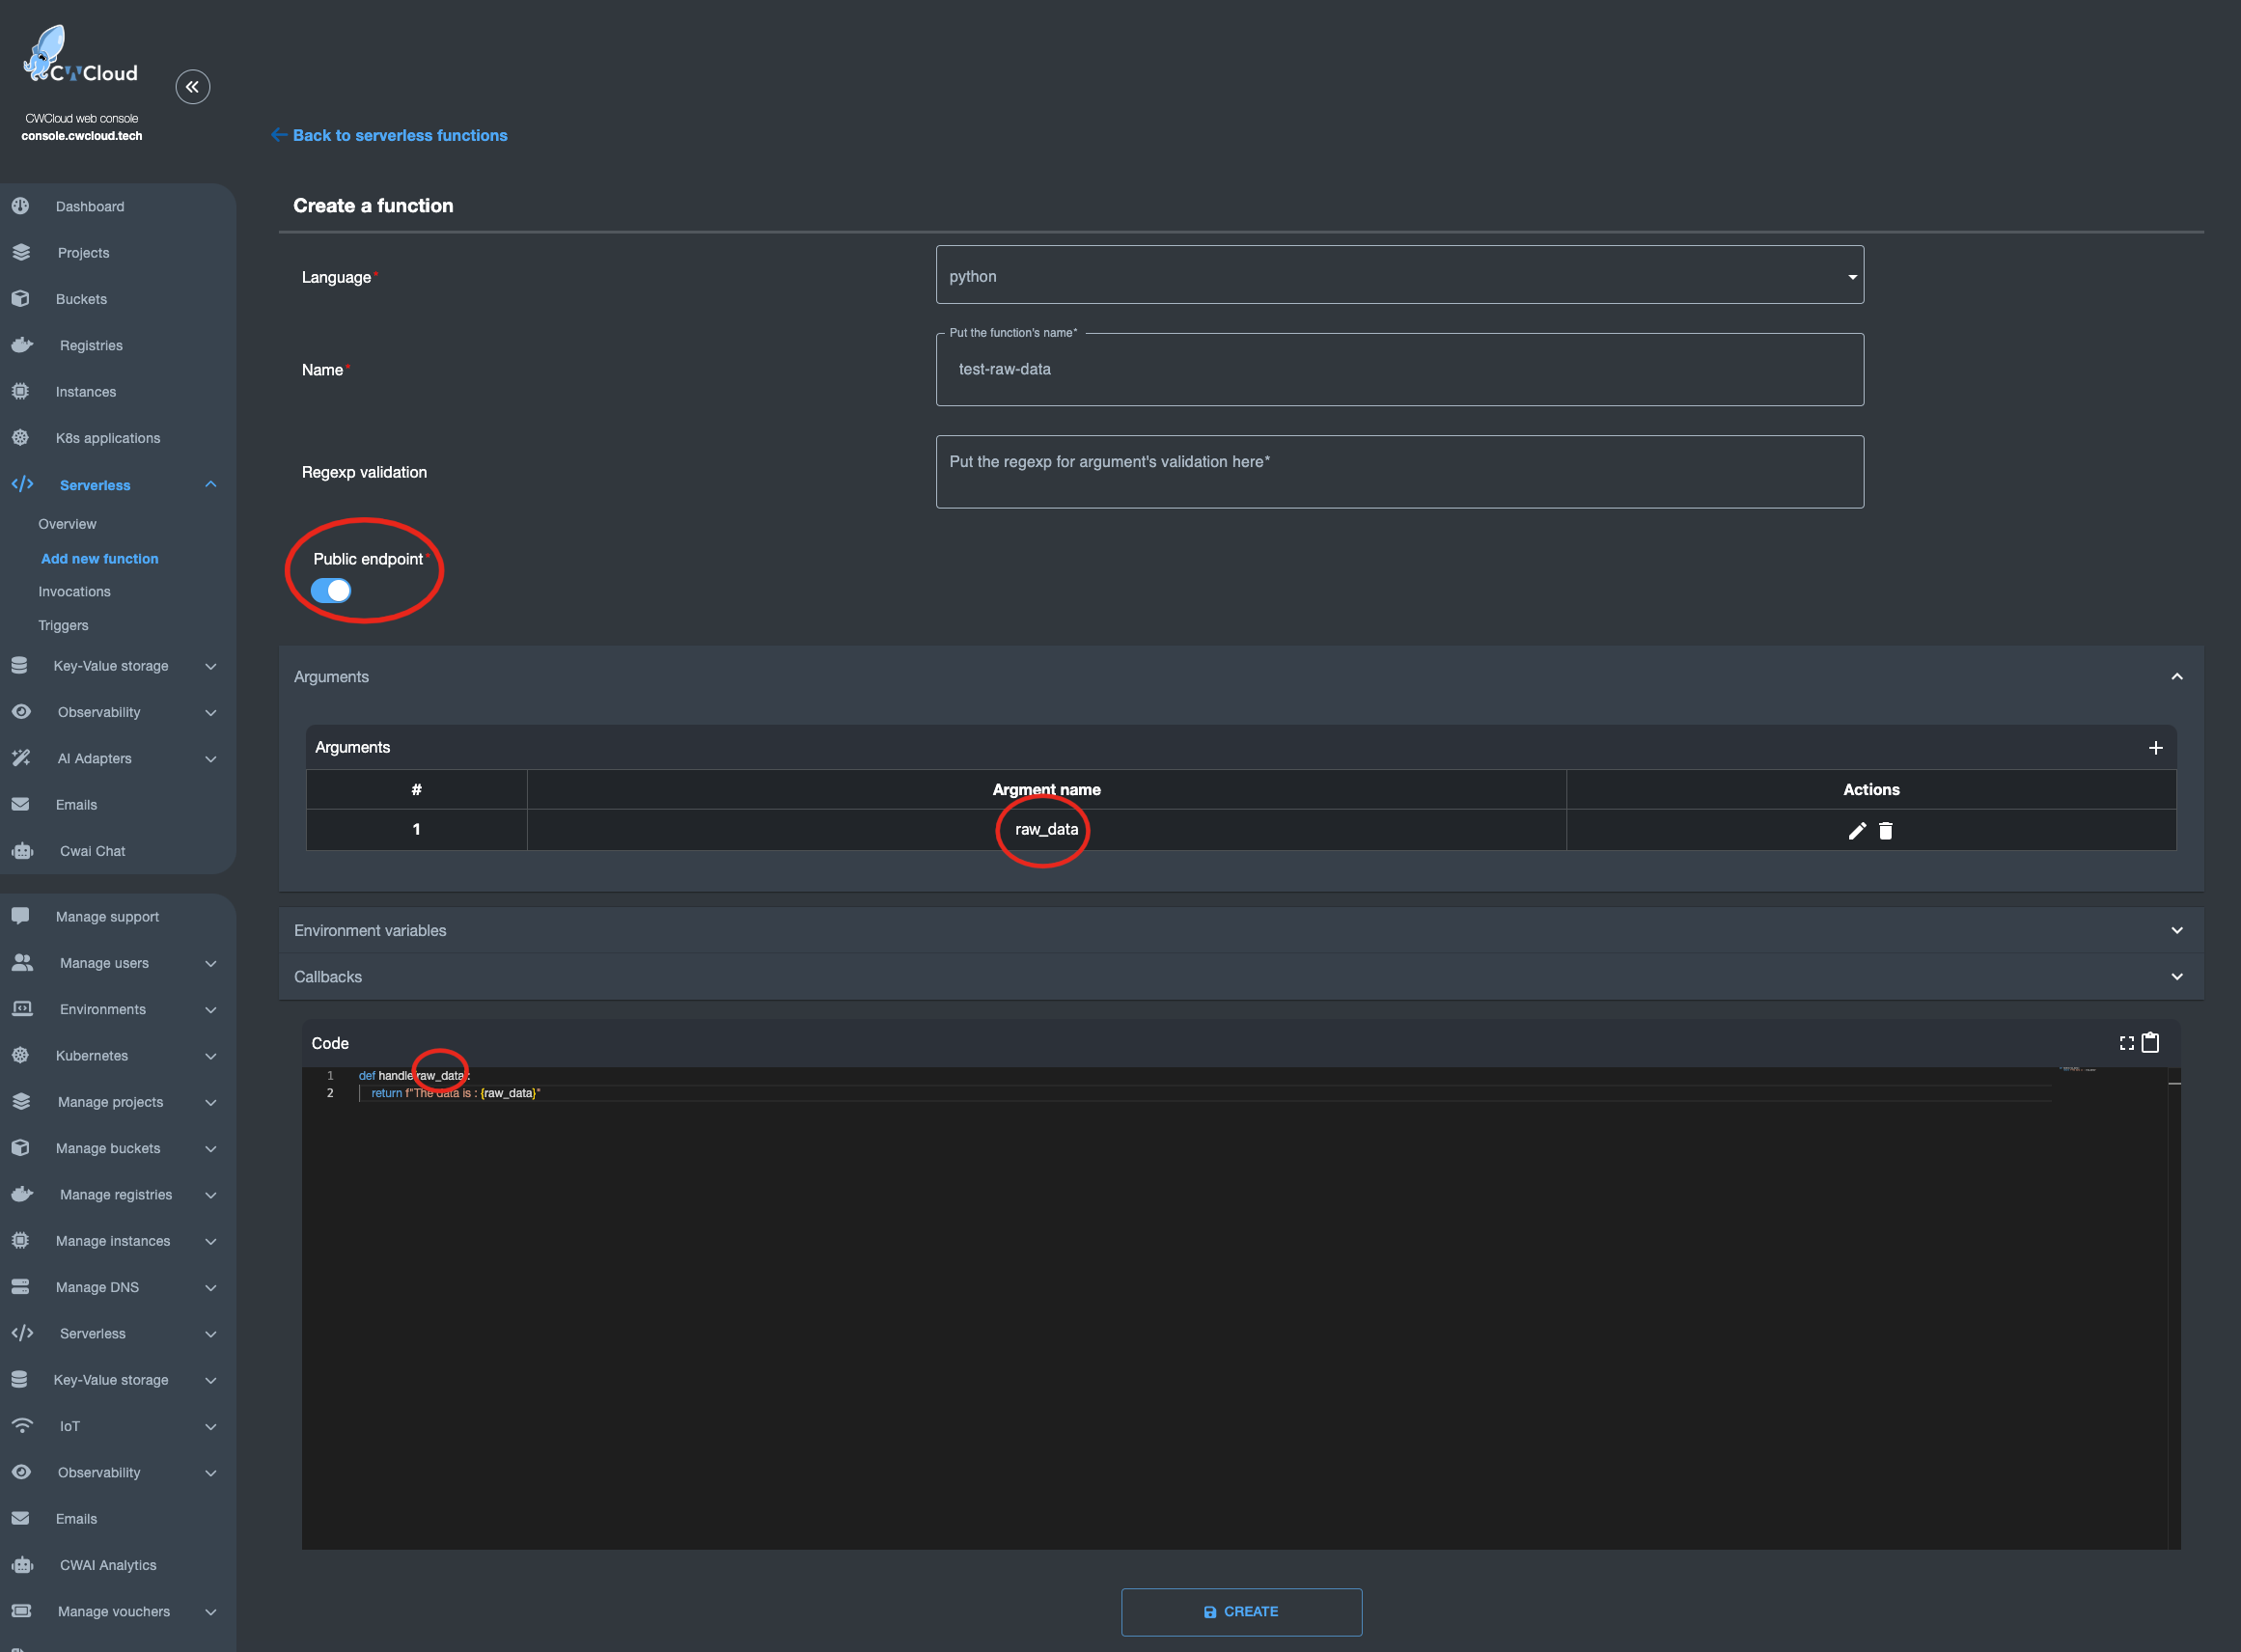
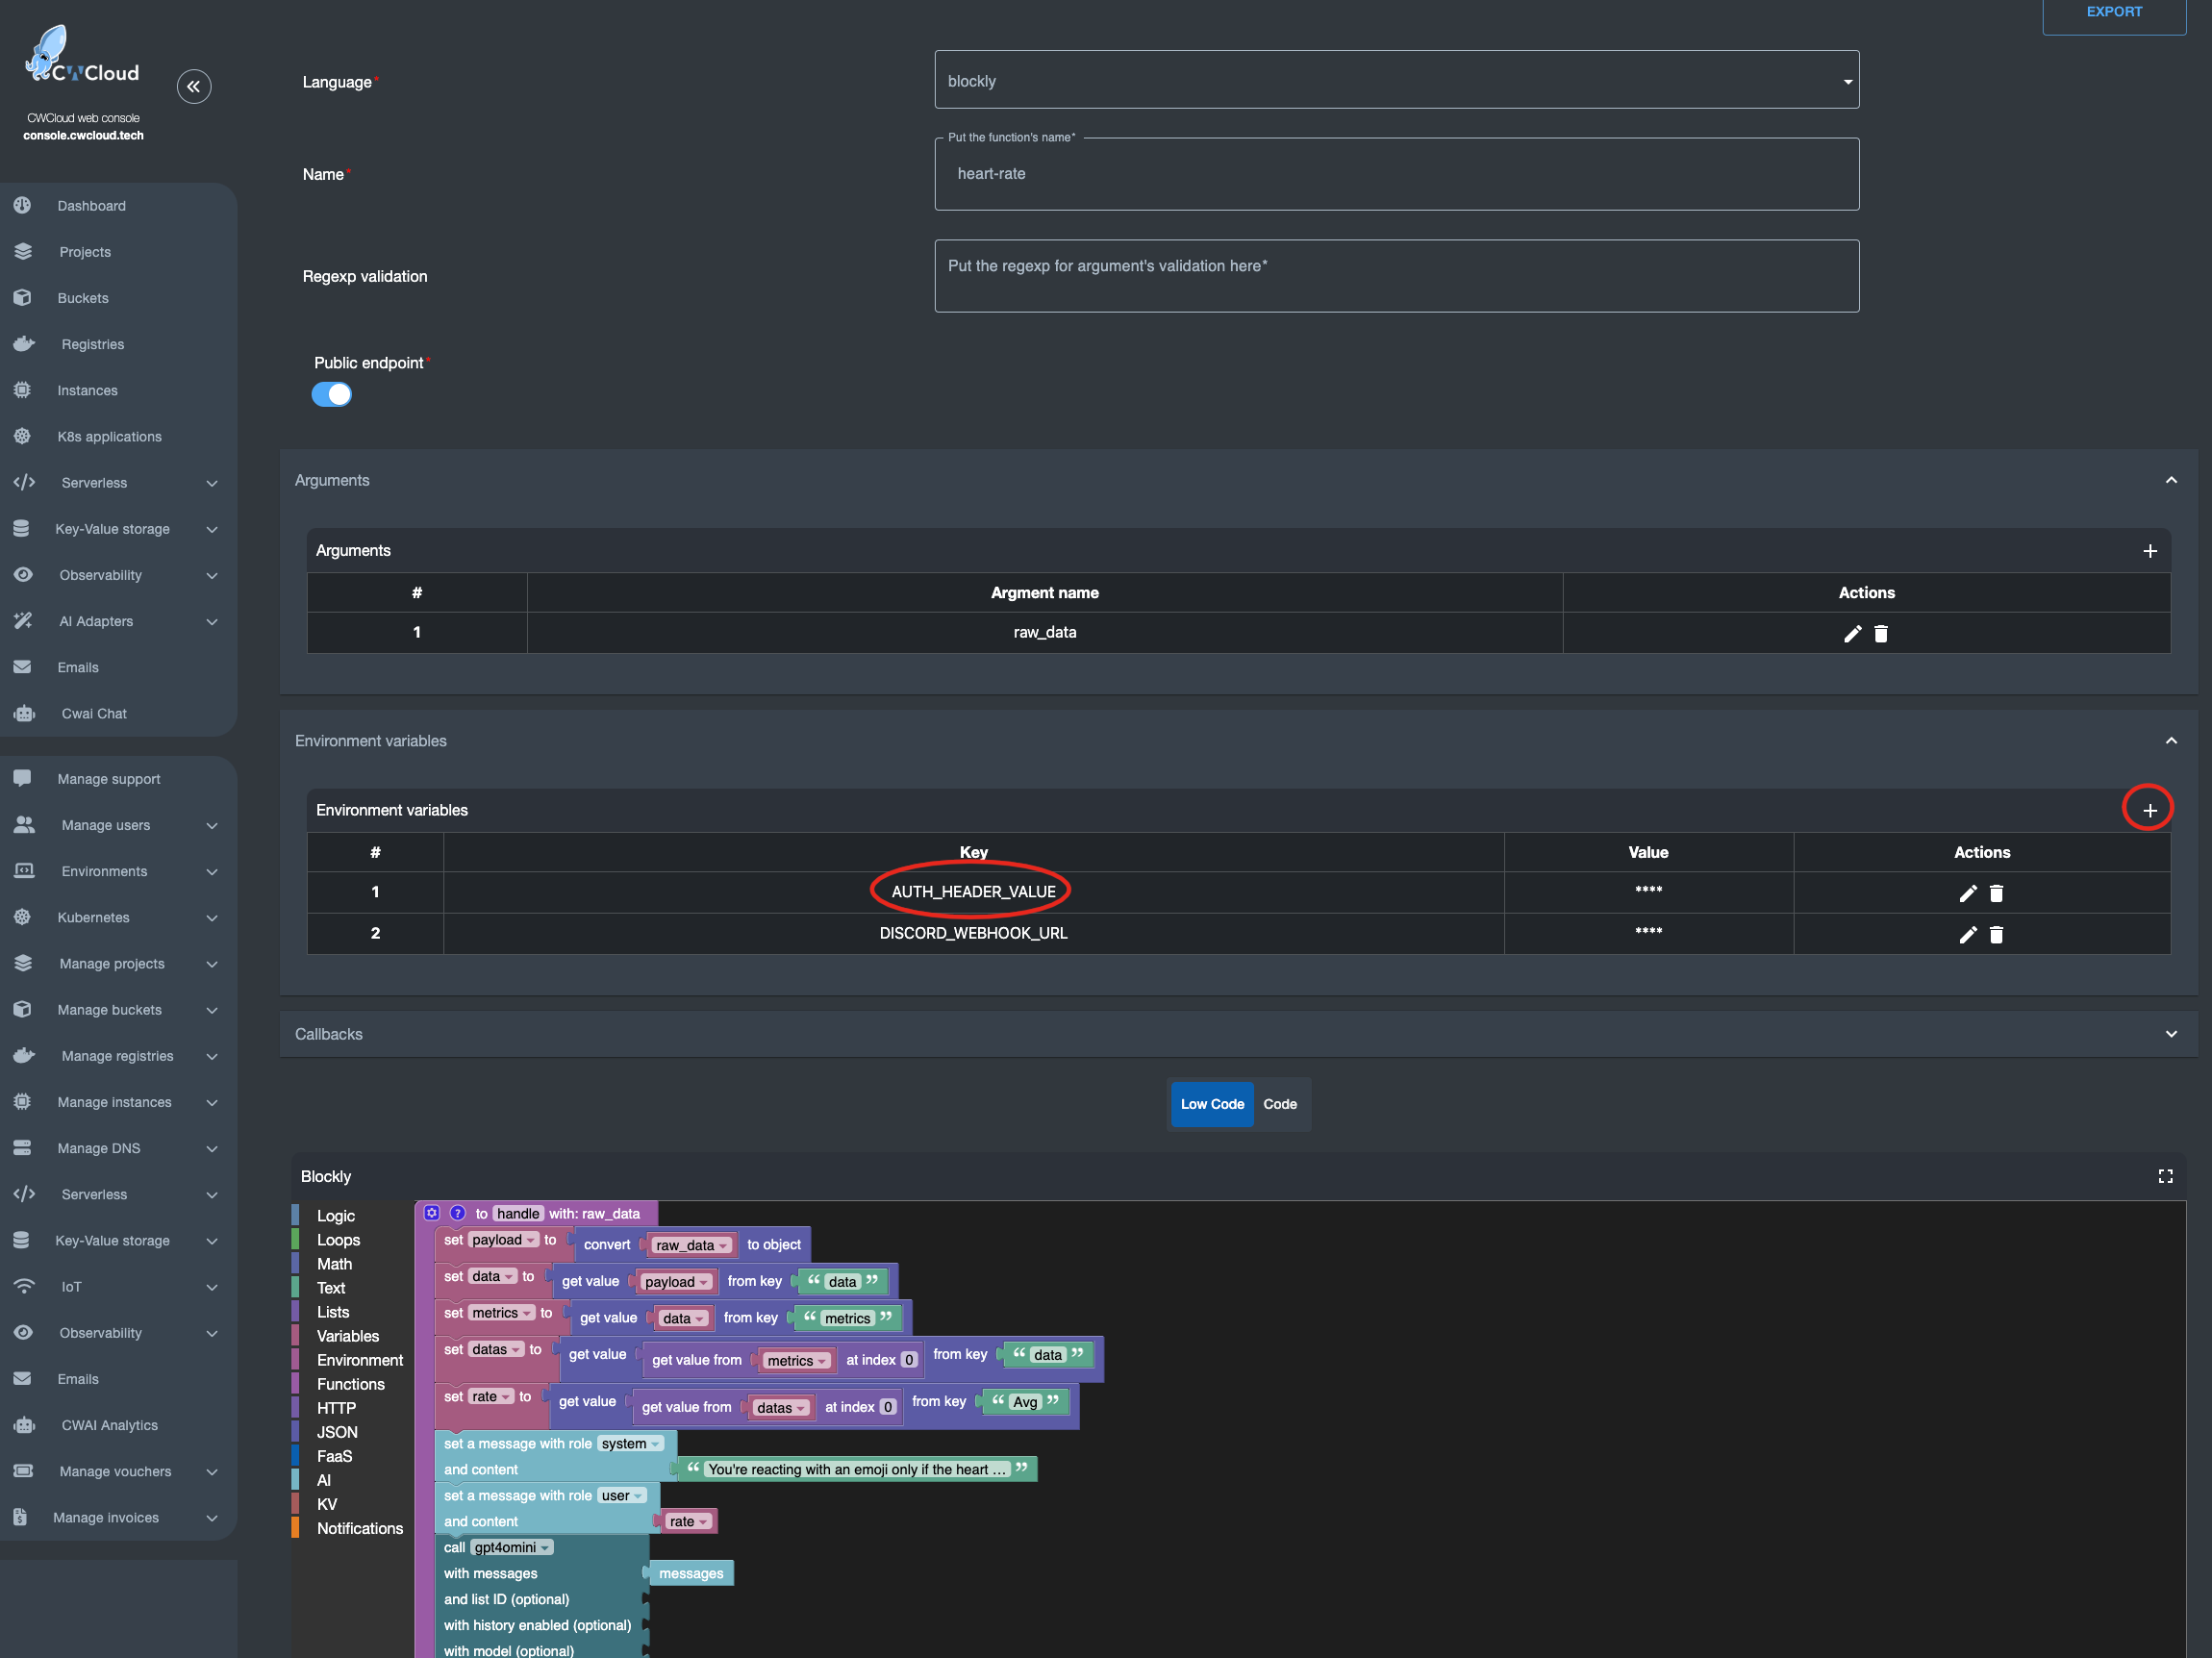
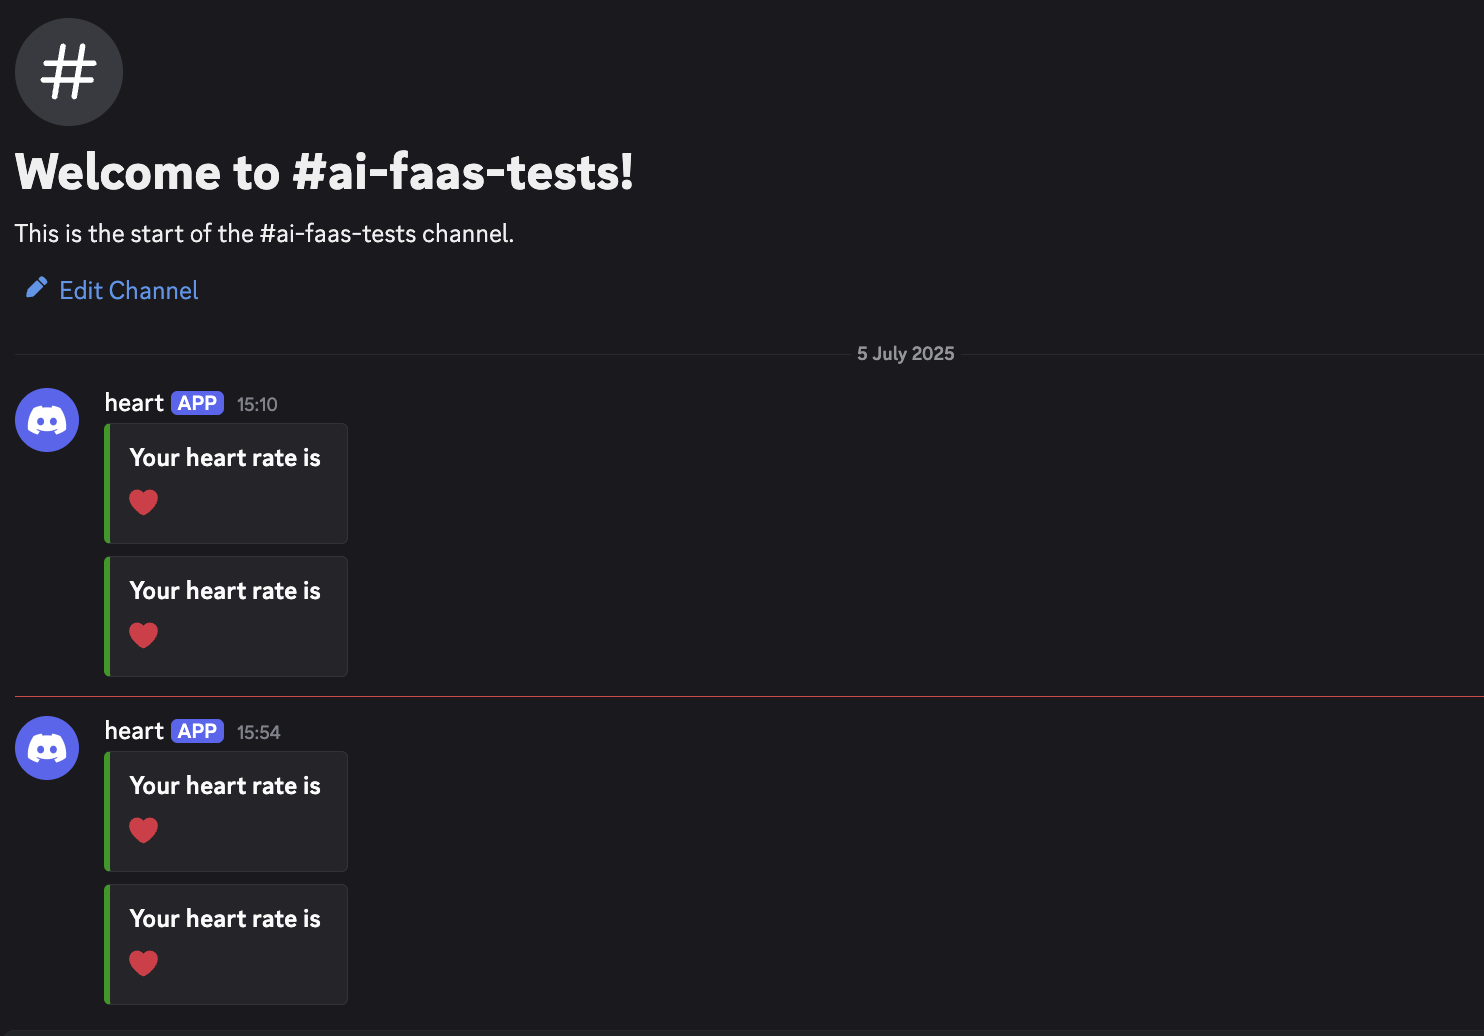
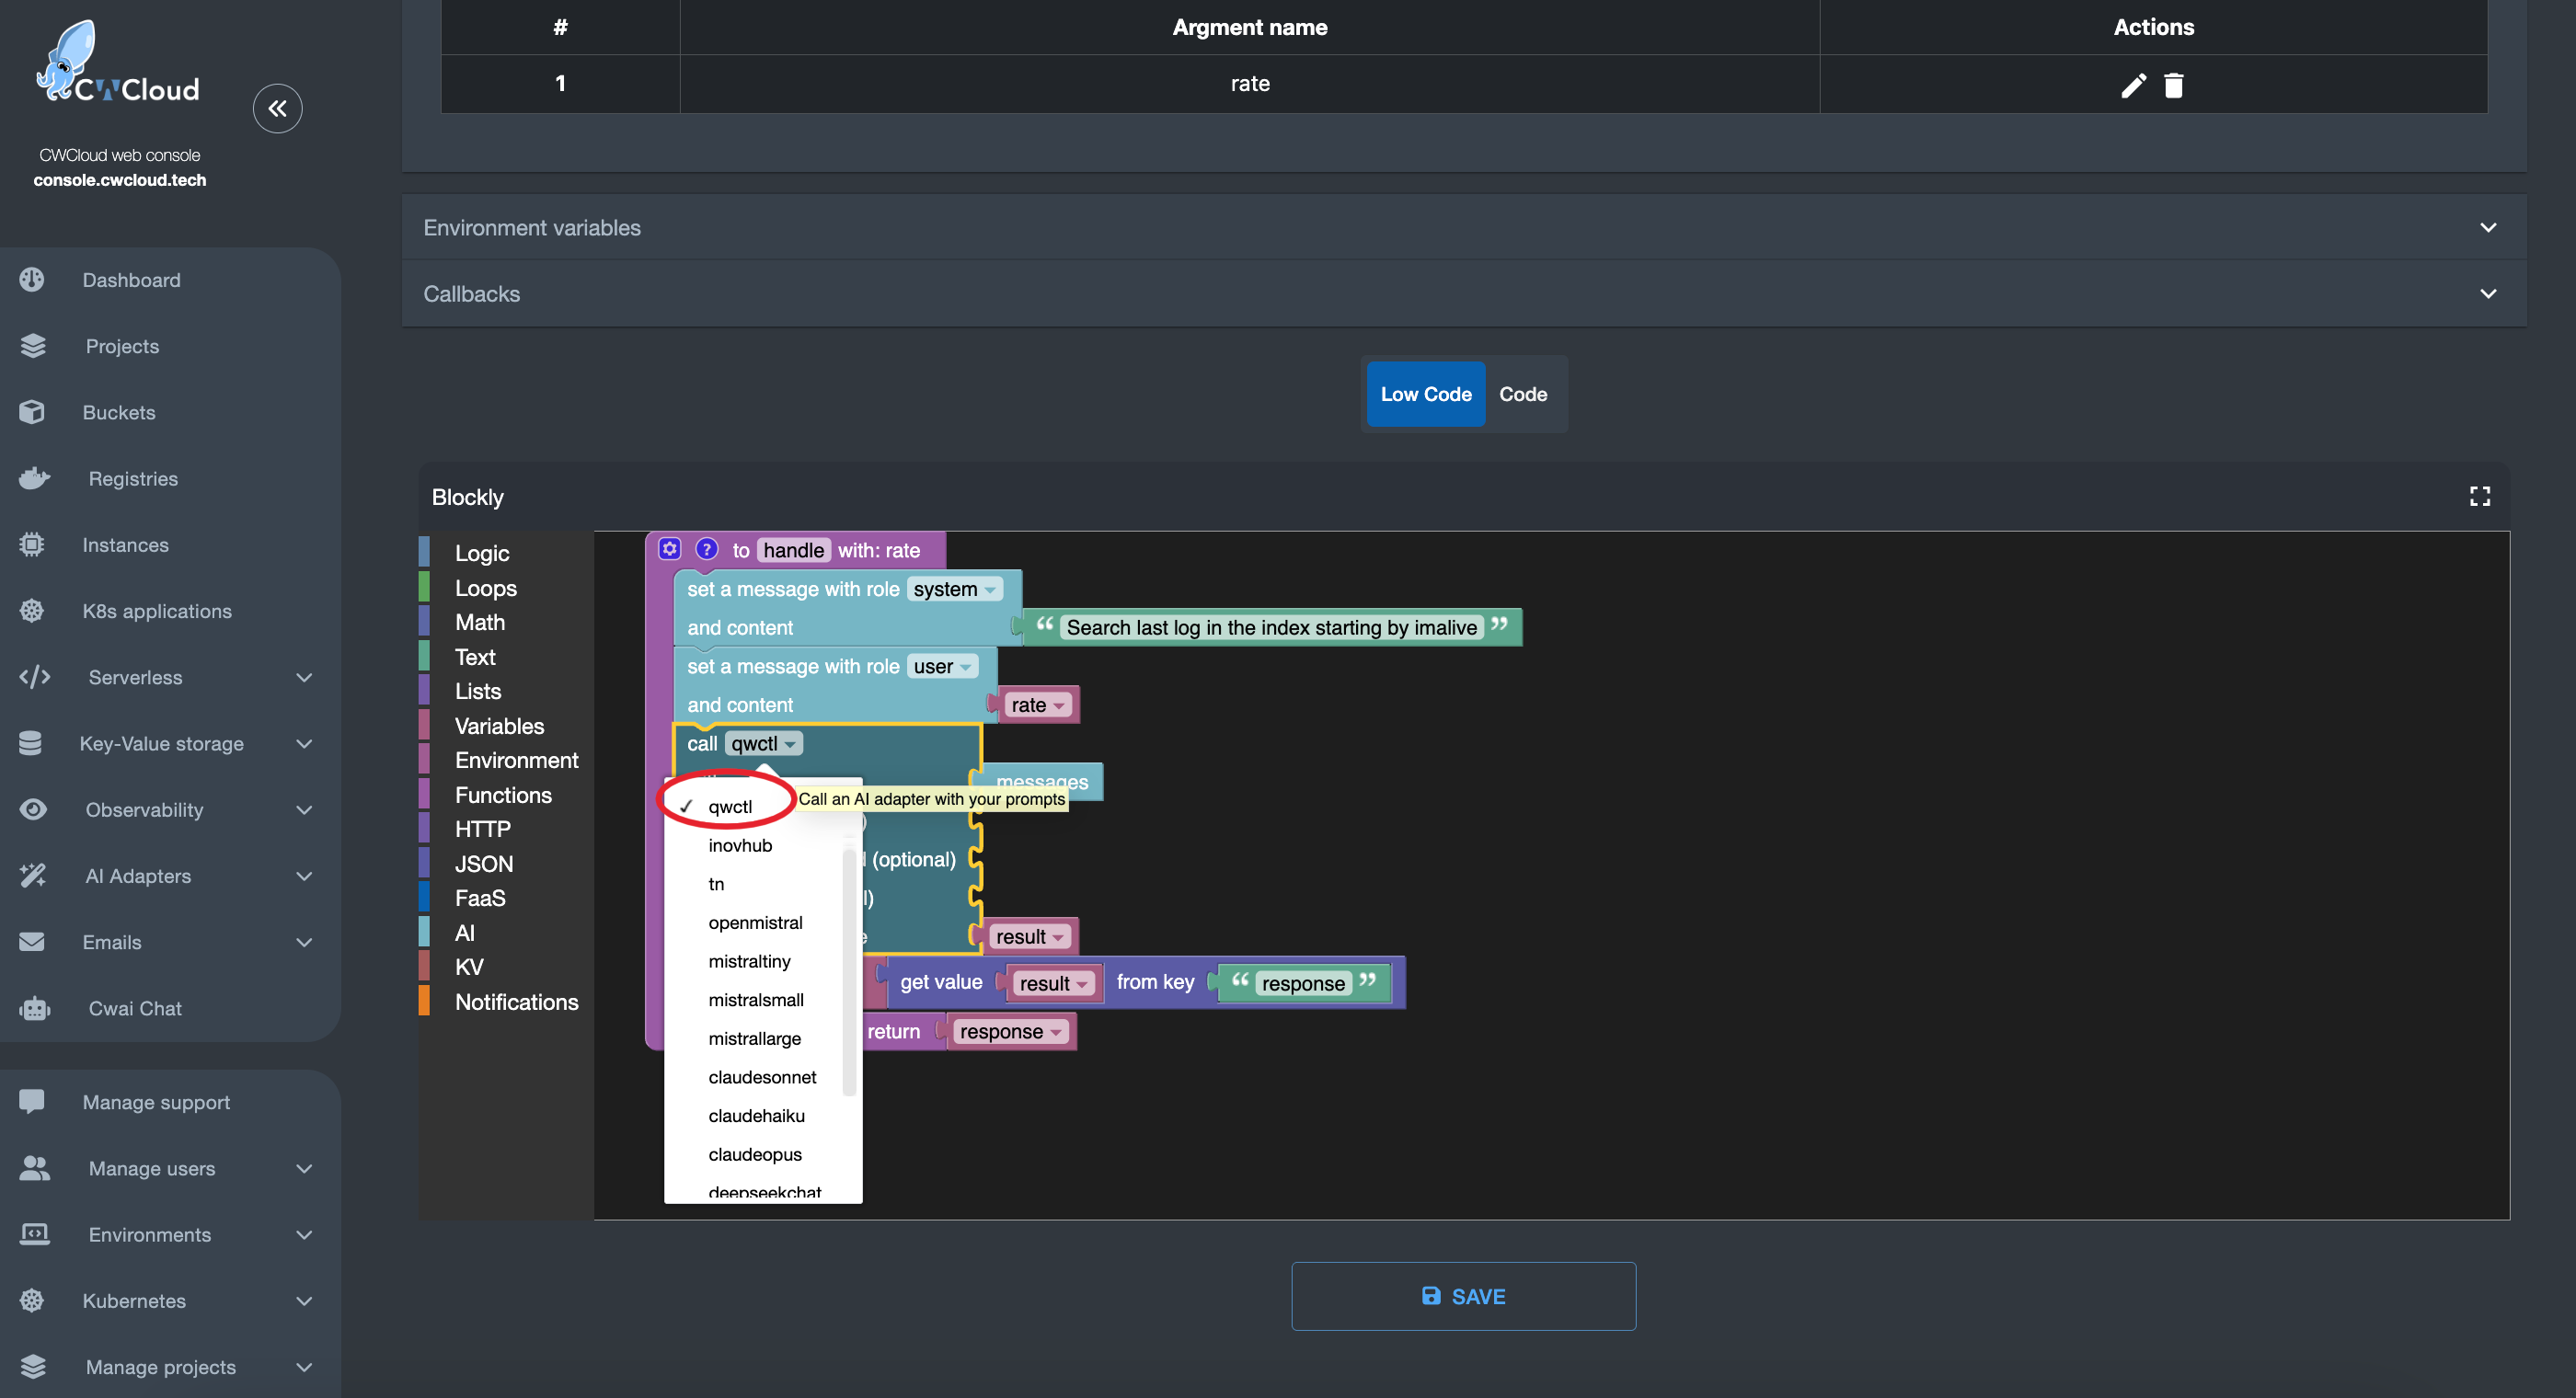
Vous pouvez aussi appeler l'agent dans une fonction serverless :
Webhook GitLab
D'abord, nous devons configurer qwctl avec les variables d'environnement suivantes :
QWCTL_AGENT_NAME: le nom de l'agent qui sera utilisé comme déclencheur (ex. :qwctlpour être déclenché par des commentaires contenant!qwctldans les issues GitLab)QWCTL_GITLAB_TOKEN: un token GitLab avec les permissions pour publier des commentaires sur les issuesQWCTL_GITLAB_BASE_URL: l'URL de l'instance GitLab (ex. :https://gitlab.cwcloud.tech)
Bien sûr, vous pouvez aussi utiliser la commande CLI configure comme ceci :
$ qwctl configure set agent_name cwc-prod
$ qwctl configure set gitlab_token <your_gitlab_token>
$ qwctl configure set gitlab_base_url https://gitlab.cwcloud.tech
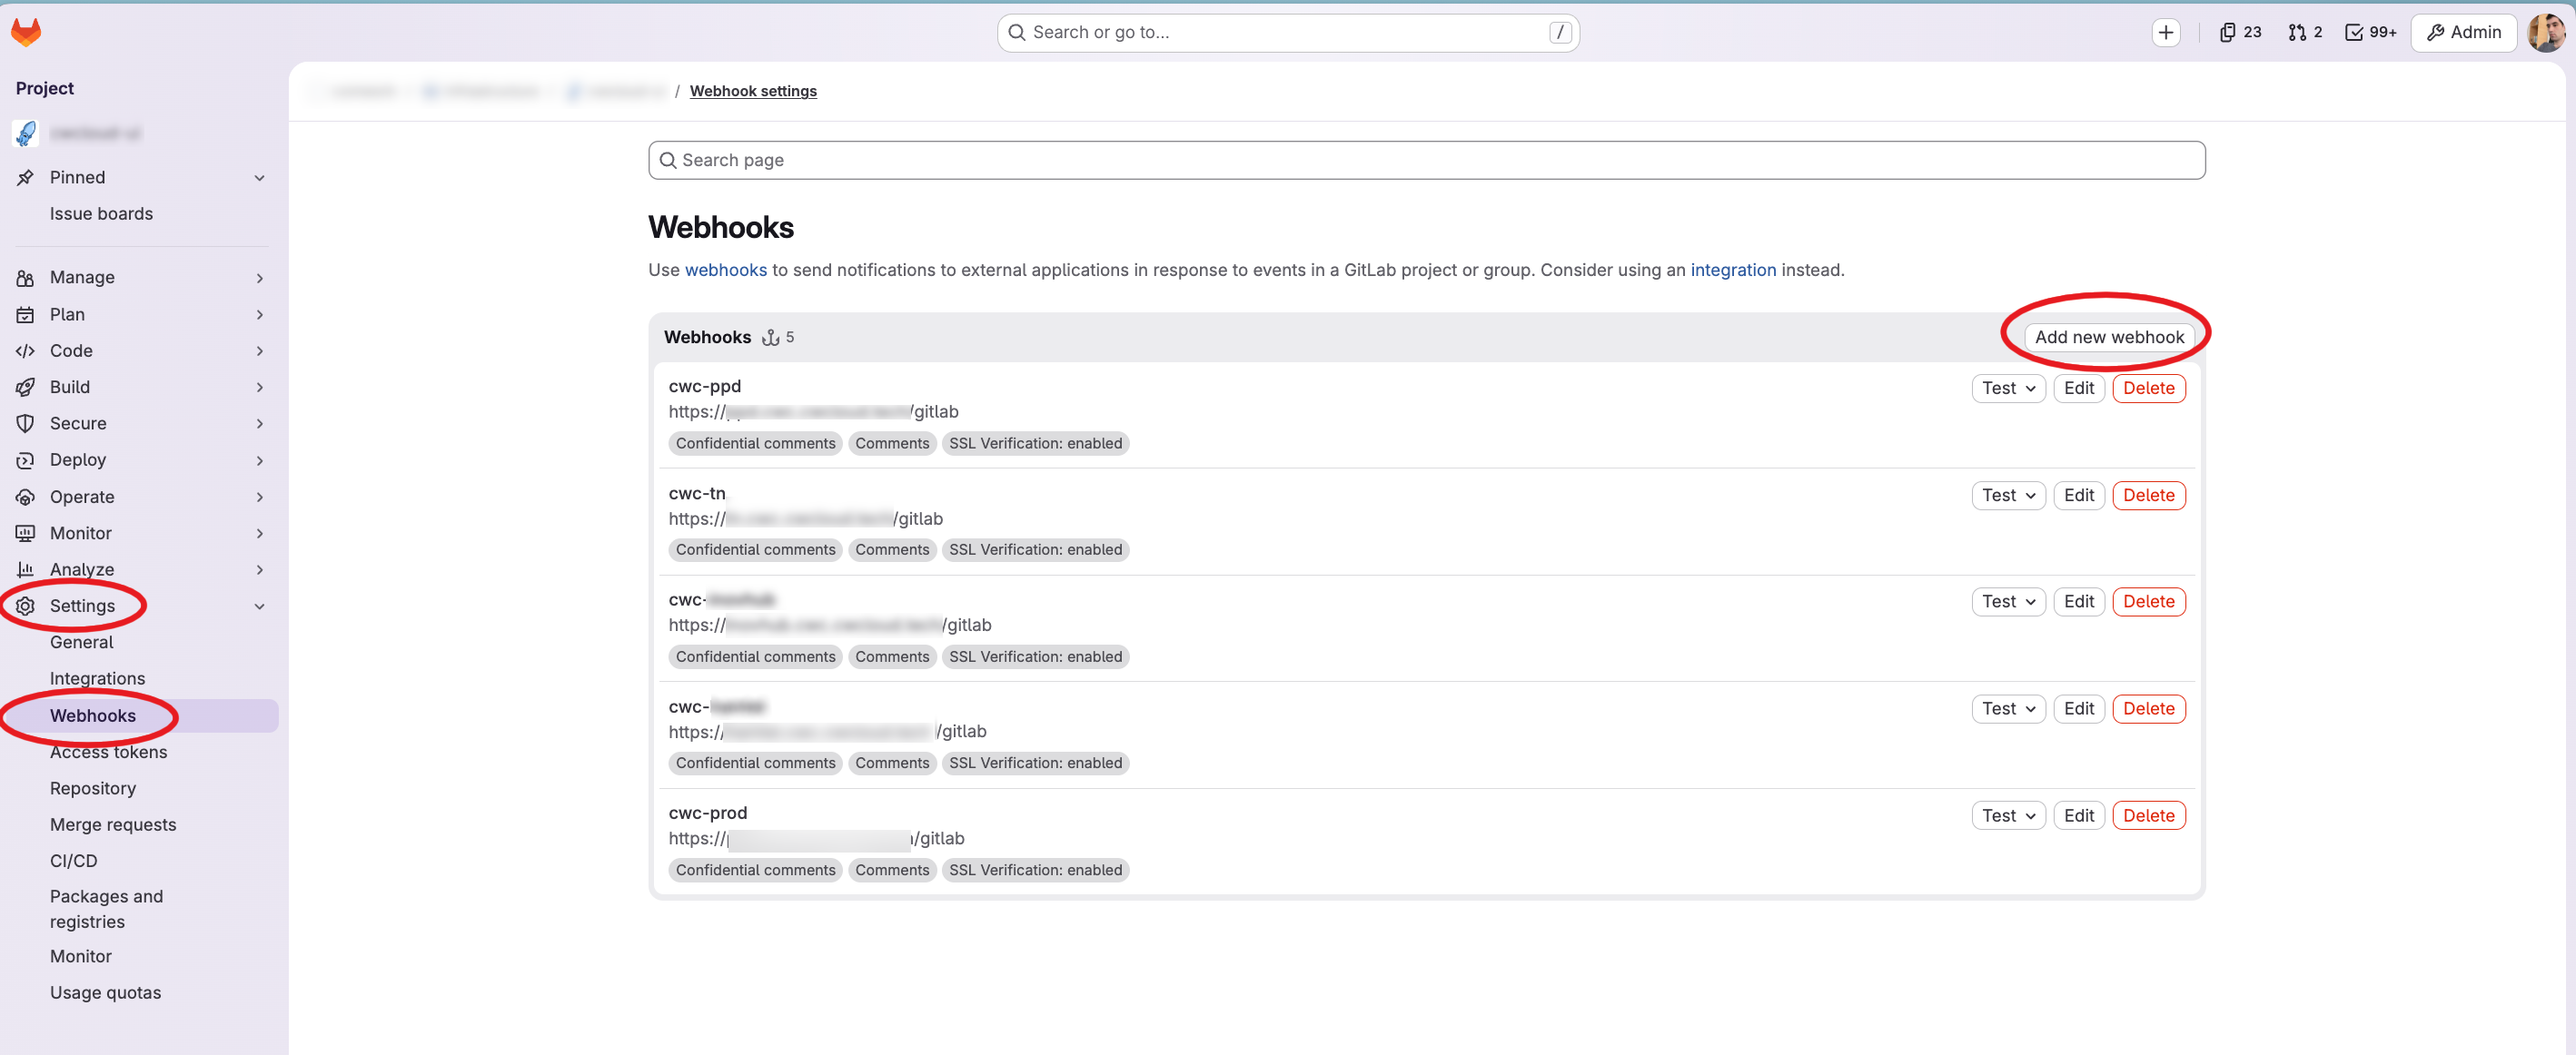
Ensuite, vous devez configurer le webhook dans GitLab comme ceci :
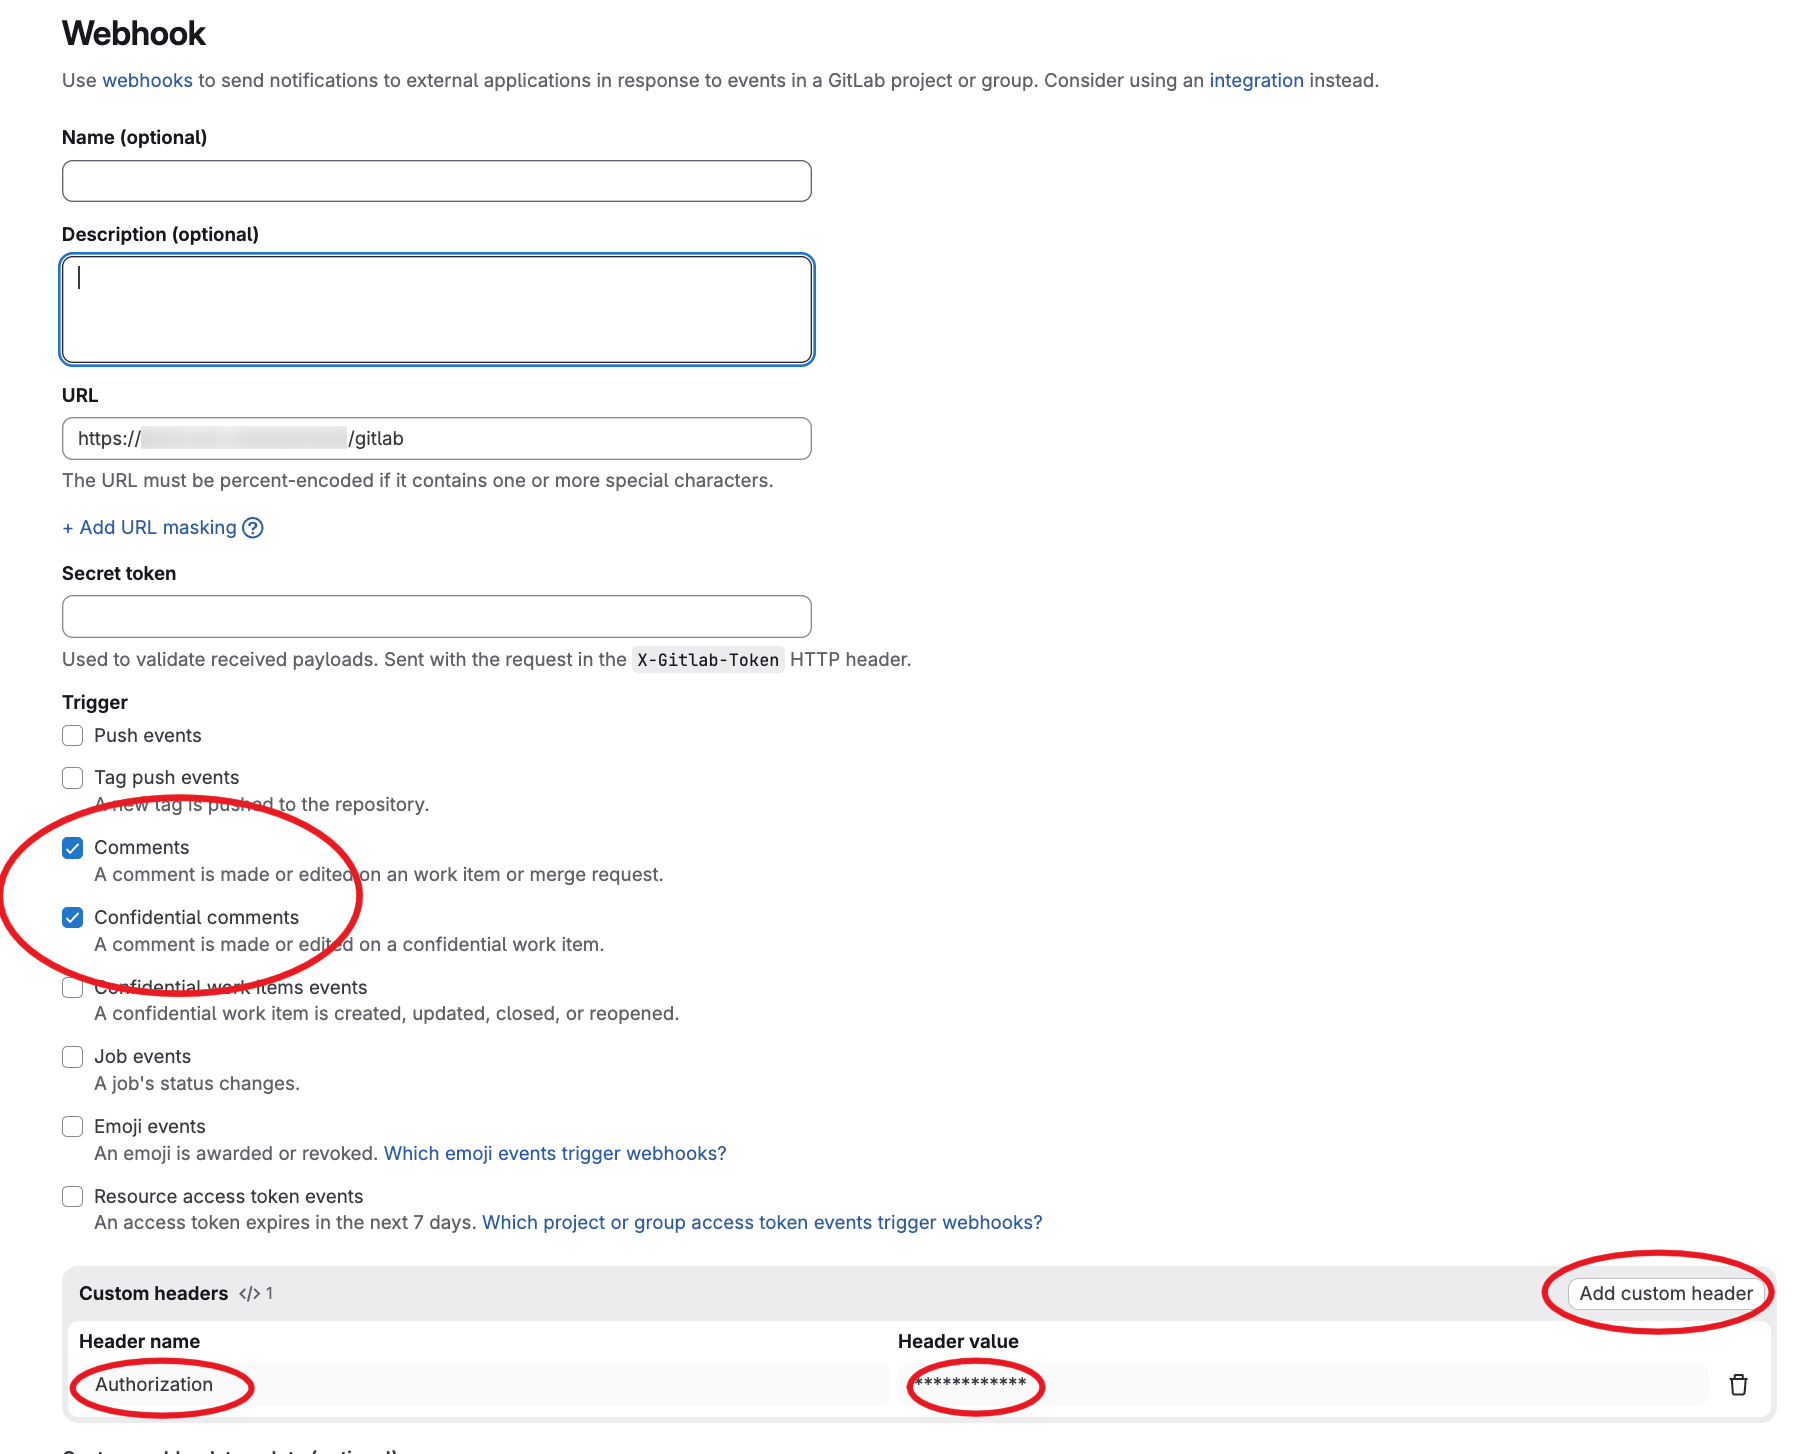
Comme vous pouvez le voir, nous avons configuré le chemin d'endpoint /gitlab et nous avons également défini un header Authorization via notre reverse proxy. Cependant, l'agent web supporte aussi le secret de webhook GitLab pour l'authentification (c'est optionnel, mais il faut mettre en place une authentification d'une façon ou d'une autre).
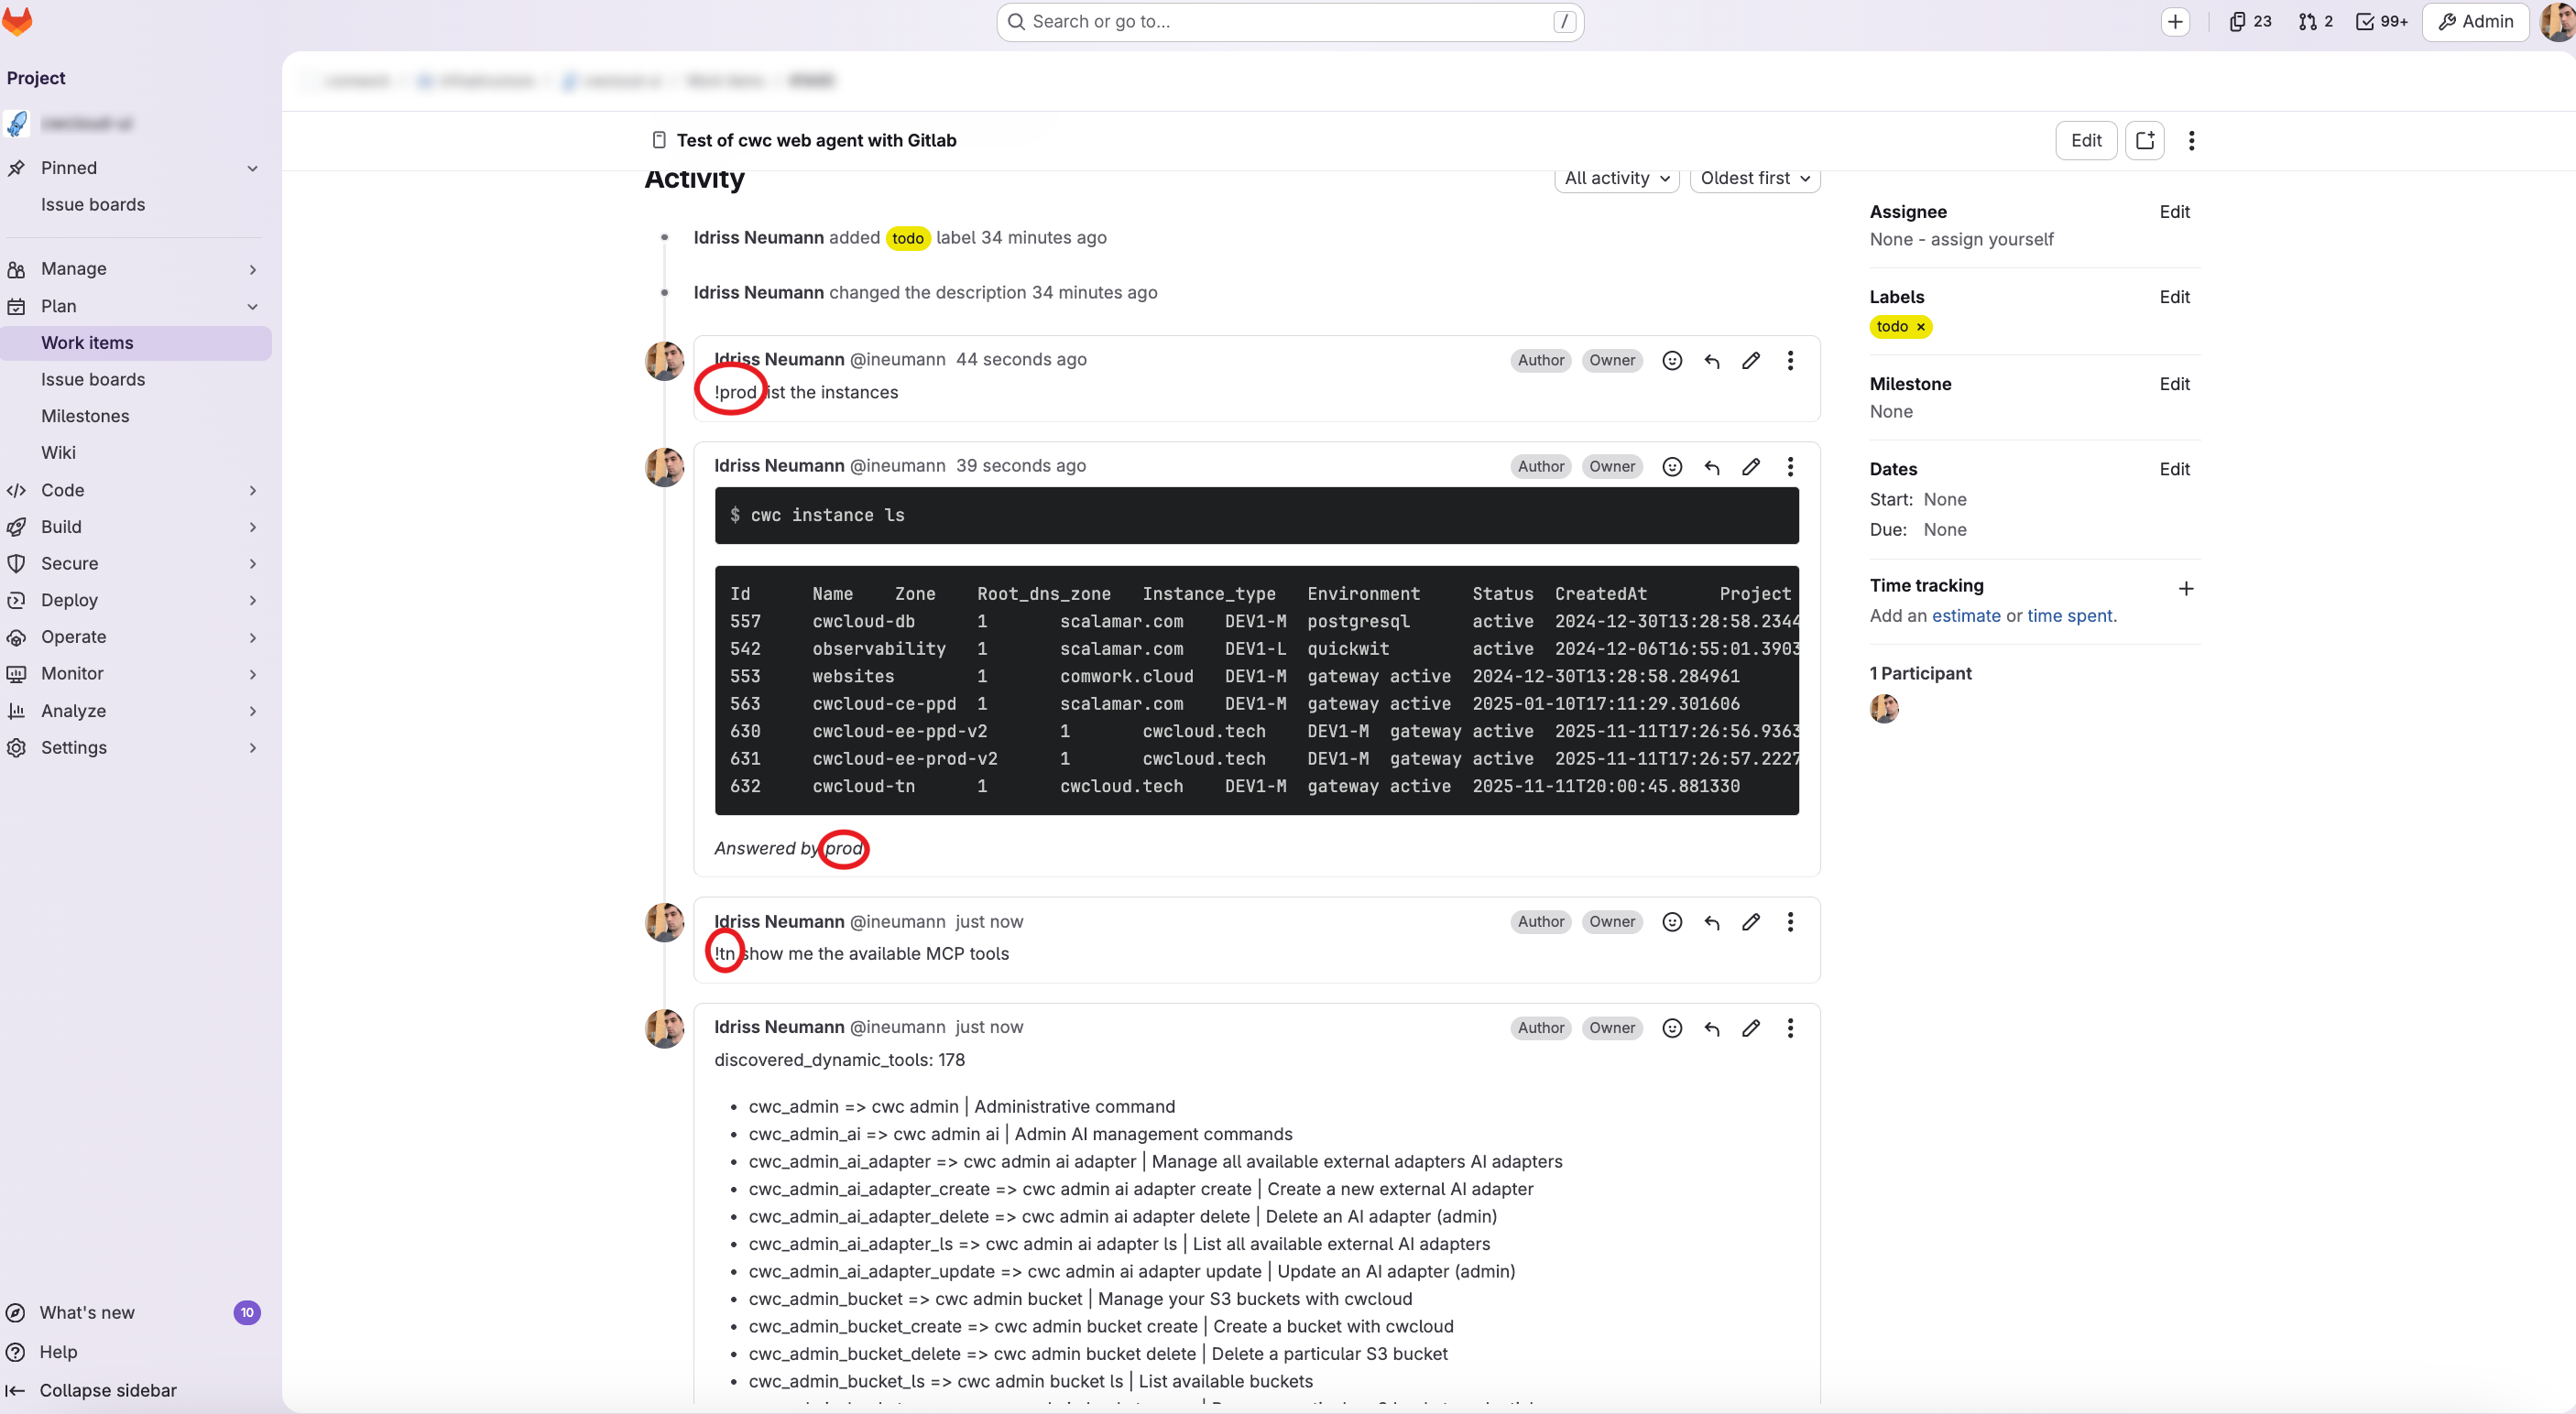
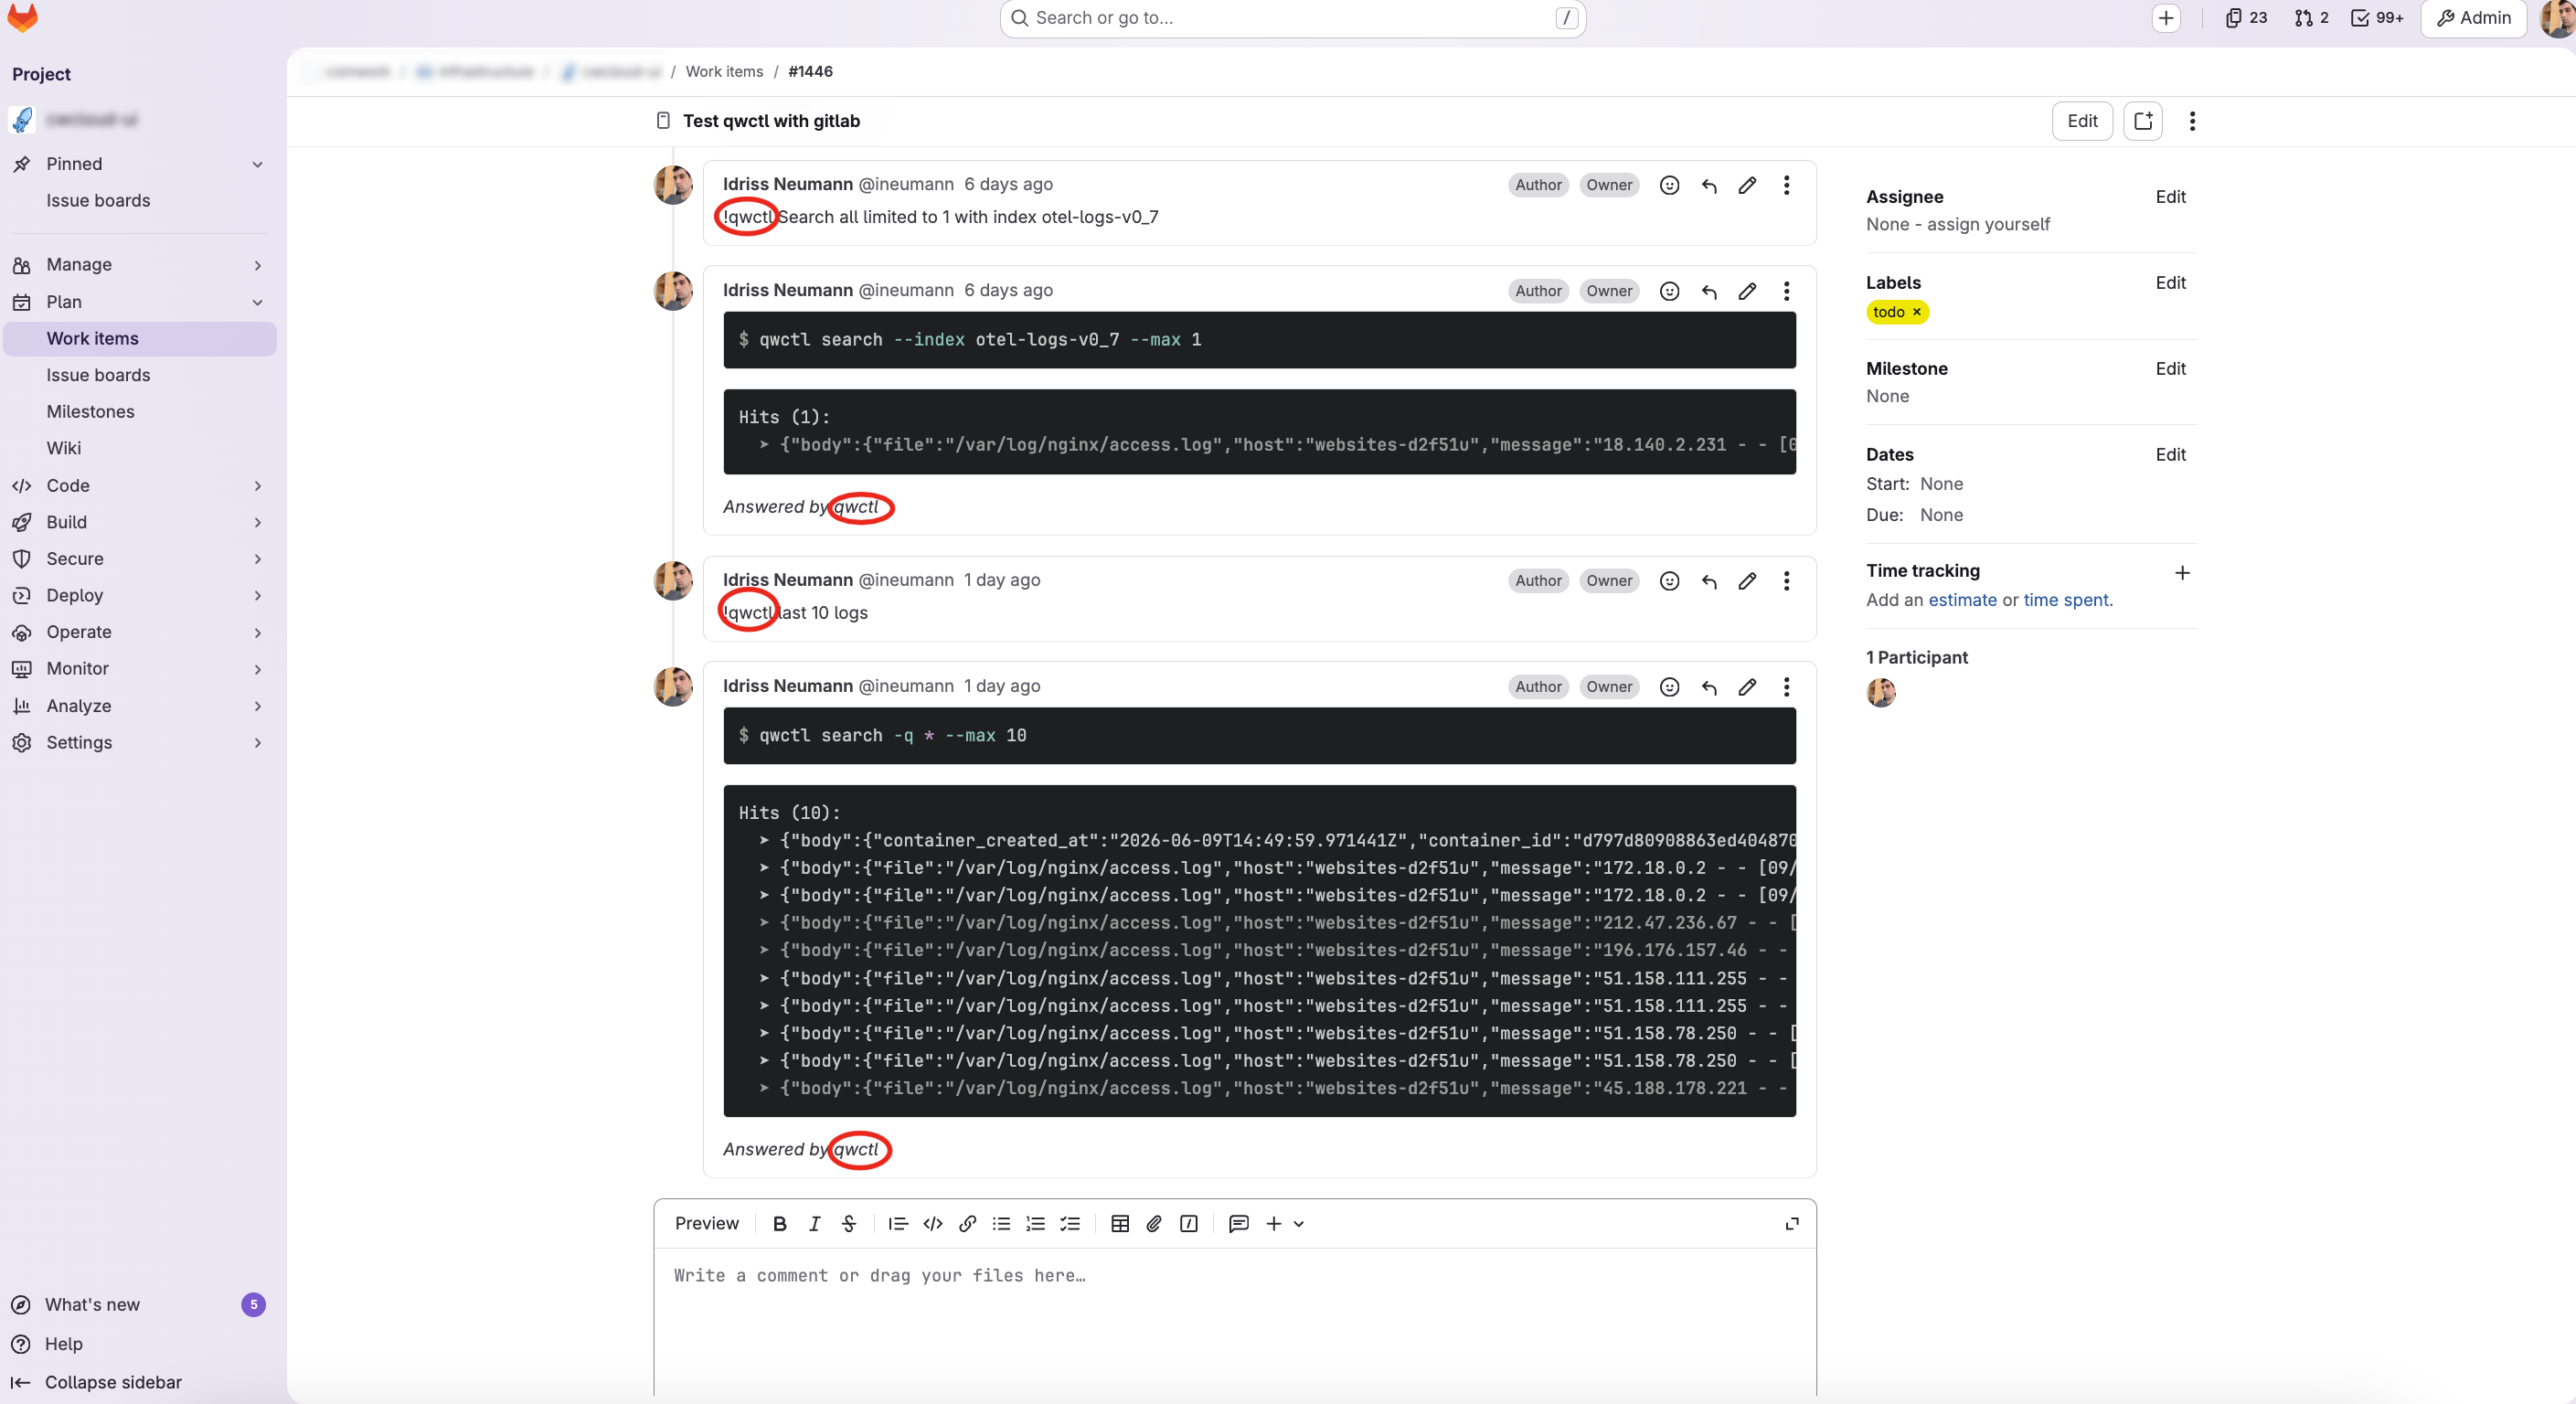
Et enfin, voici ce que nous obtenons dans les issues GitLab lorsque nous commentons !qwctl :
Conclusion
Ce billet illustre notre vision du platform engineering en 2026 : des agents qui suivent des instructions depuis les systèmes de tickets, les pipelines CI/CD, les fonctions serverless, etc.
Pour l'instant, nos agents répondent seulement à des instructions venant des tickets, du chat ou de l'application mobile, mais la CLI exposant aussi un serveur MCP sera réutilisée pour des agents plus avancés, capables de raisonnements et d'analyses plus complexes dans le futur.