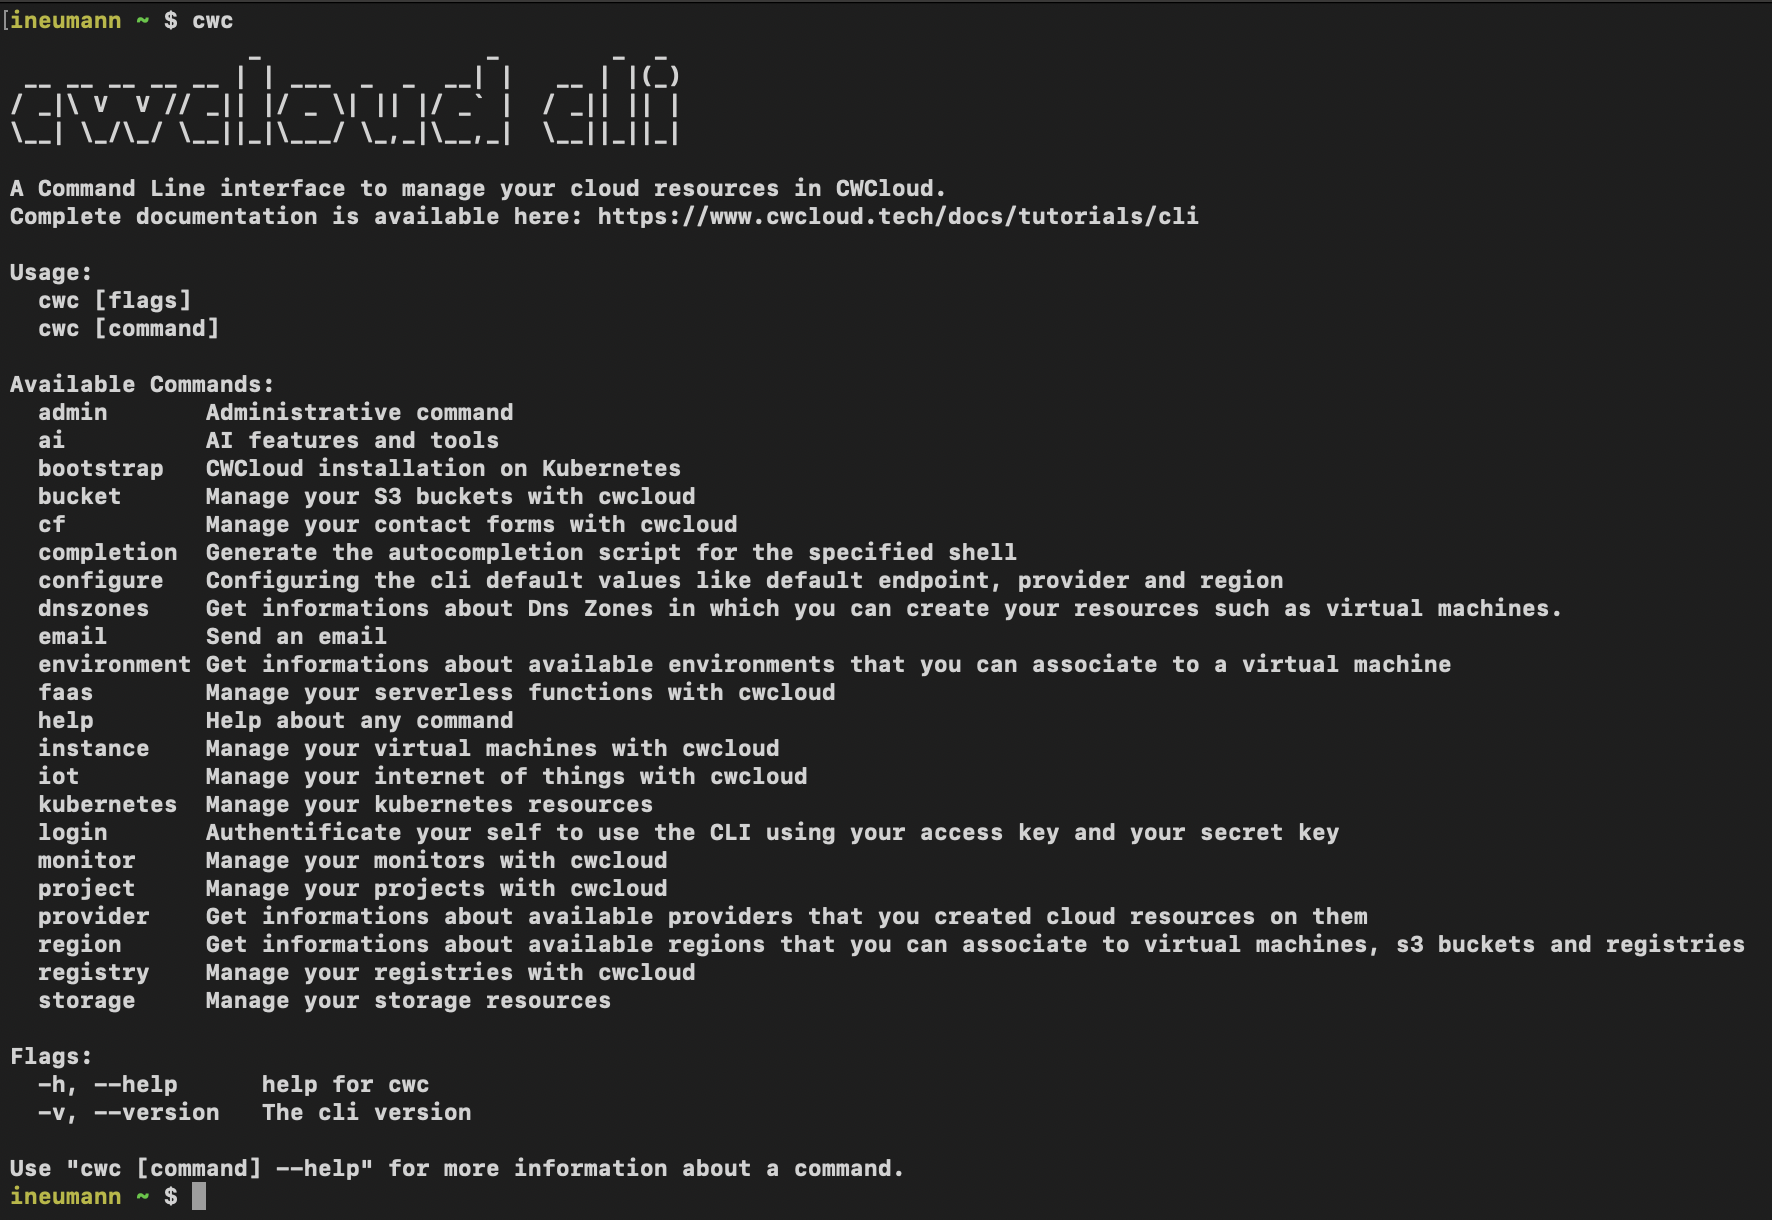
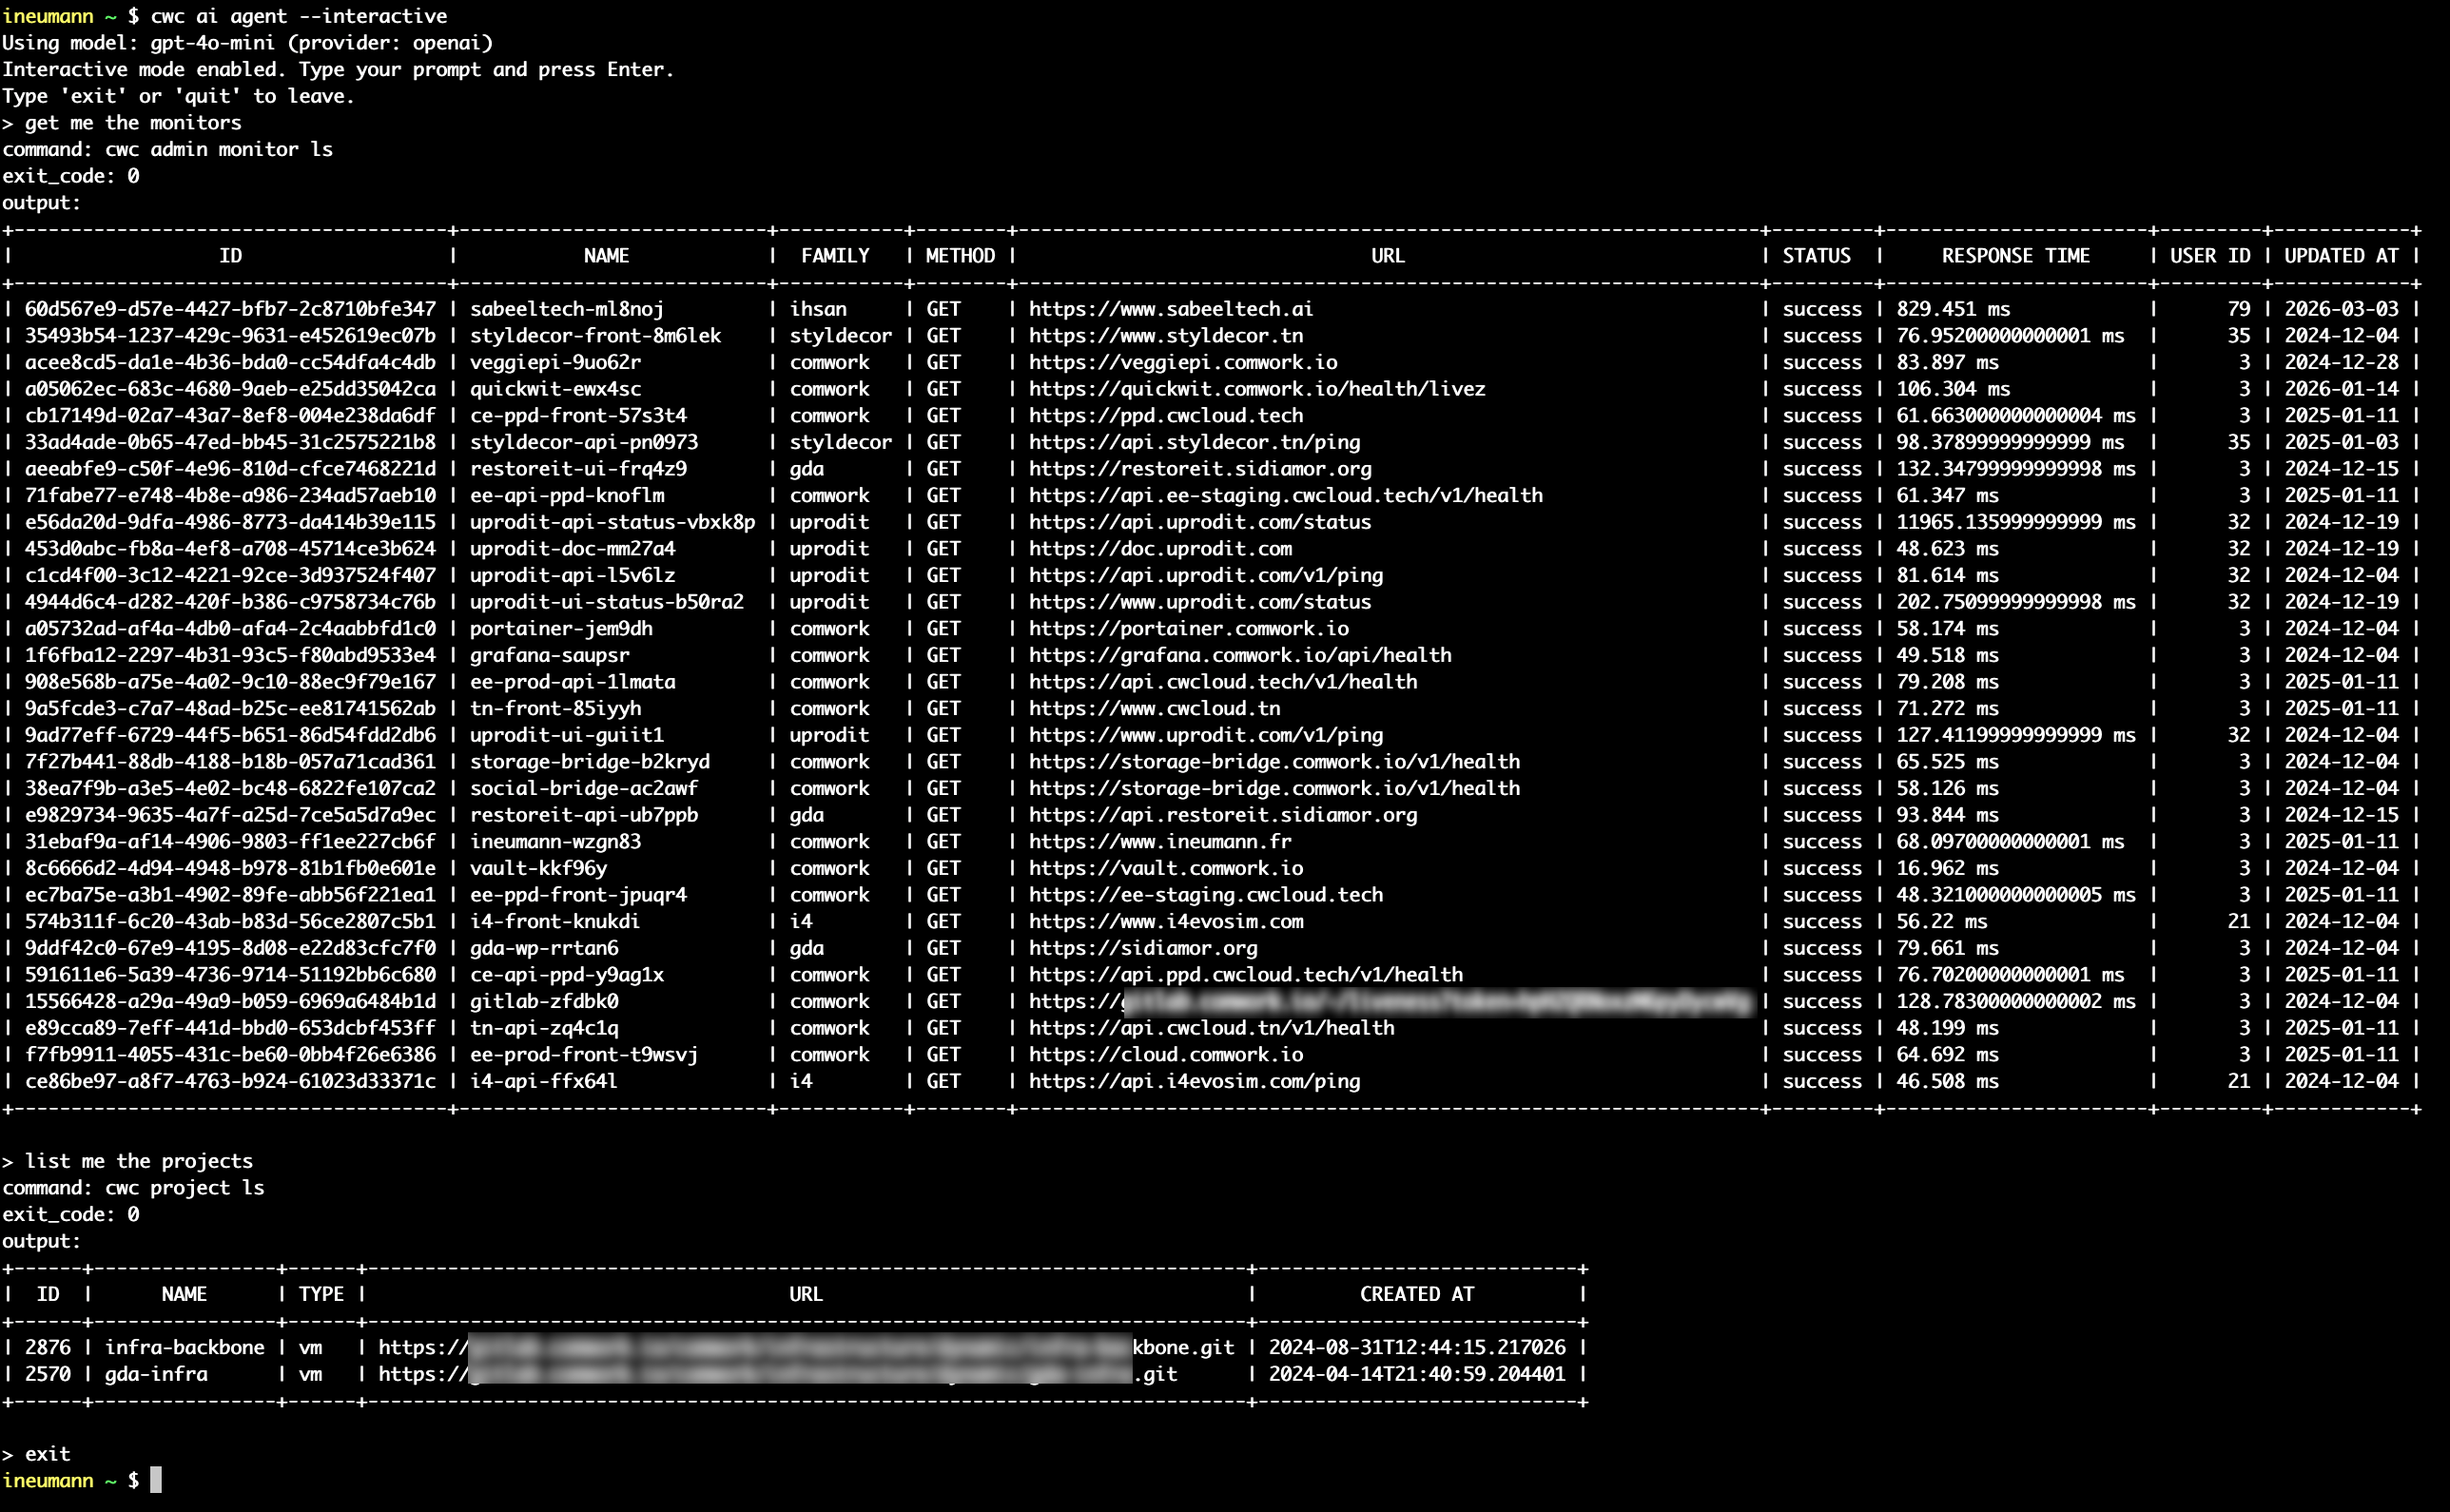
Quickwit CLI as an AI web agent for CWCloud and Gitlab

The qwctl is OpenSource but for the on premises instances of CWCloud, you need to have the Enterprise Edition (EE) to use the AI agent features. Please contact us for more information.
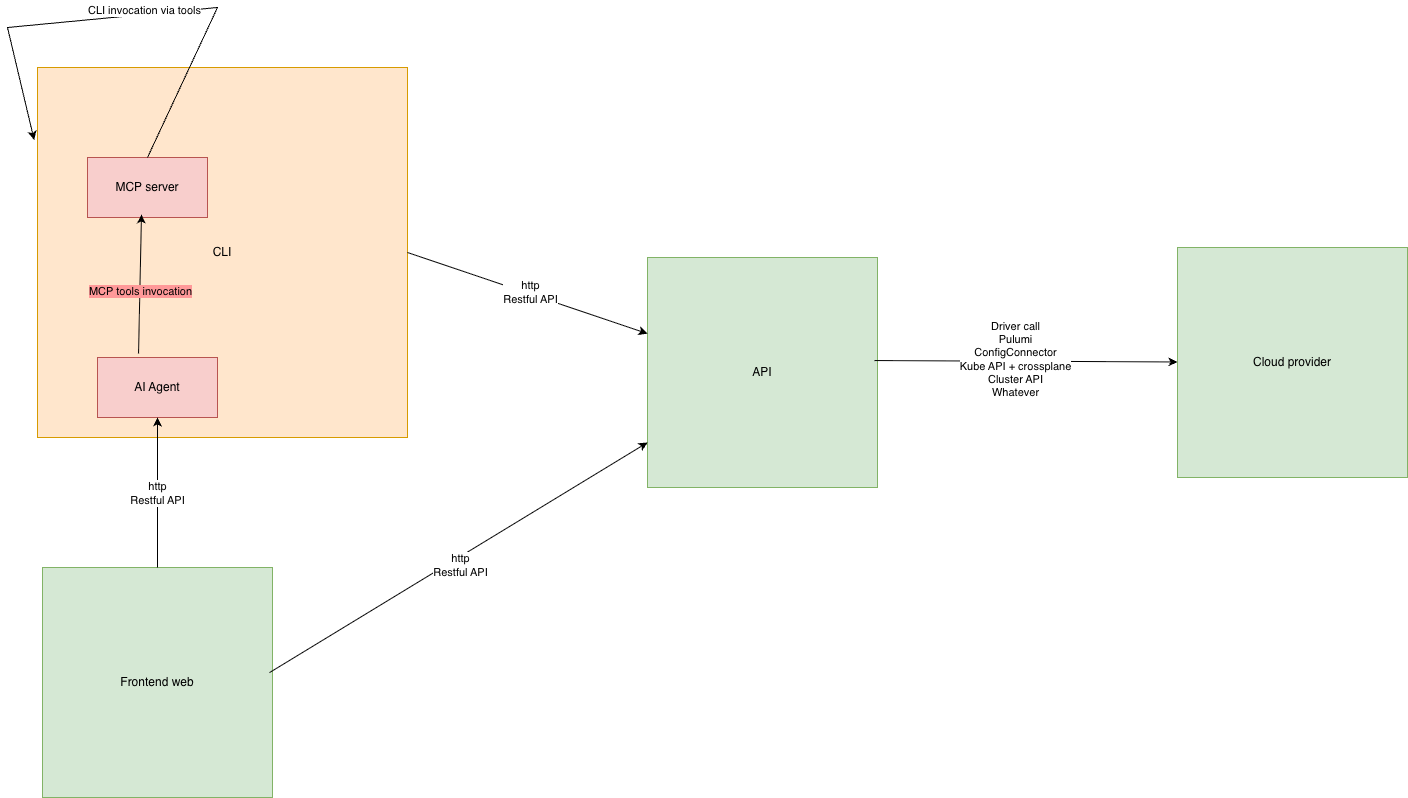
As explained in our previous blog post, we're still working on agentizing every pillars of the platform engineering to be able to interact with chat, serverless function or ticket webhook triggering prompts. And one of the pillars is observability.
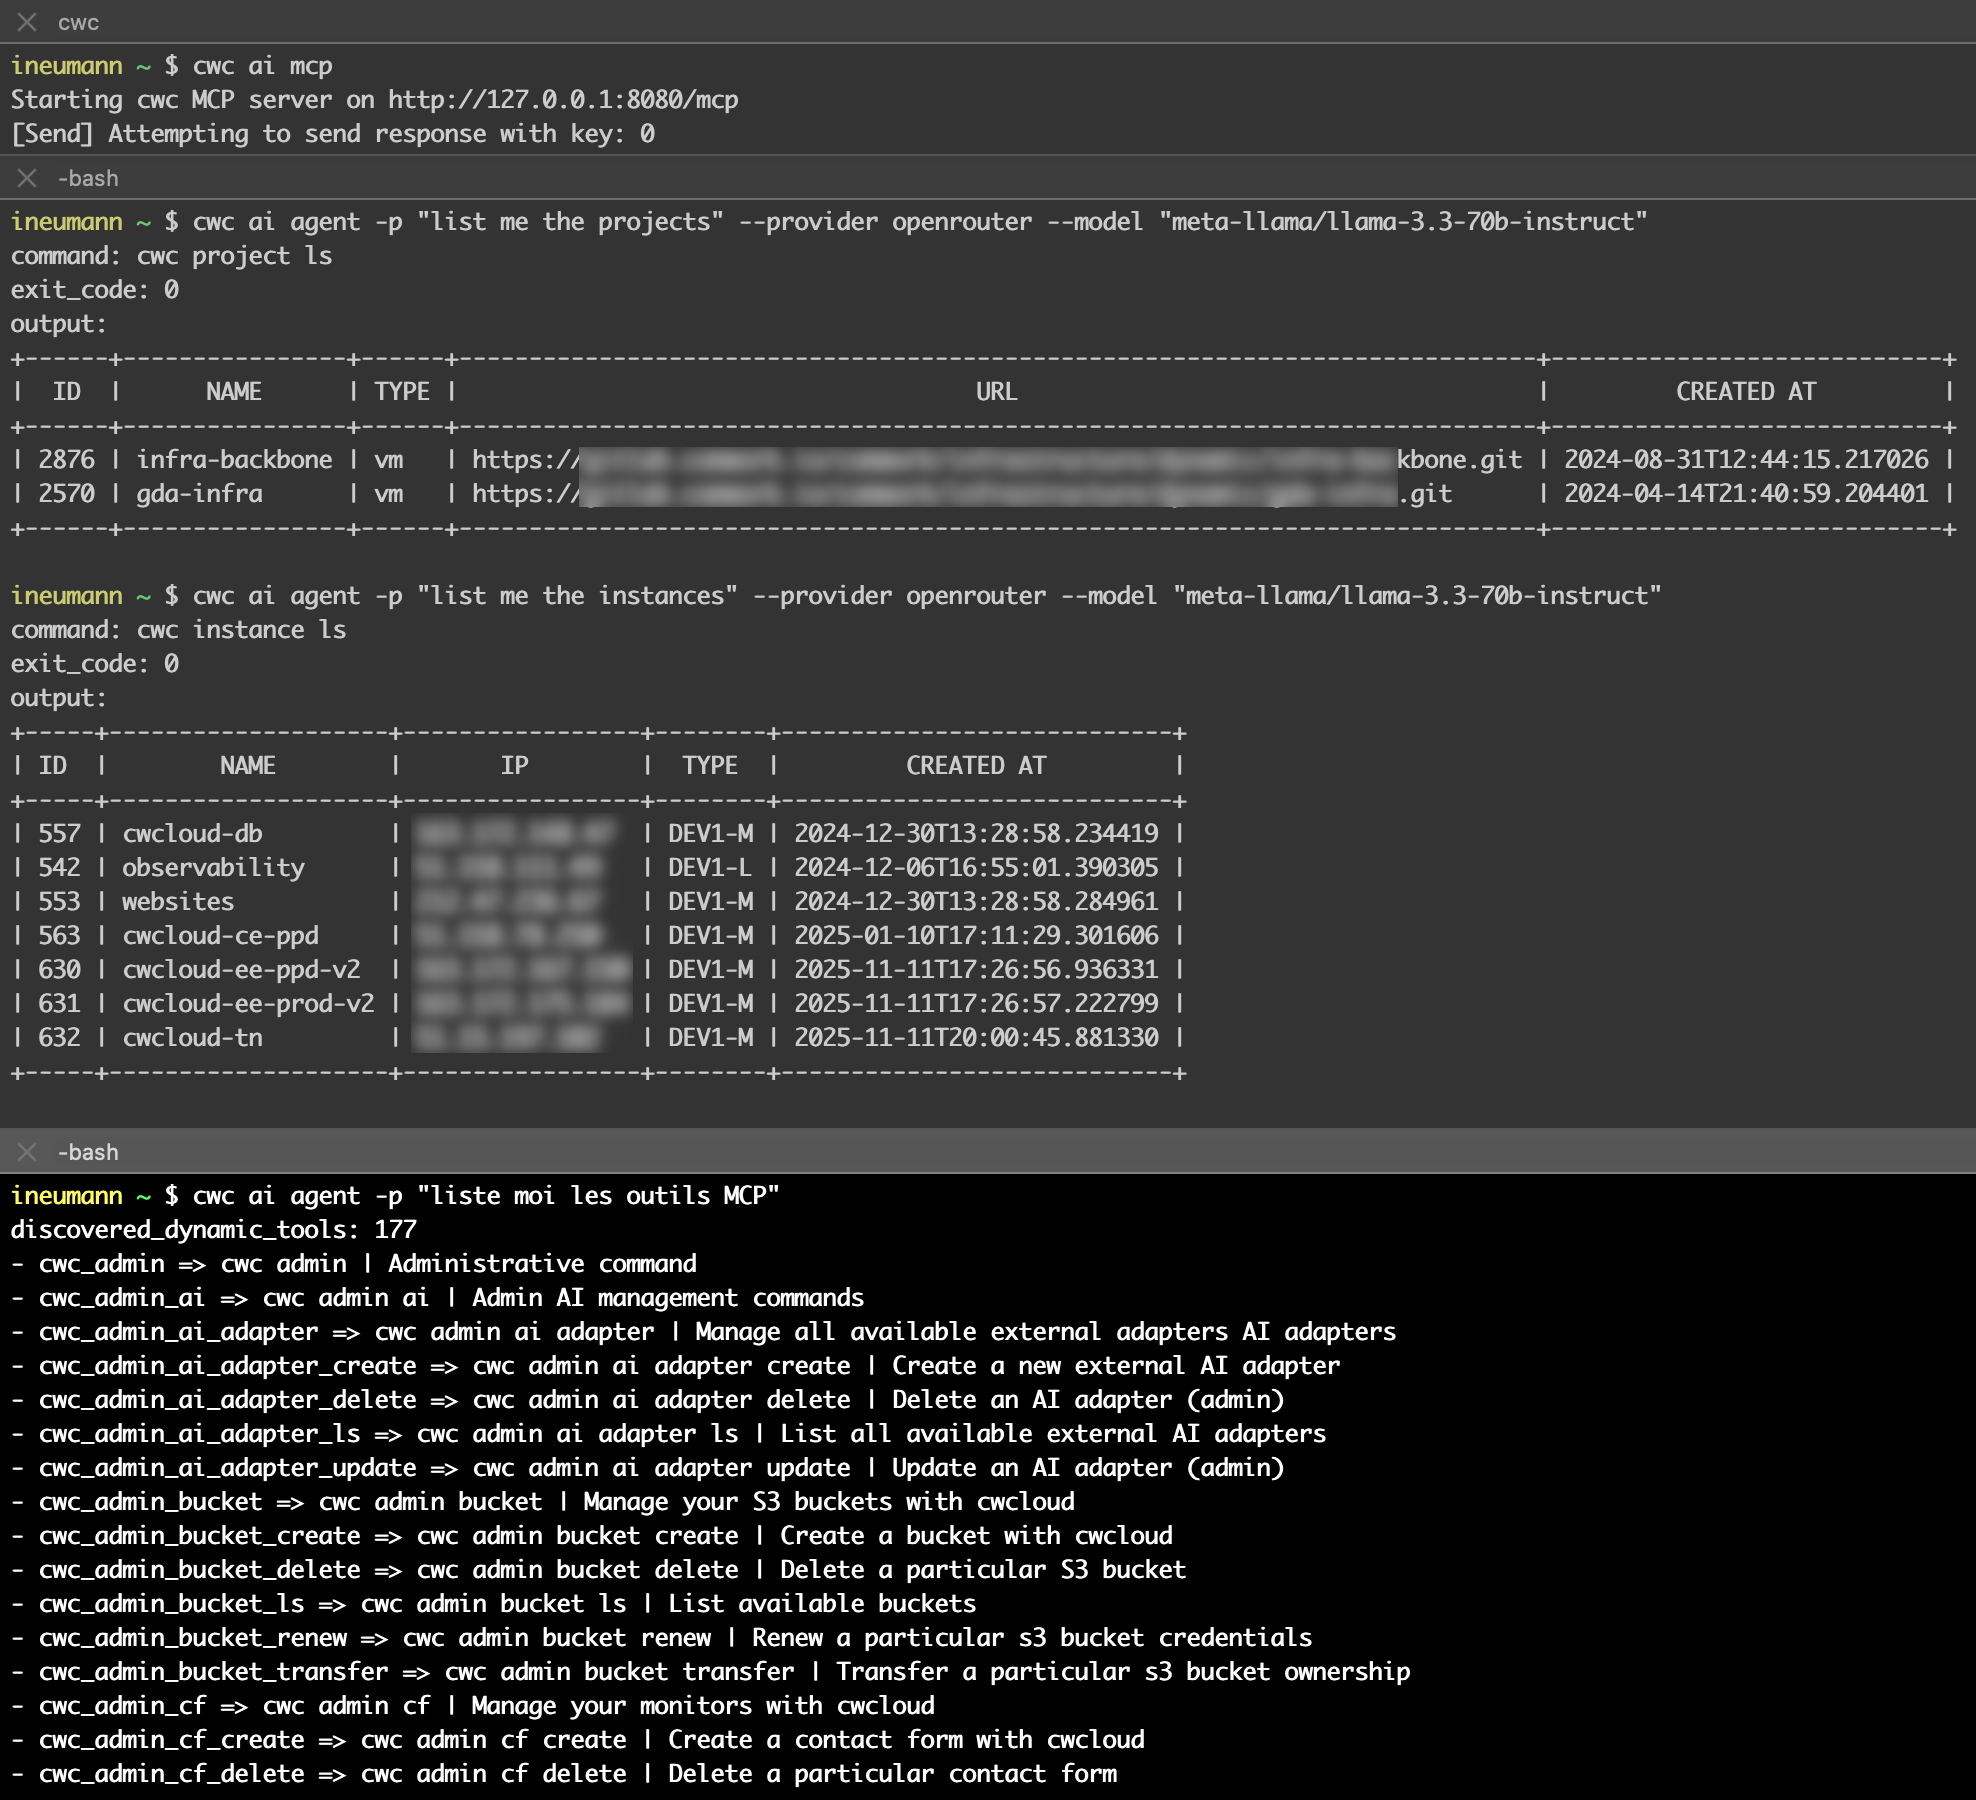
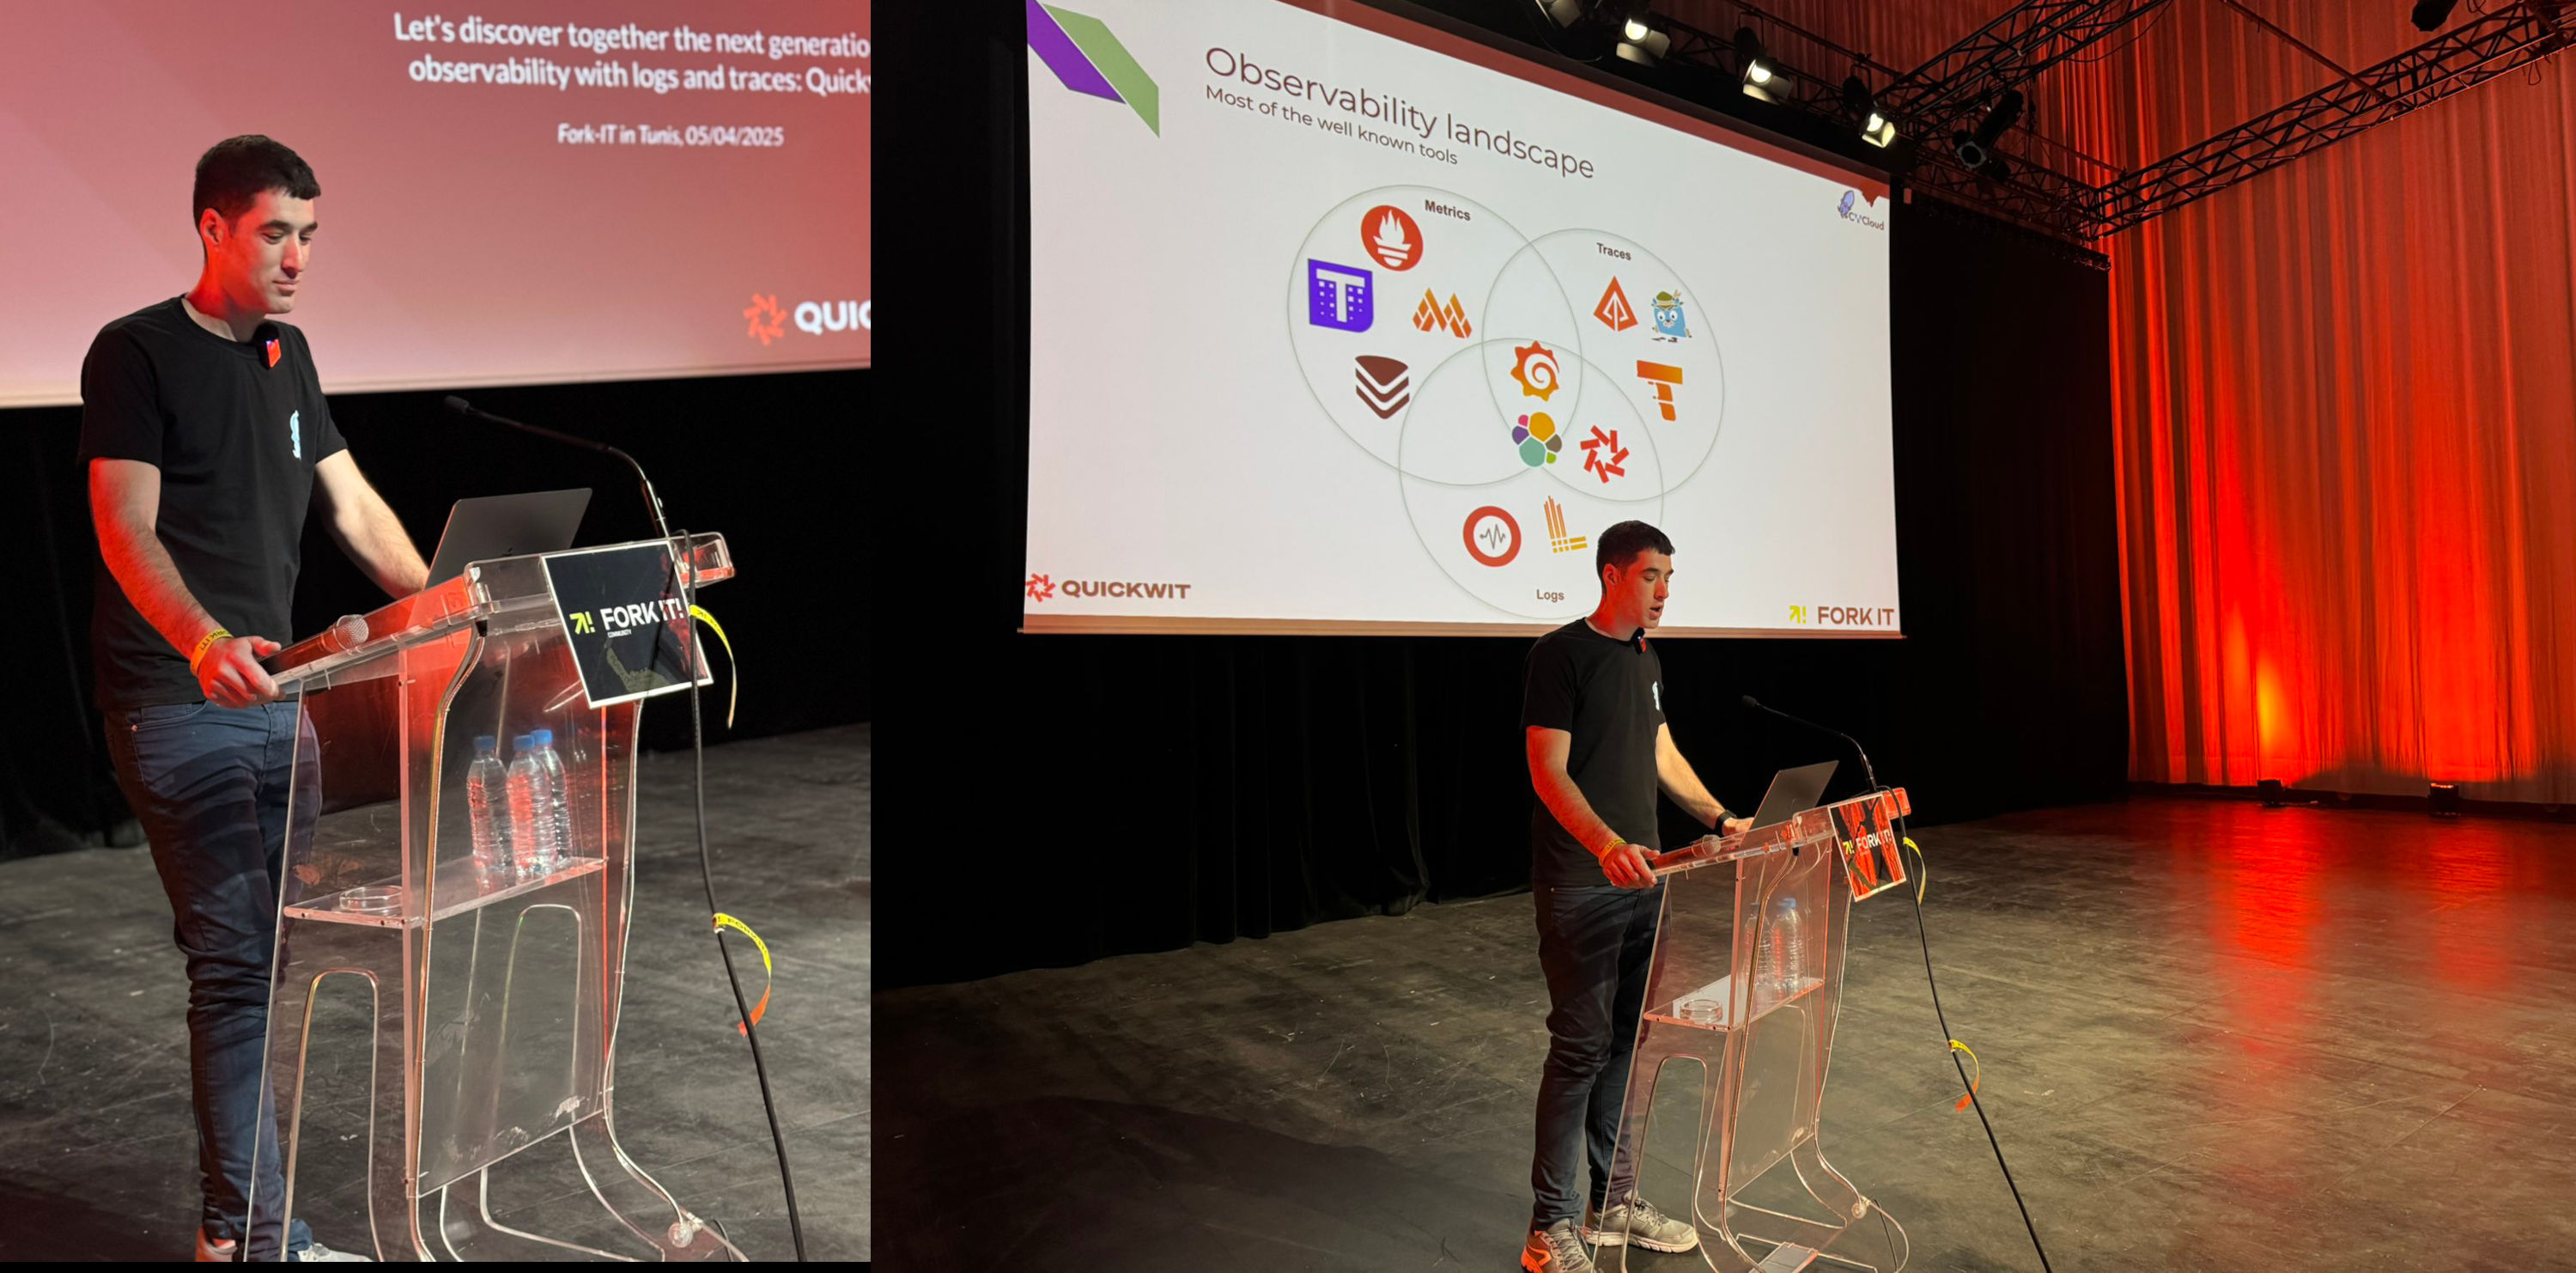
As you might notice with several blogposts like this one we also are working closely with Quickwit since few years and we're contributing to their CLI aka qwctl and this CLI is built following the model of our own cwc CLI with MCP server and interactive agent embeded.
Here's a demo of using qwctl as MCP server and web agent:
In this blogpost, we'll see how to use qwctl as an external web agent compliant with CWAI API and as a gitlab webhook.
First, here's how the qwctl CLI can be started as a web agent:
$ qwctl ai web-agent
We can also specify the port and listen address:
$ qwctl ai web-agent -a 0.0.0.0 -p 8081 -s http://localhost:8080/mcp
And then we can send http POST query like this to the web agent:
$ curl -X POST http://localhost:8081 -H "Content-Type: application/json" -d '{ "settings": { "max_tokens": 500 }, "message": "Hello"}'
The web agent will answer like this (following the external adapter contract):
{
  "status": "ok",
  "message": "Hello! How can I assist you today?",
  "usage": {
    "prompt_tokens": 8,
    "completion_tokens": 10,
    "total_tokens": 18
  }
}
In order to host the cli as MCP server and web agent at the same time, here's an example of docker compose file:
services:
  qwctl_mcp:
    image: "rg.fr-par.scw.cloud/cwcloud-ce-u7u1q0/cwc:1.19.13"
    restart: always
    container_name: qwctl_mcp
    env_file:
      - .env.qwctl
    volumes:
      - "/etc/ssl/certs/ca-bundle.crt:/etc/ssl/certs/ca-bundle.crt:ro"
      - "/etc/ssl/certs/ca-bundle.trust.crt:/etc/ssl/certs/ca-bundle.trust.crt:ro"
    command: ["ai", "mcp", "-l", "0.0.0.0", "-p", "8080"]
    networks:
      - cwc_network
  qwctl_agent:
    image: "rg.fr-par.scw.cloud/cwcloud-ce-u7u1q0/cwc:1.19.13"
    restart: always
    container_name: qwctl_agent
    env_file:
      - .env.qwctl
    volumes:
      - "/etc/ssl/certs/ca-bundle.crt:/etc/ssl/certs/ca-bundle.crt:ro"
      - "/etc/ssl/certs/ca-bundle.trust.crt:/etc/ssl/certs/ca-bundle.trust.crt:ro"
    command: ["ai", "web-agent", "-a", "0.0.0.0", "-p", "8081", "-s", "http://qwctl_mcp:8080"]
    ports:
        - "8081:8081"
    networks:
      - qwctl_network

networks:
  qwctl_network:
    driver: bridge
In the .env.qwctl you can set all the required environment variables for the qwctl CLI, such as the API key and the default model to use. You can refer to this documentation to get more details.
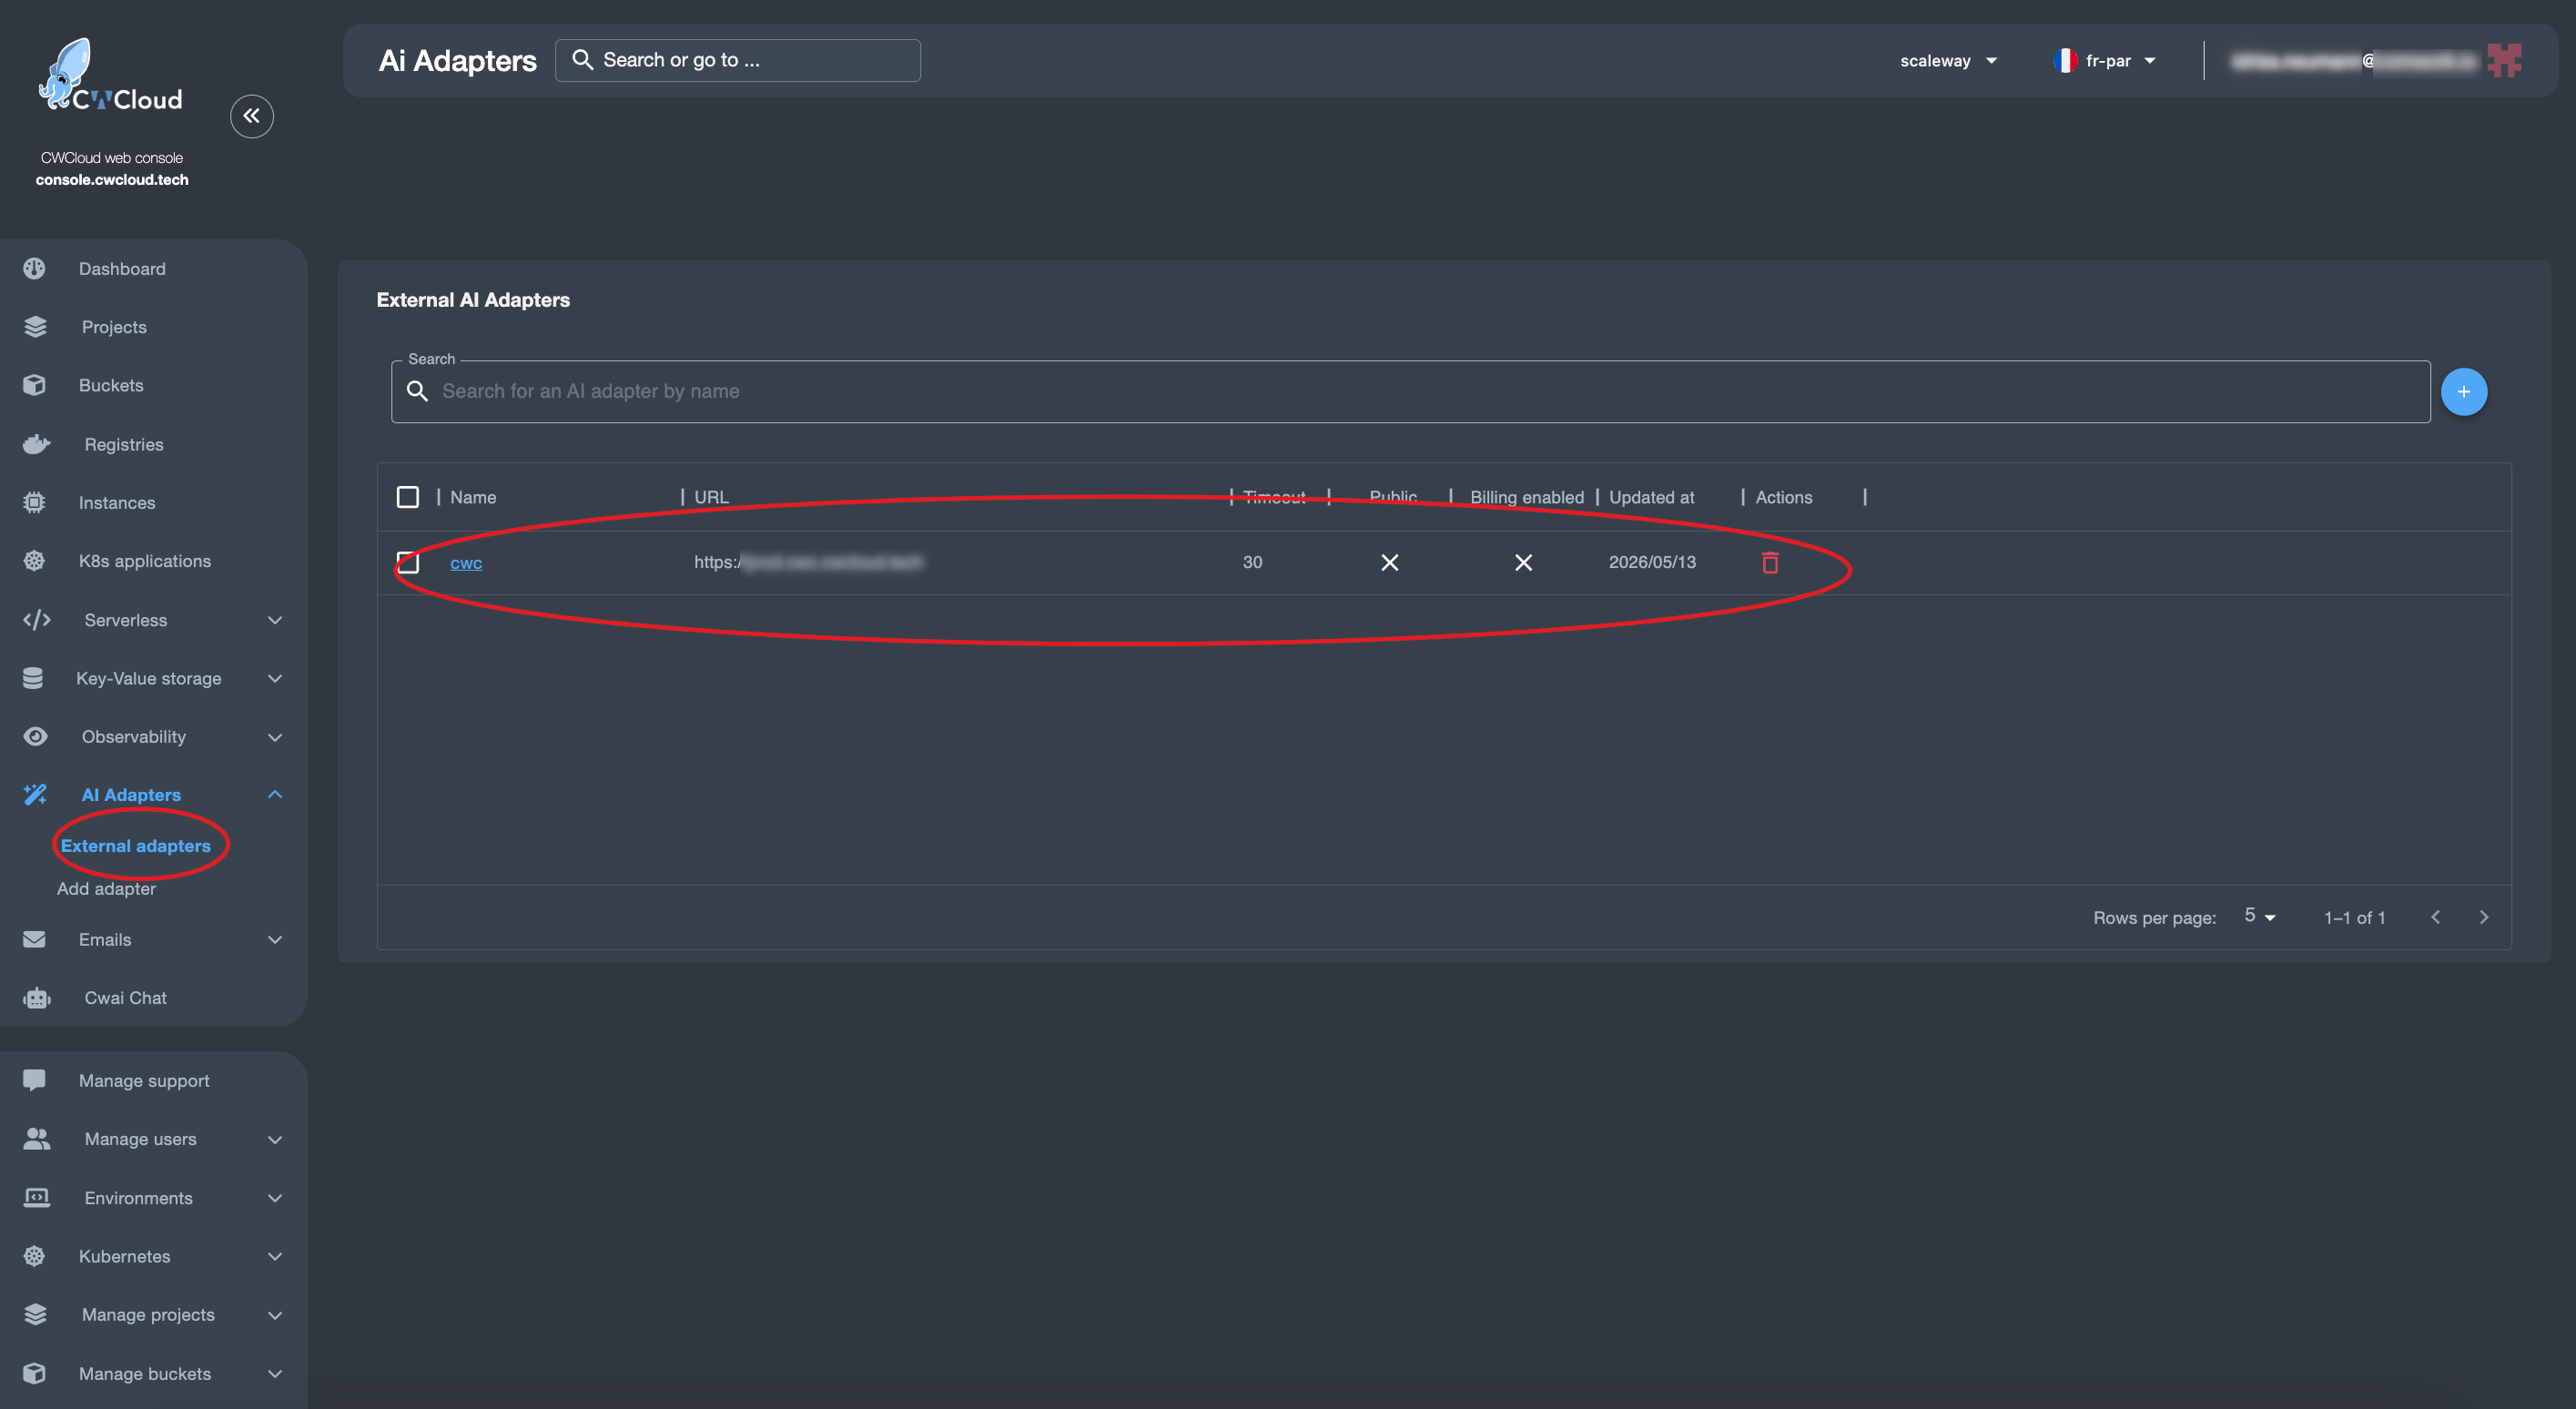
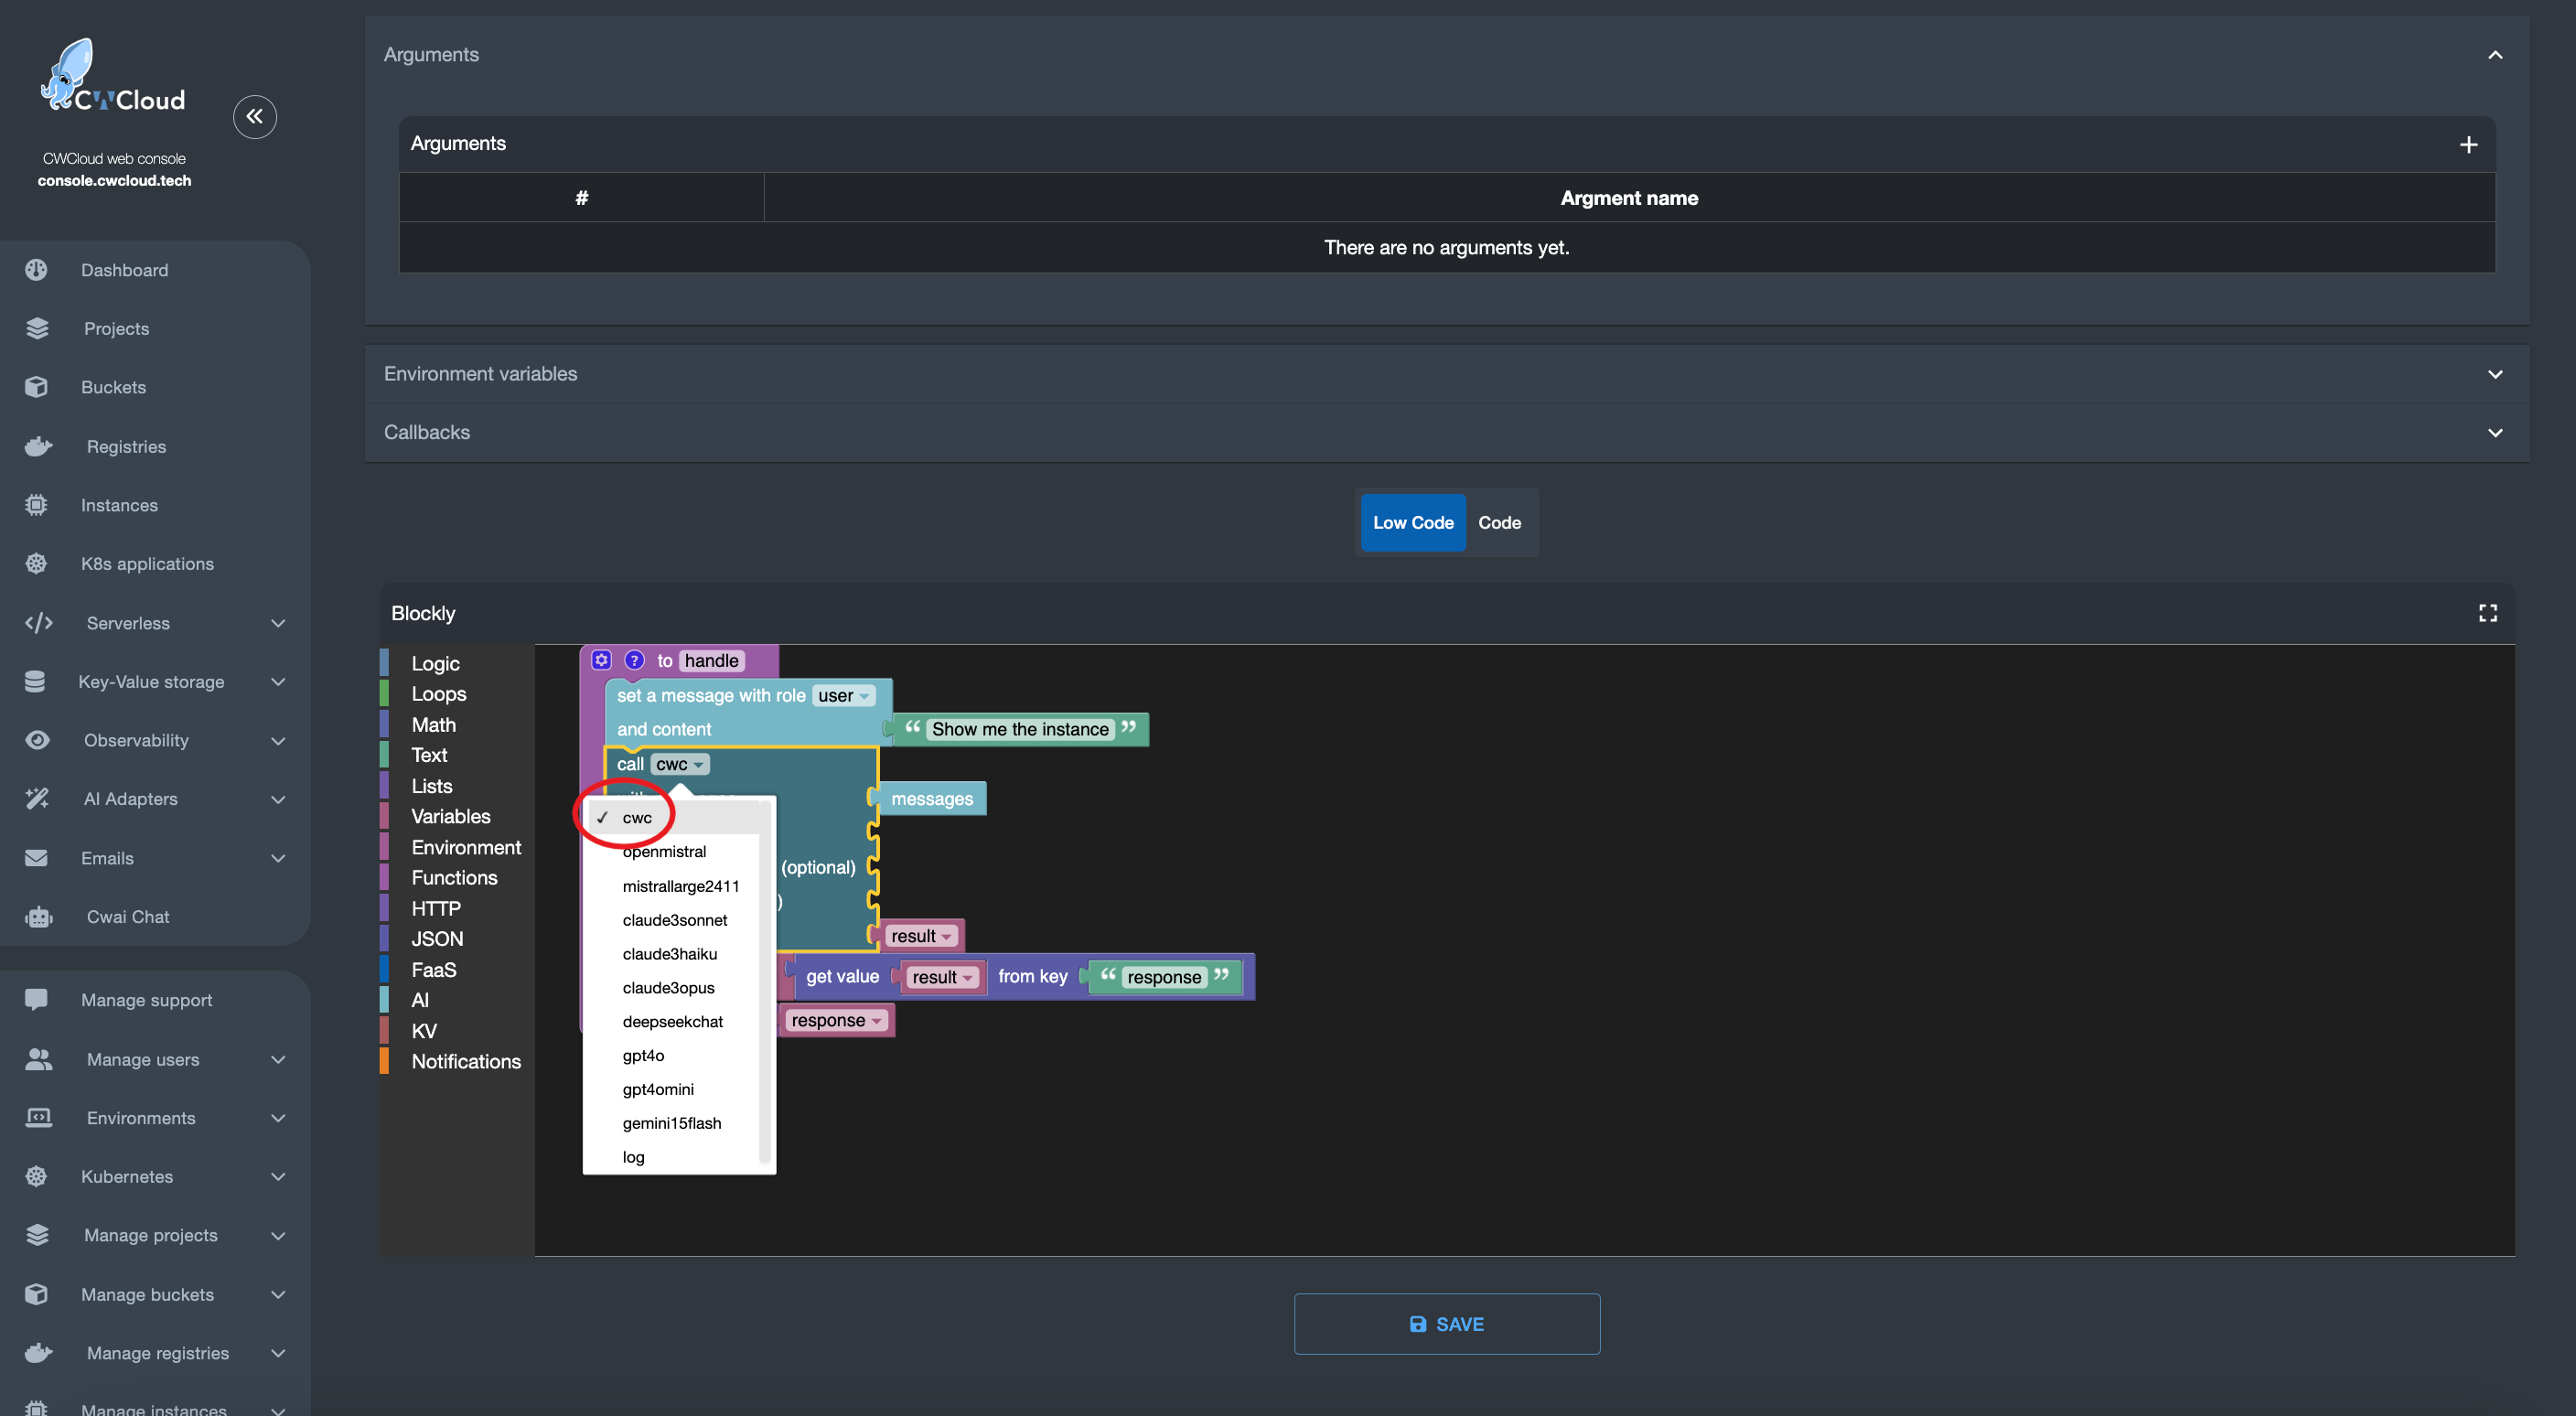
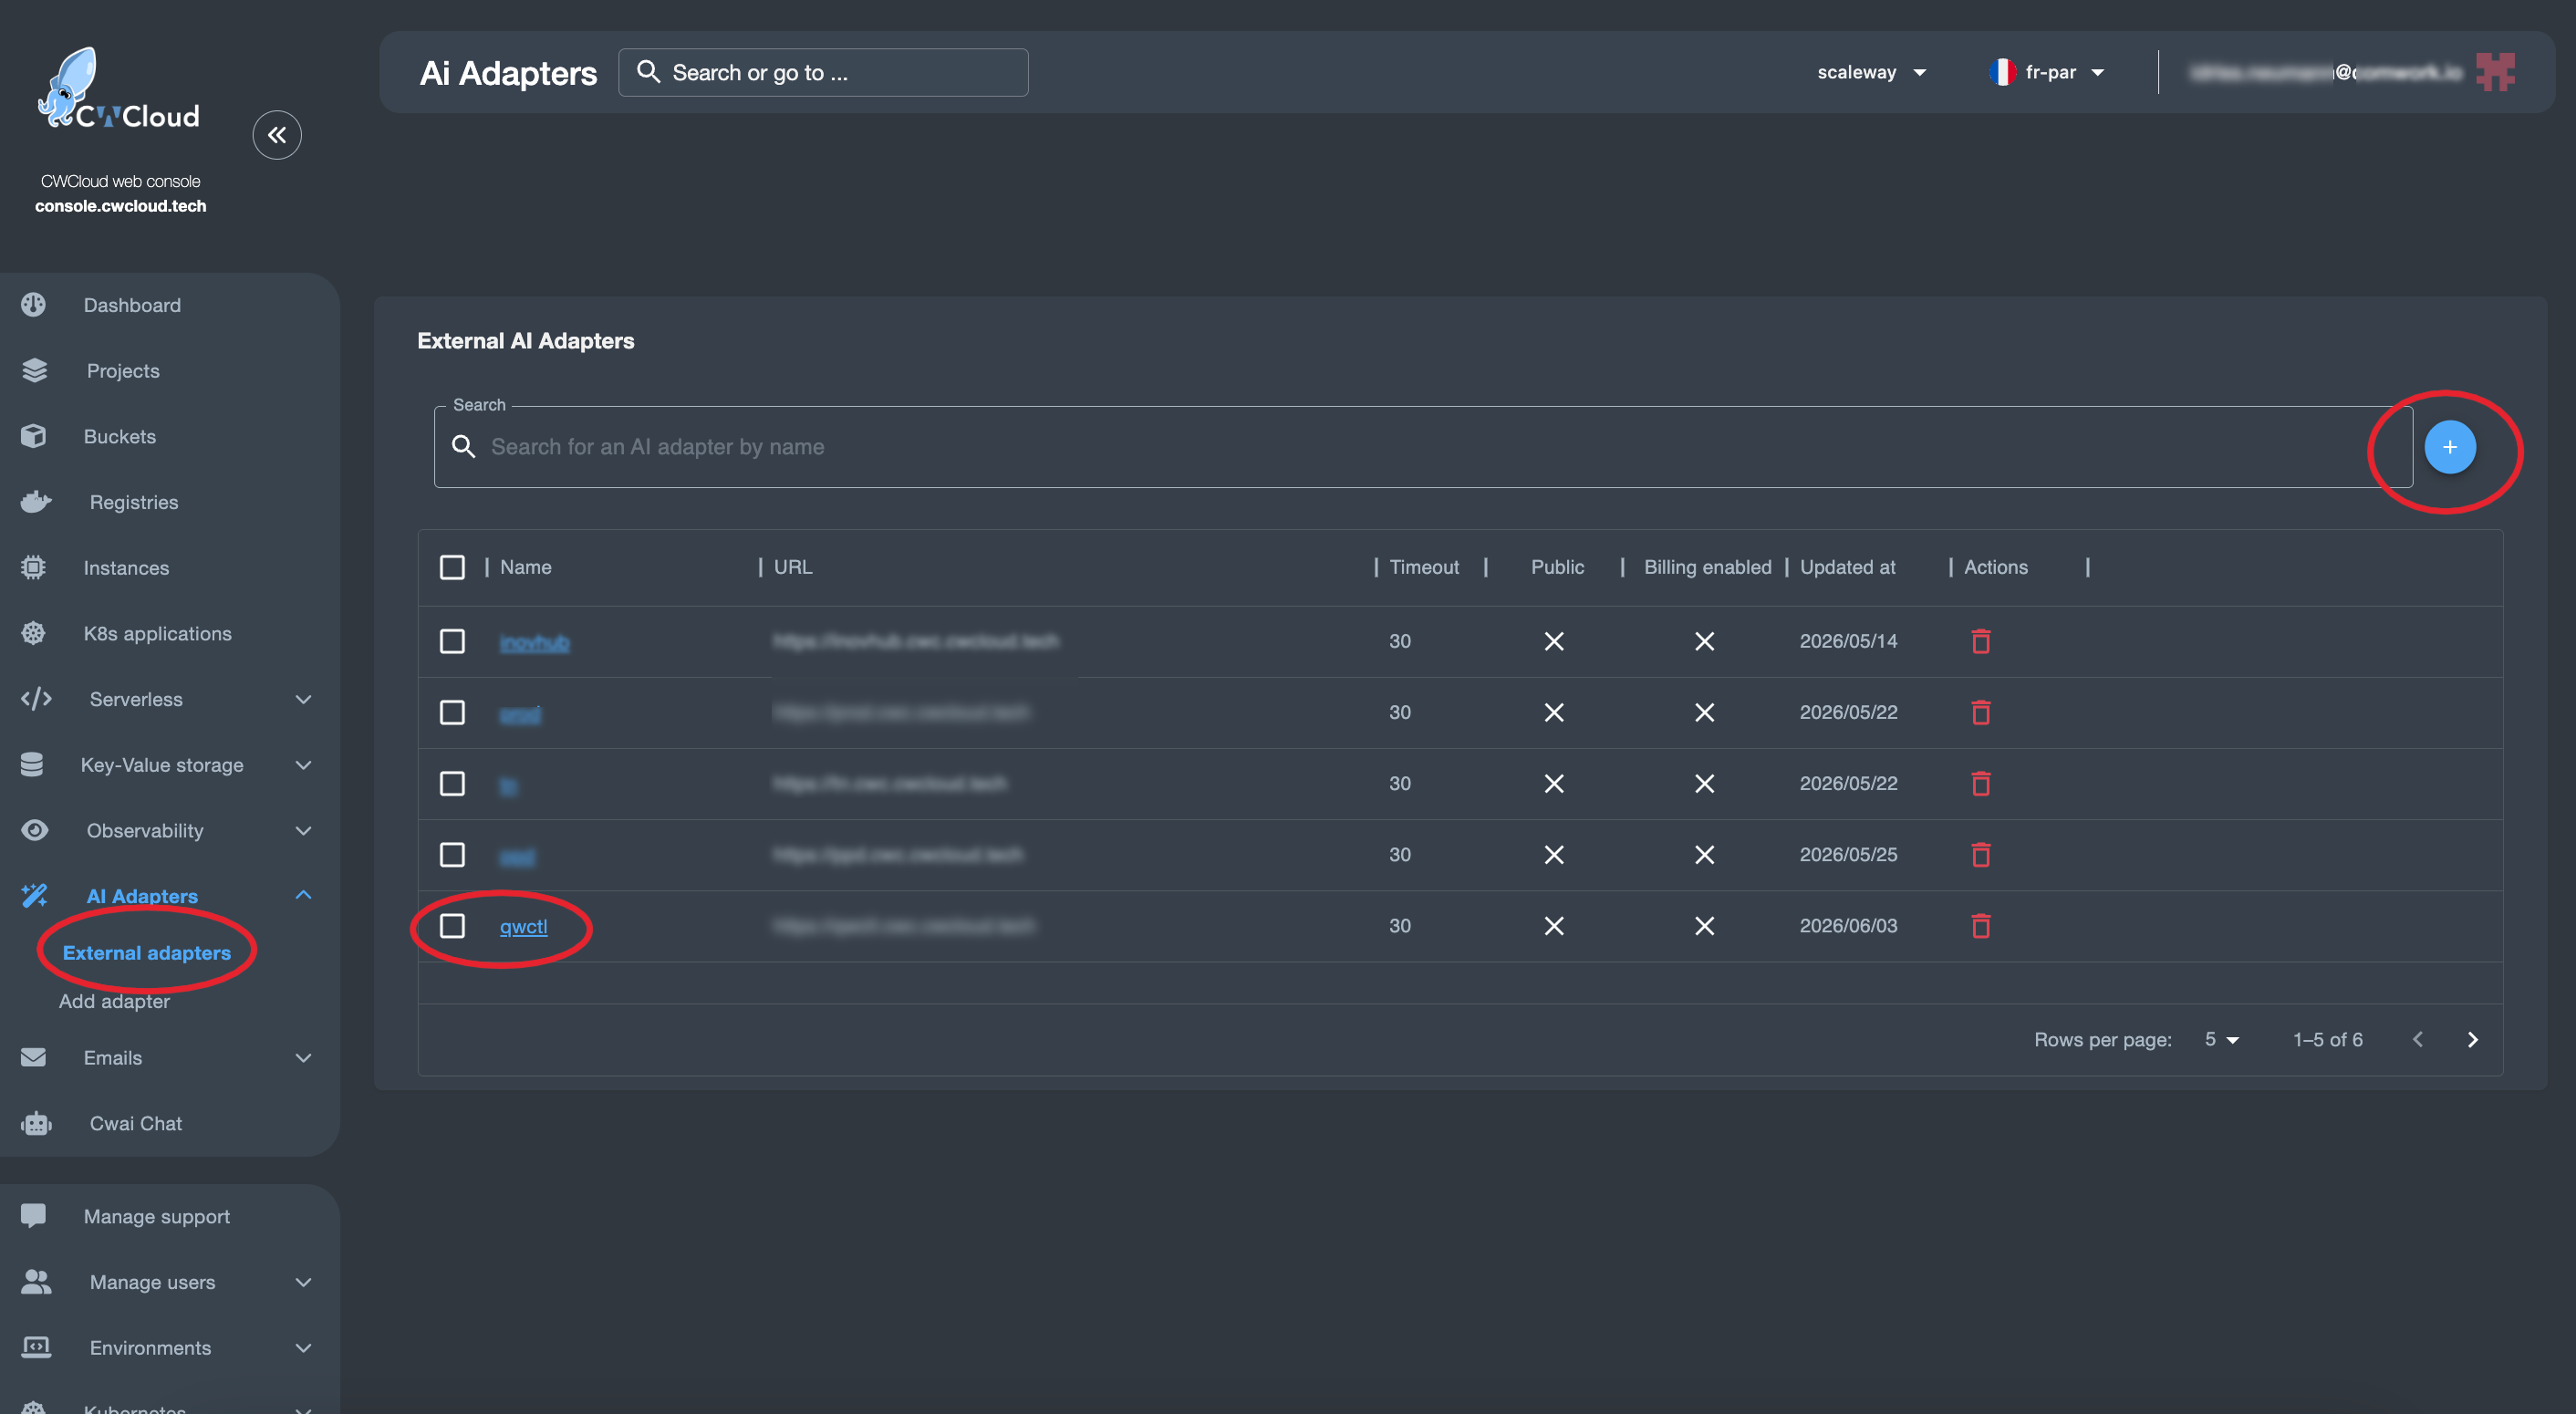
CWCloud AI external adapter
Then we can add the web agent as an external adapter:
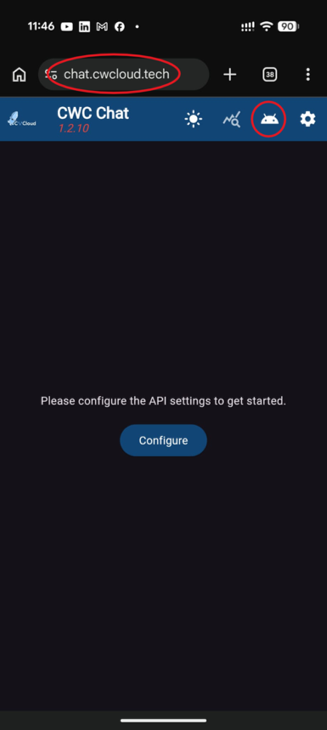
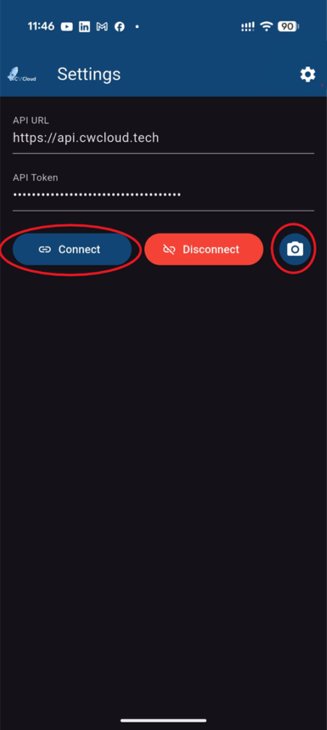
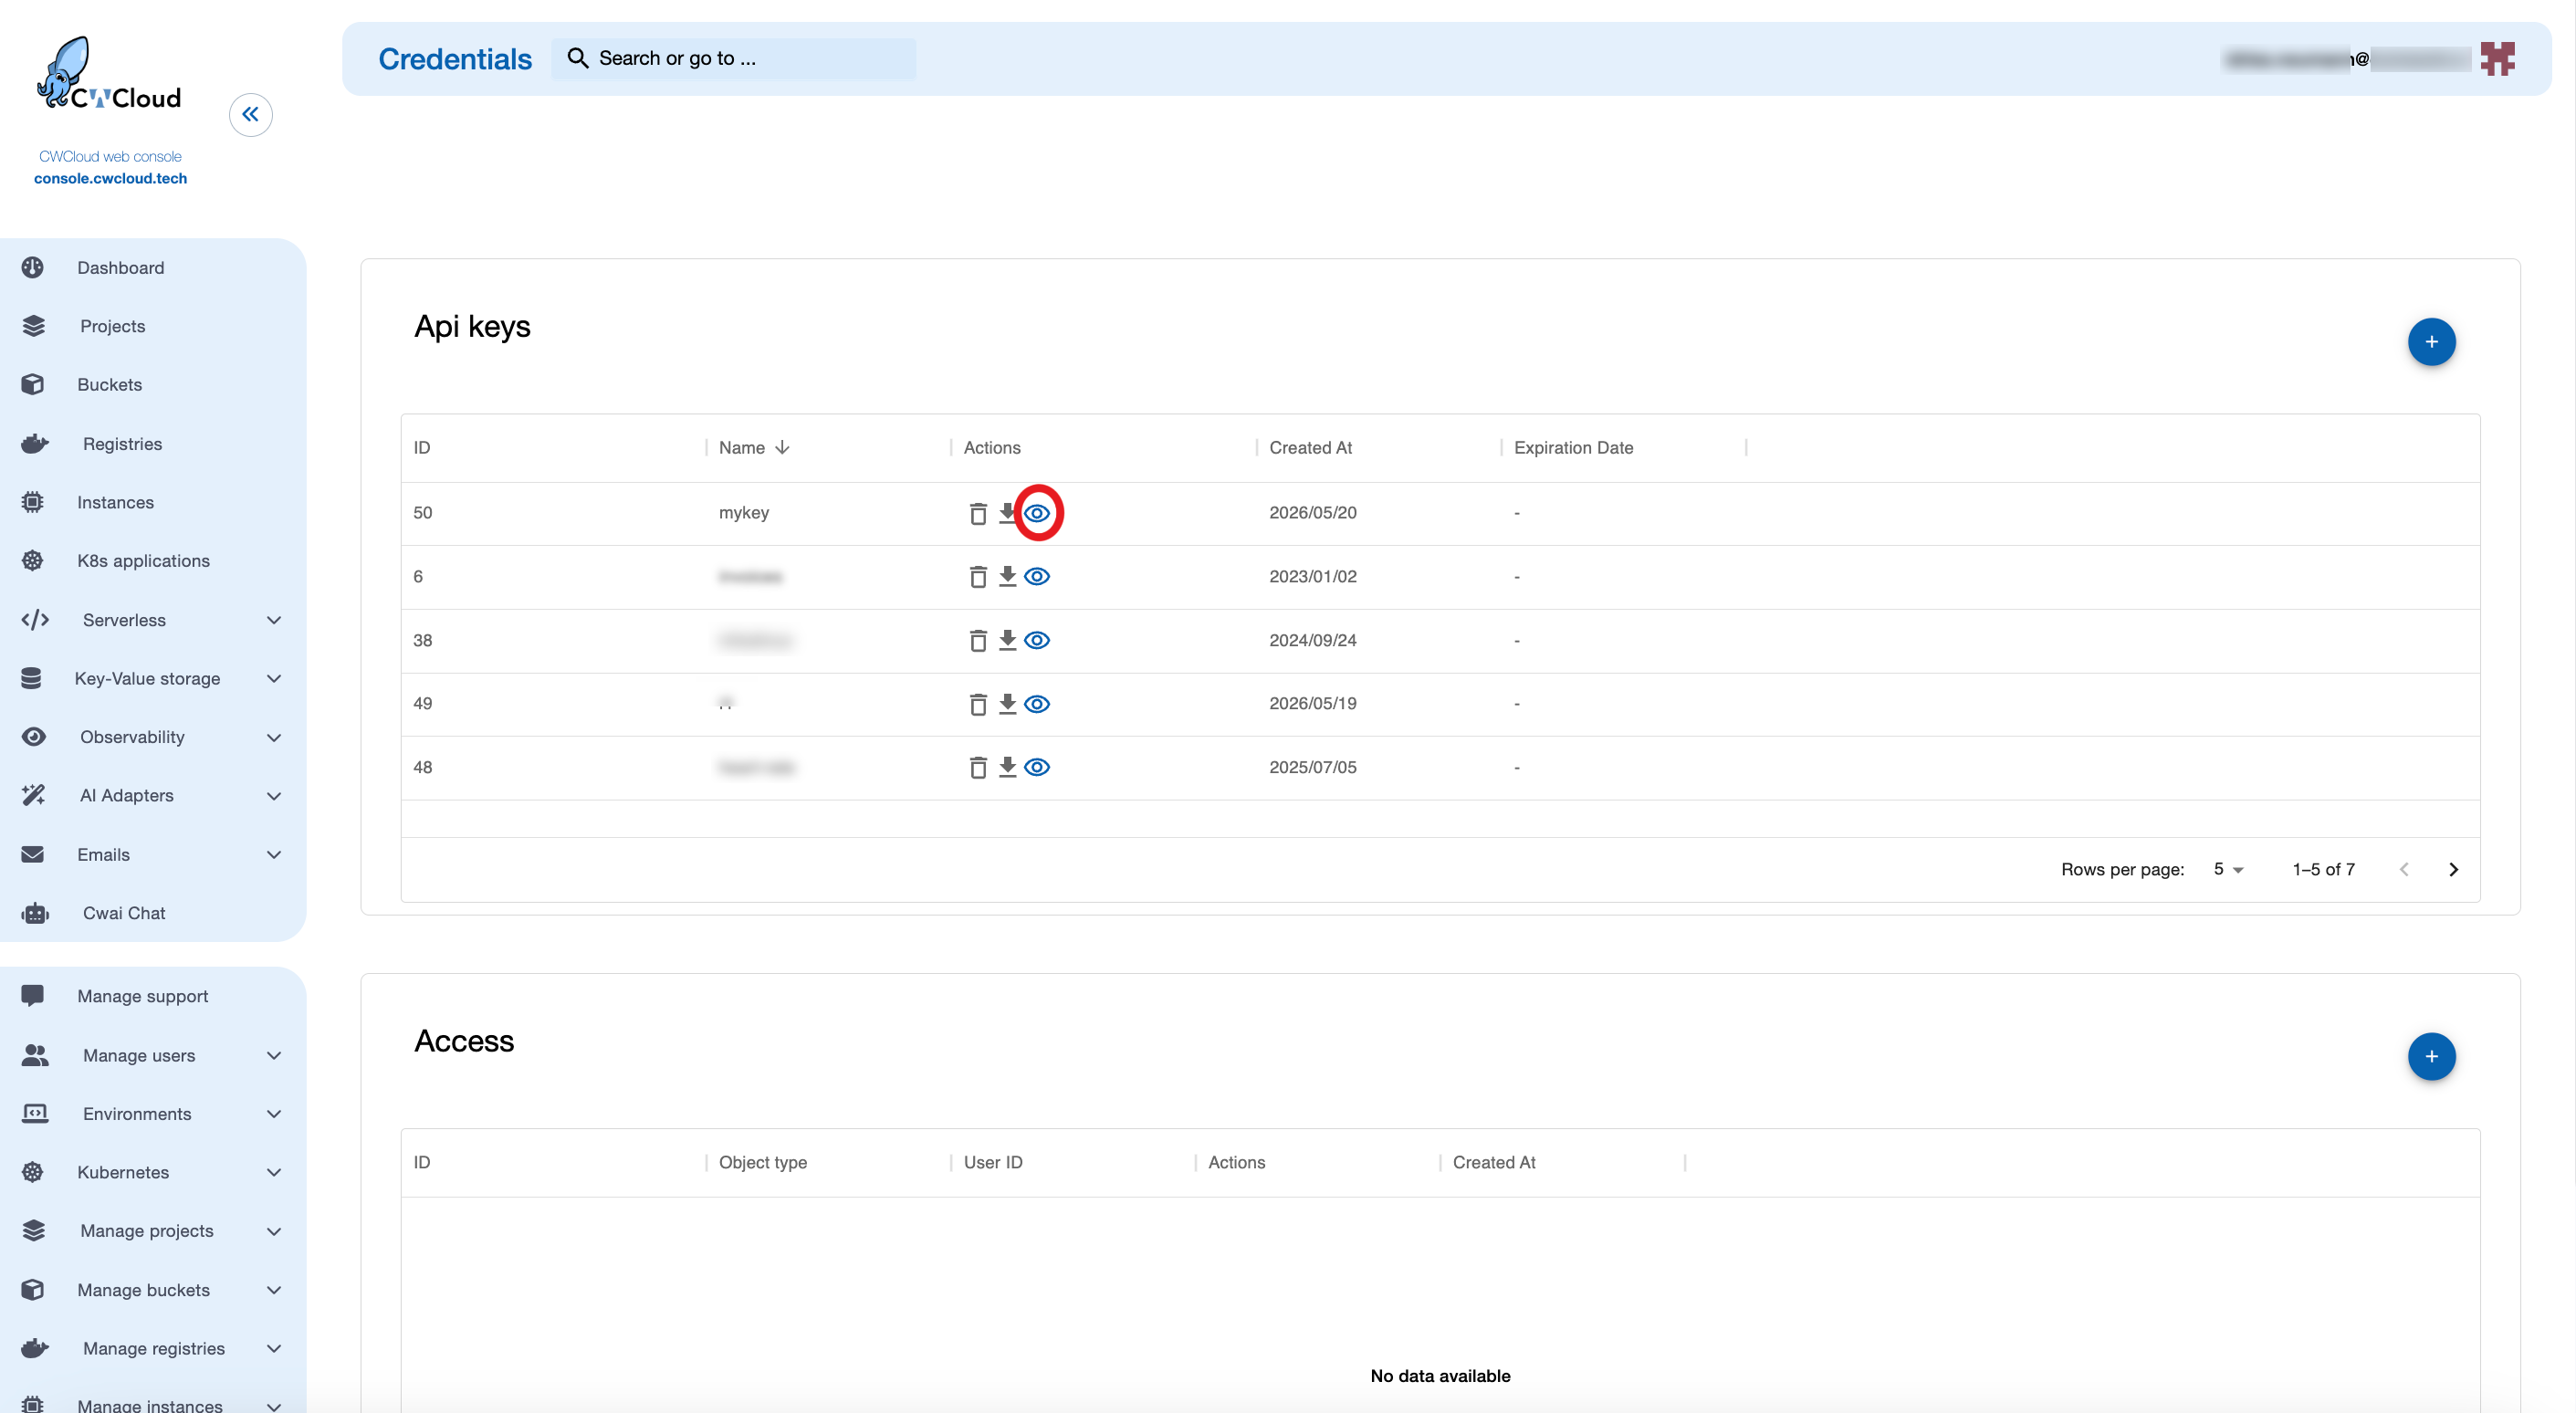
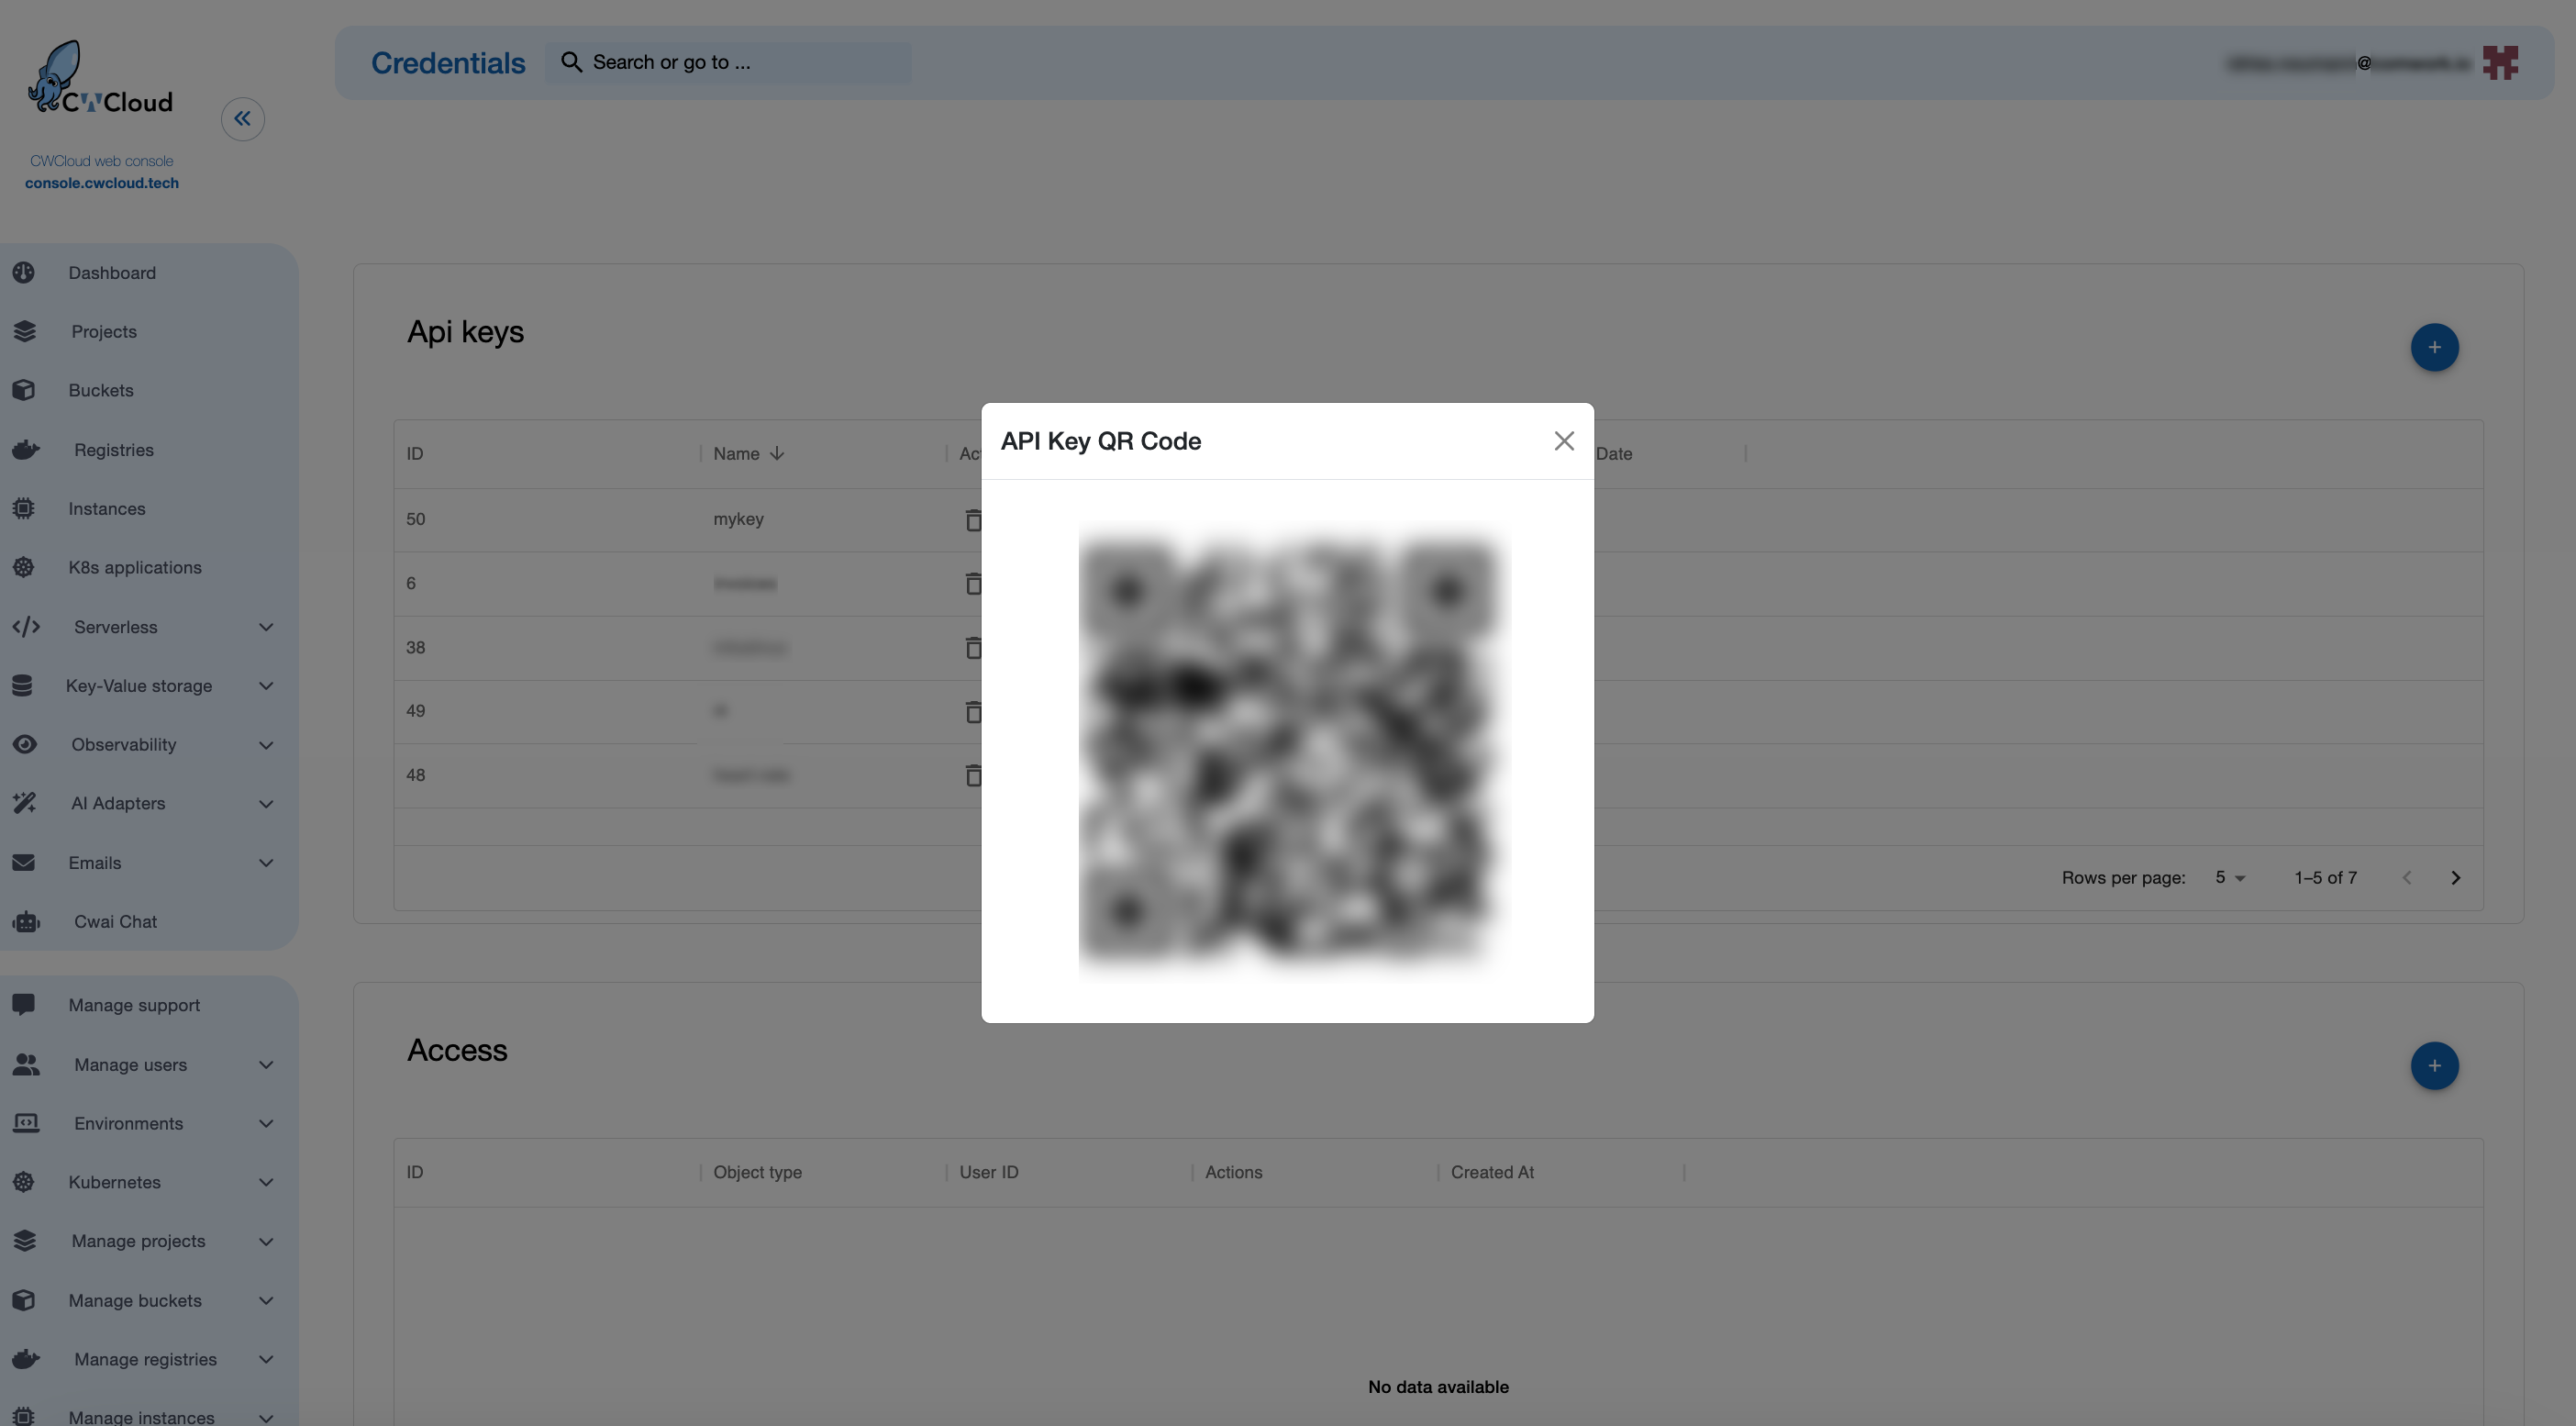
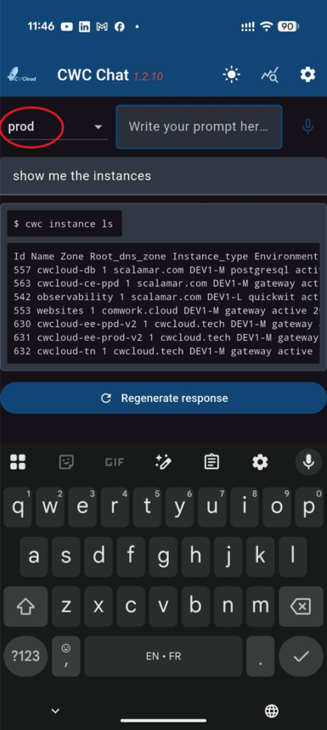
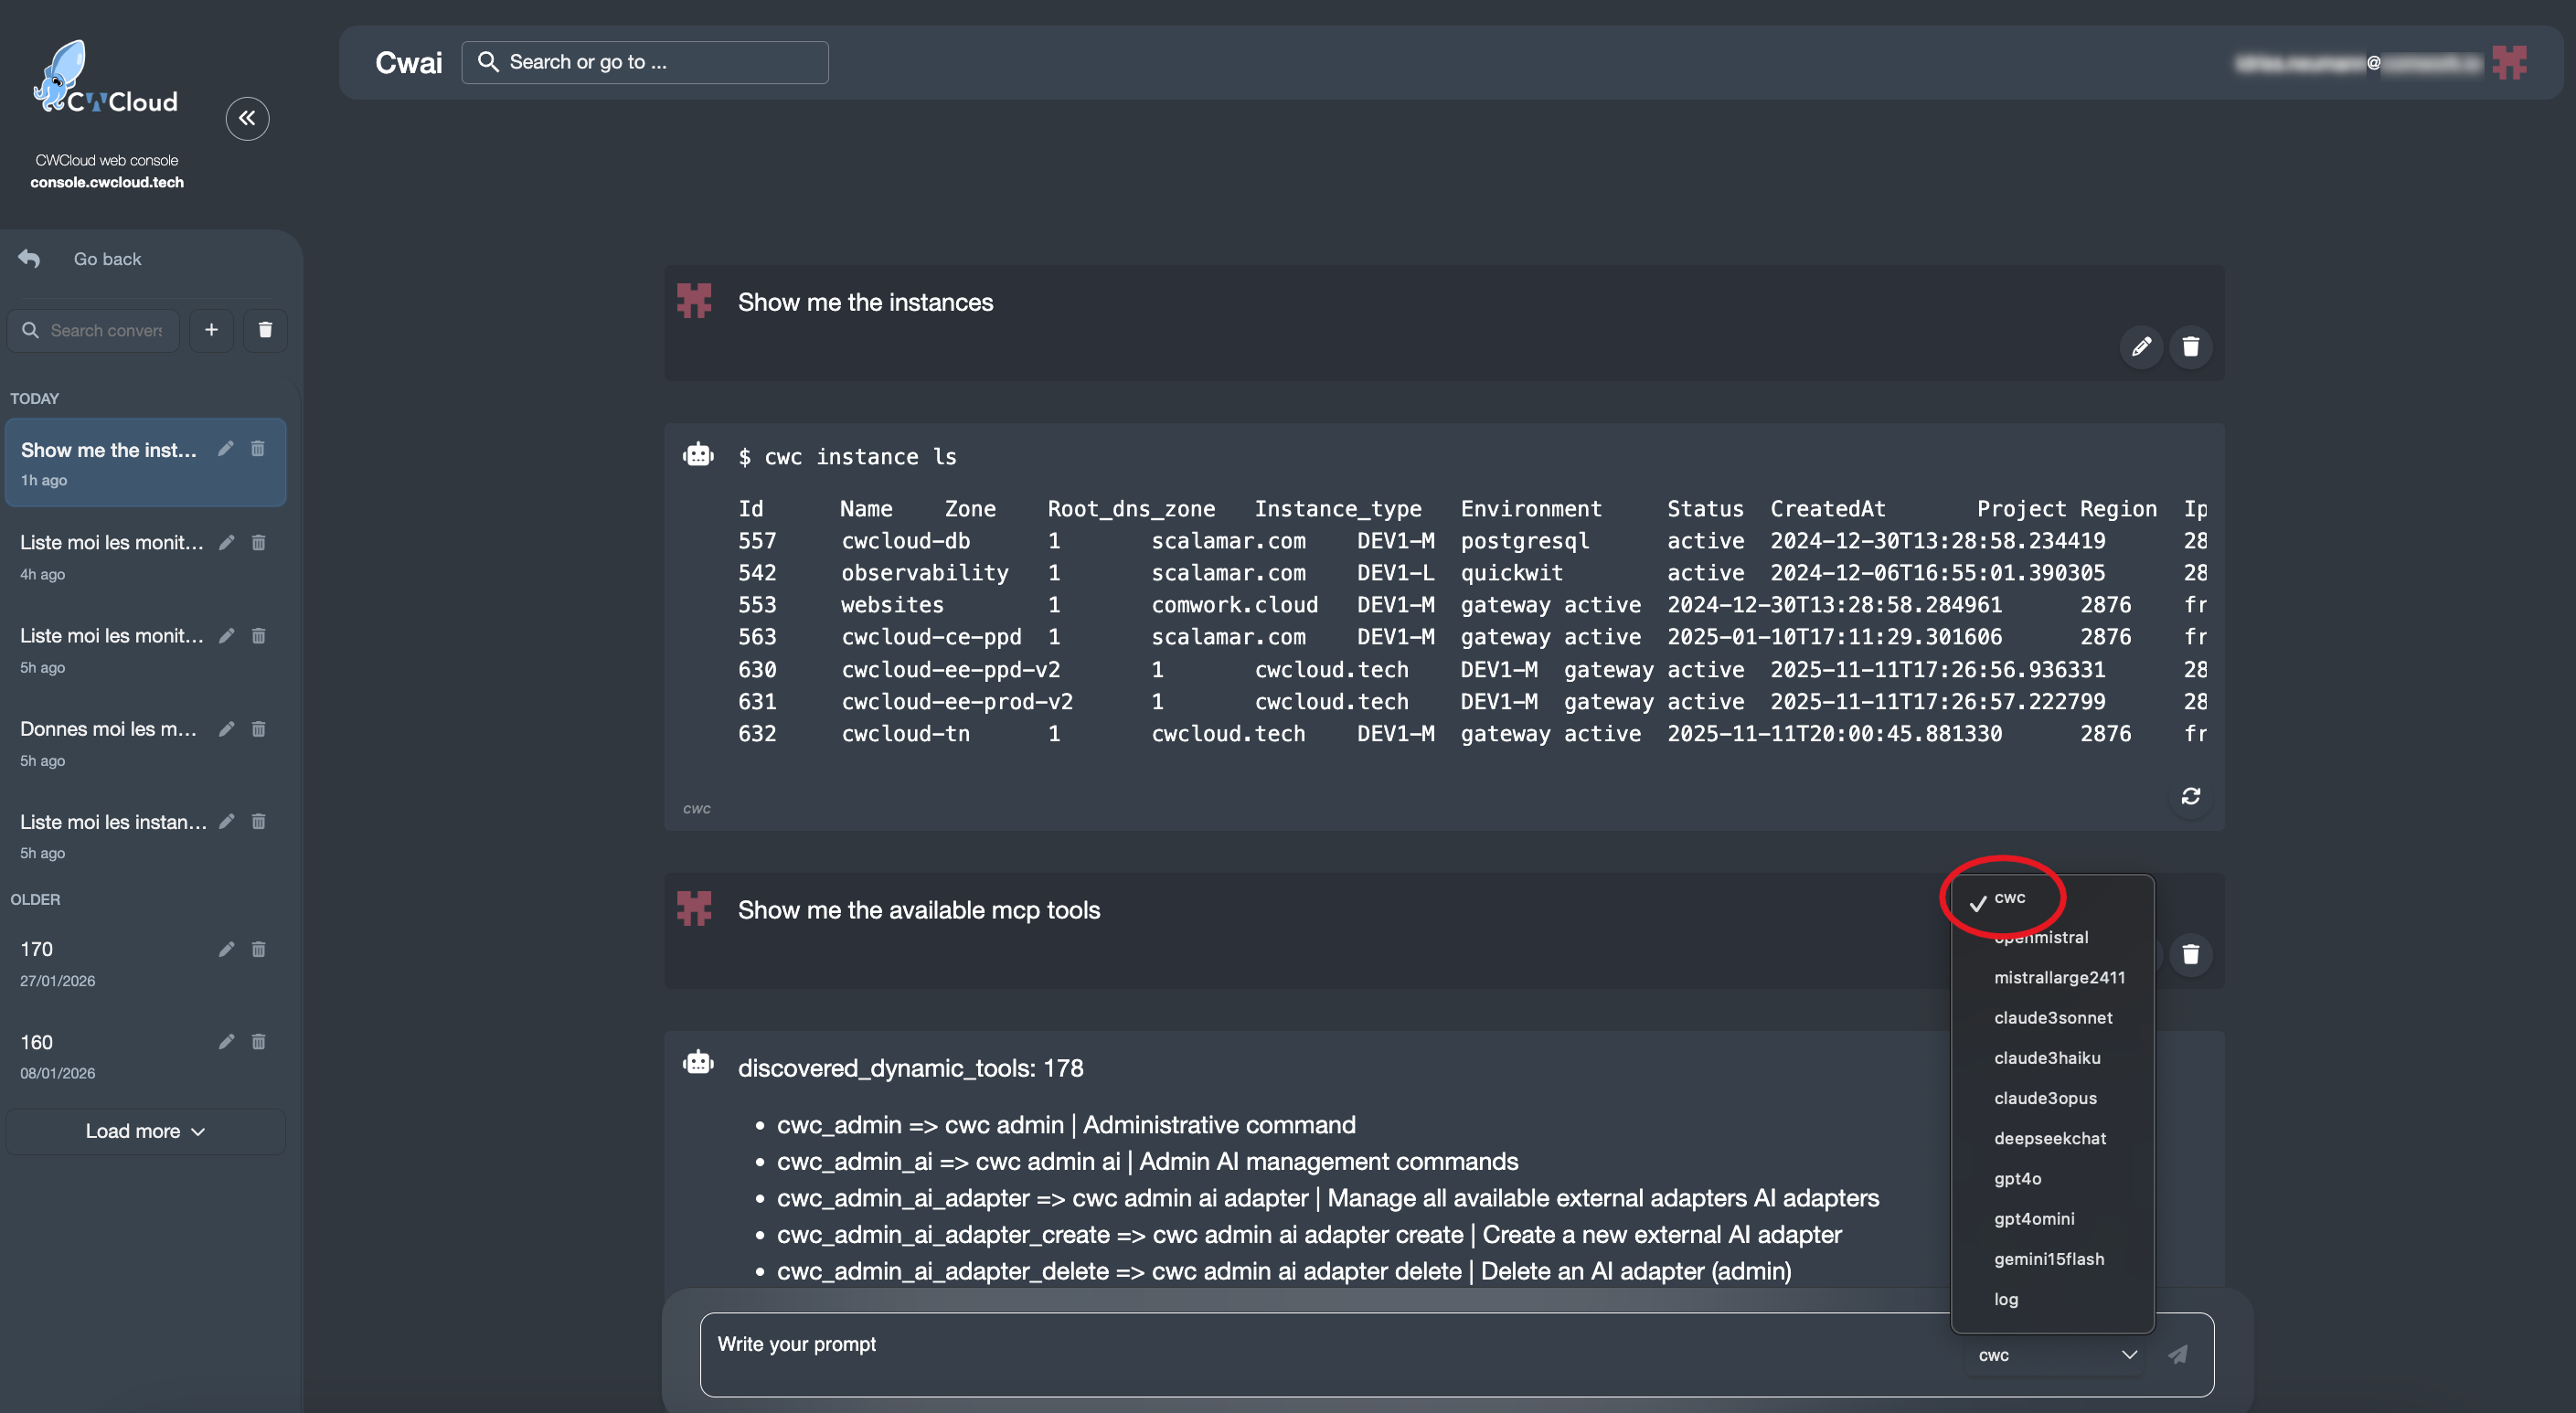
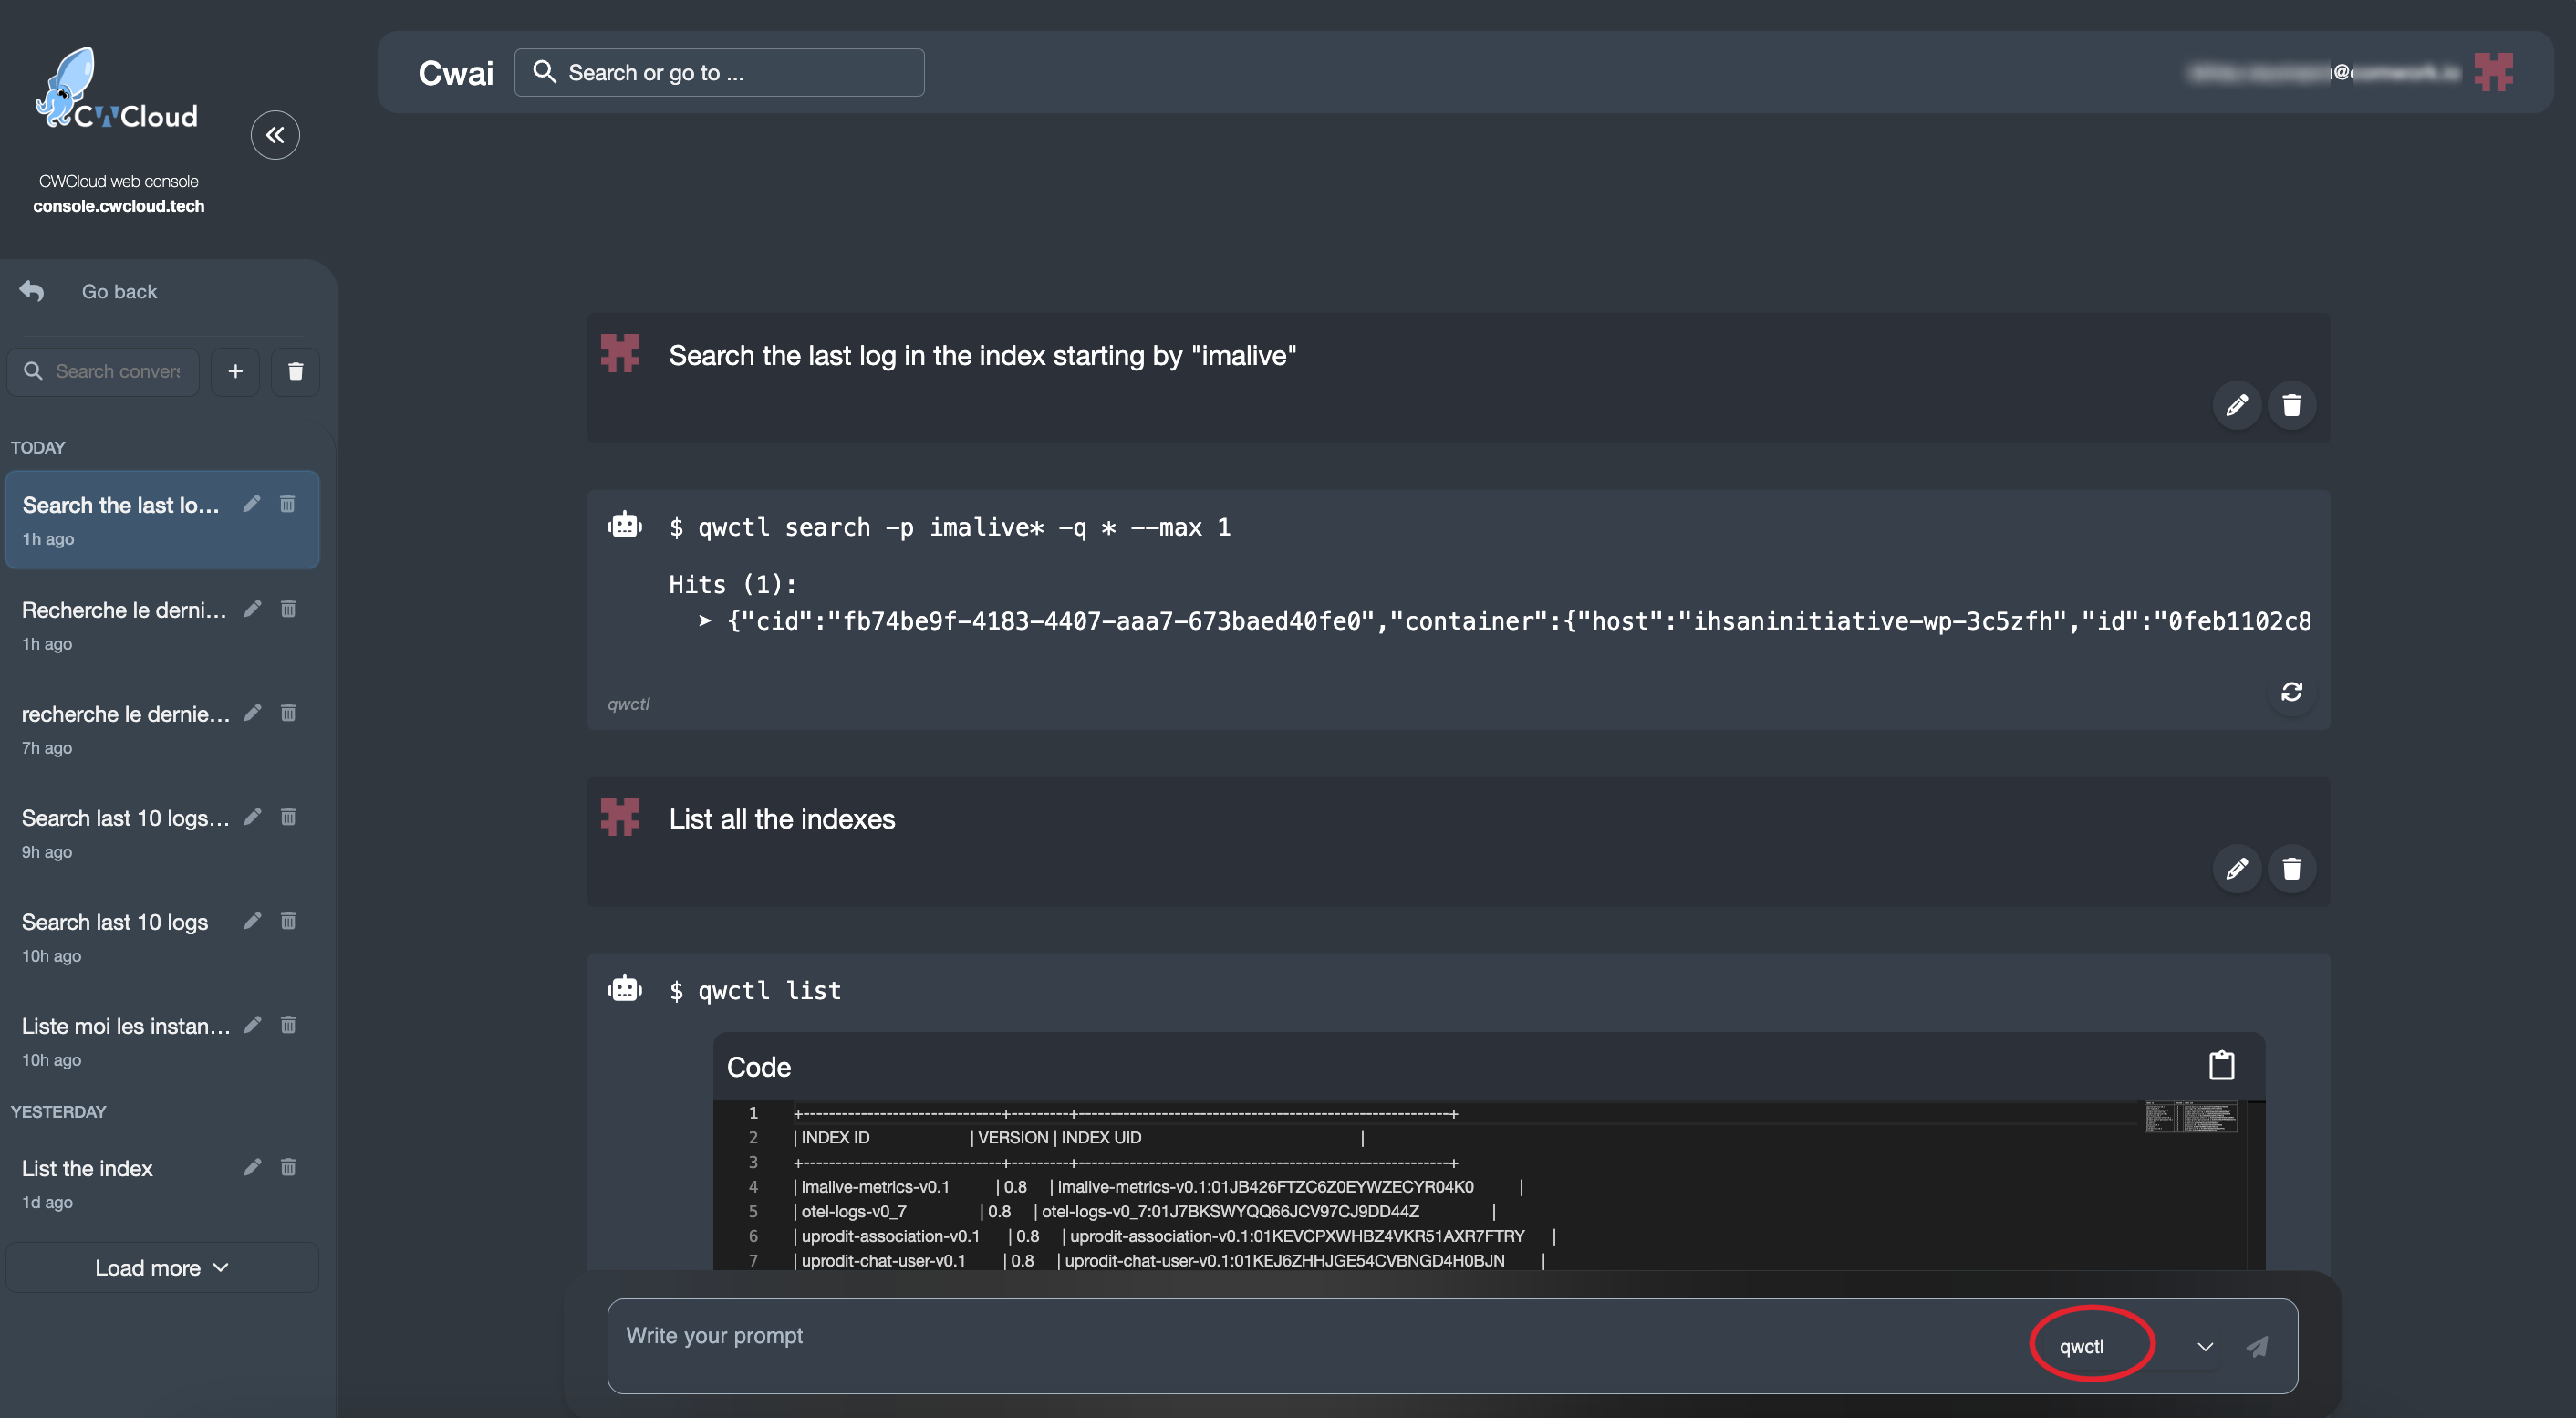
And then we can use it with the CWAI's chat:
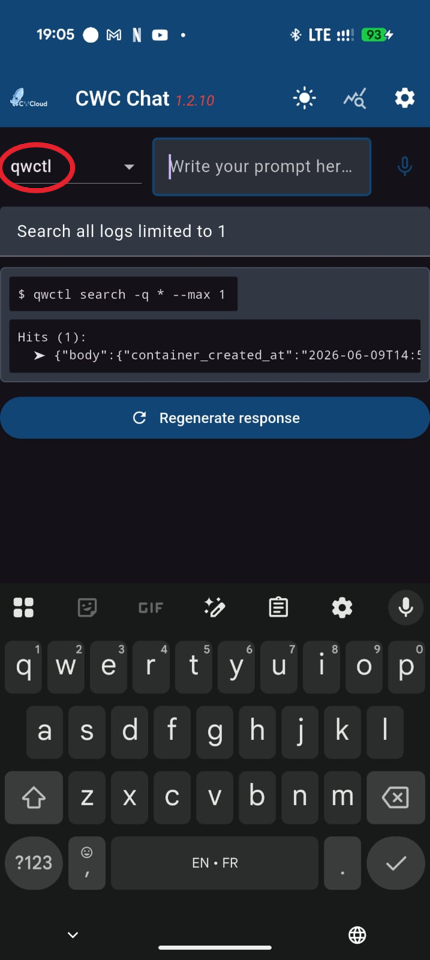
Or the mobile app:
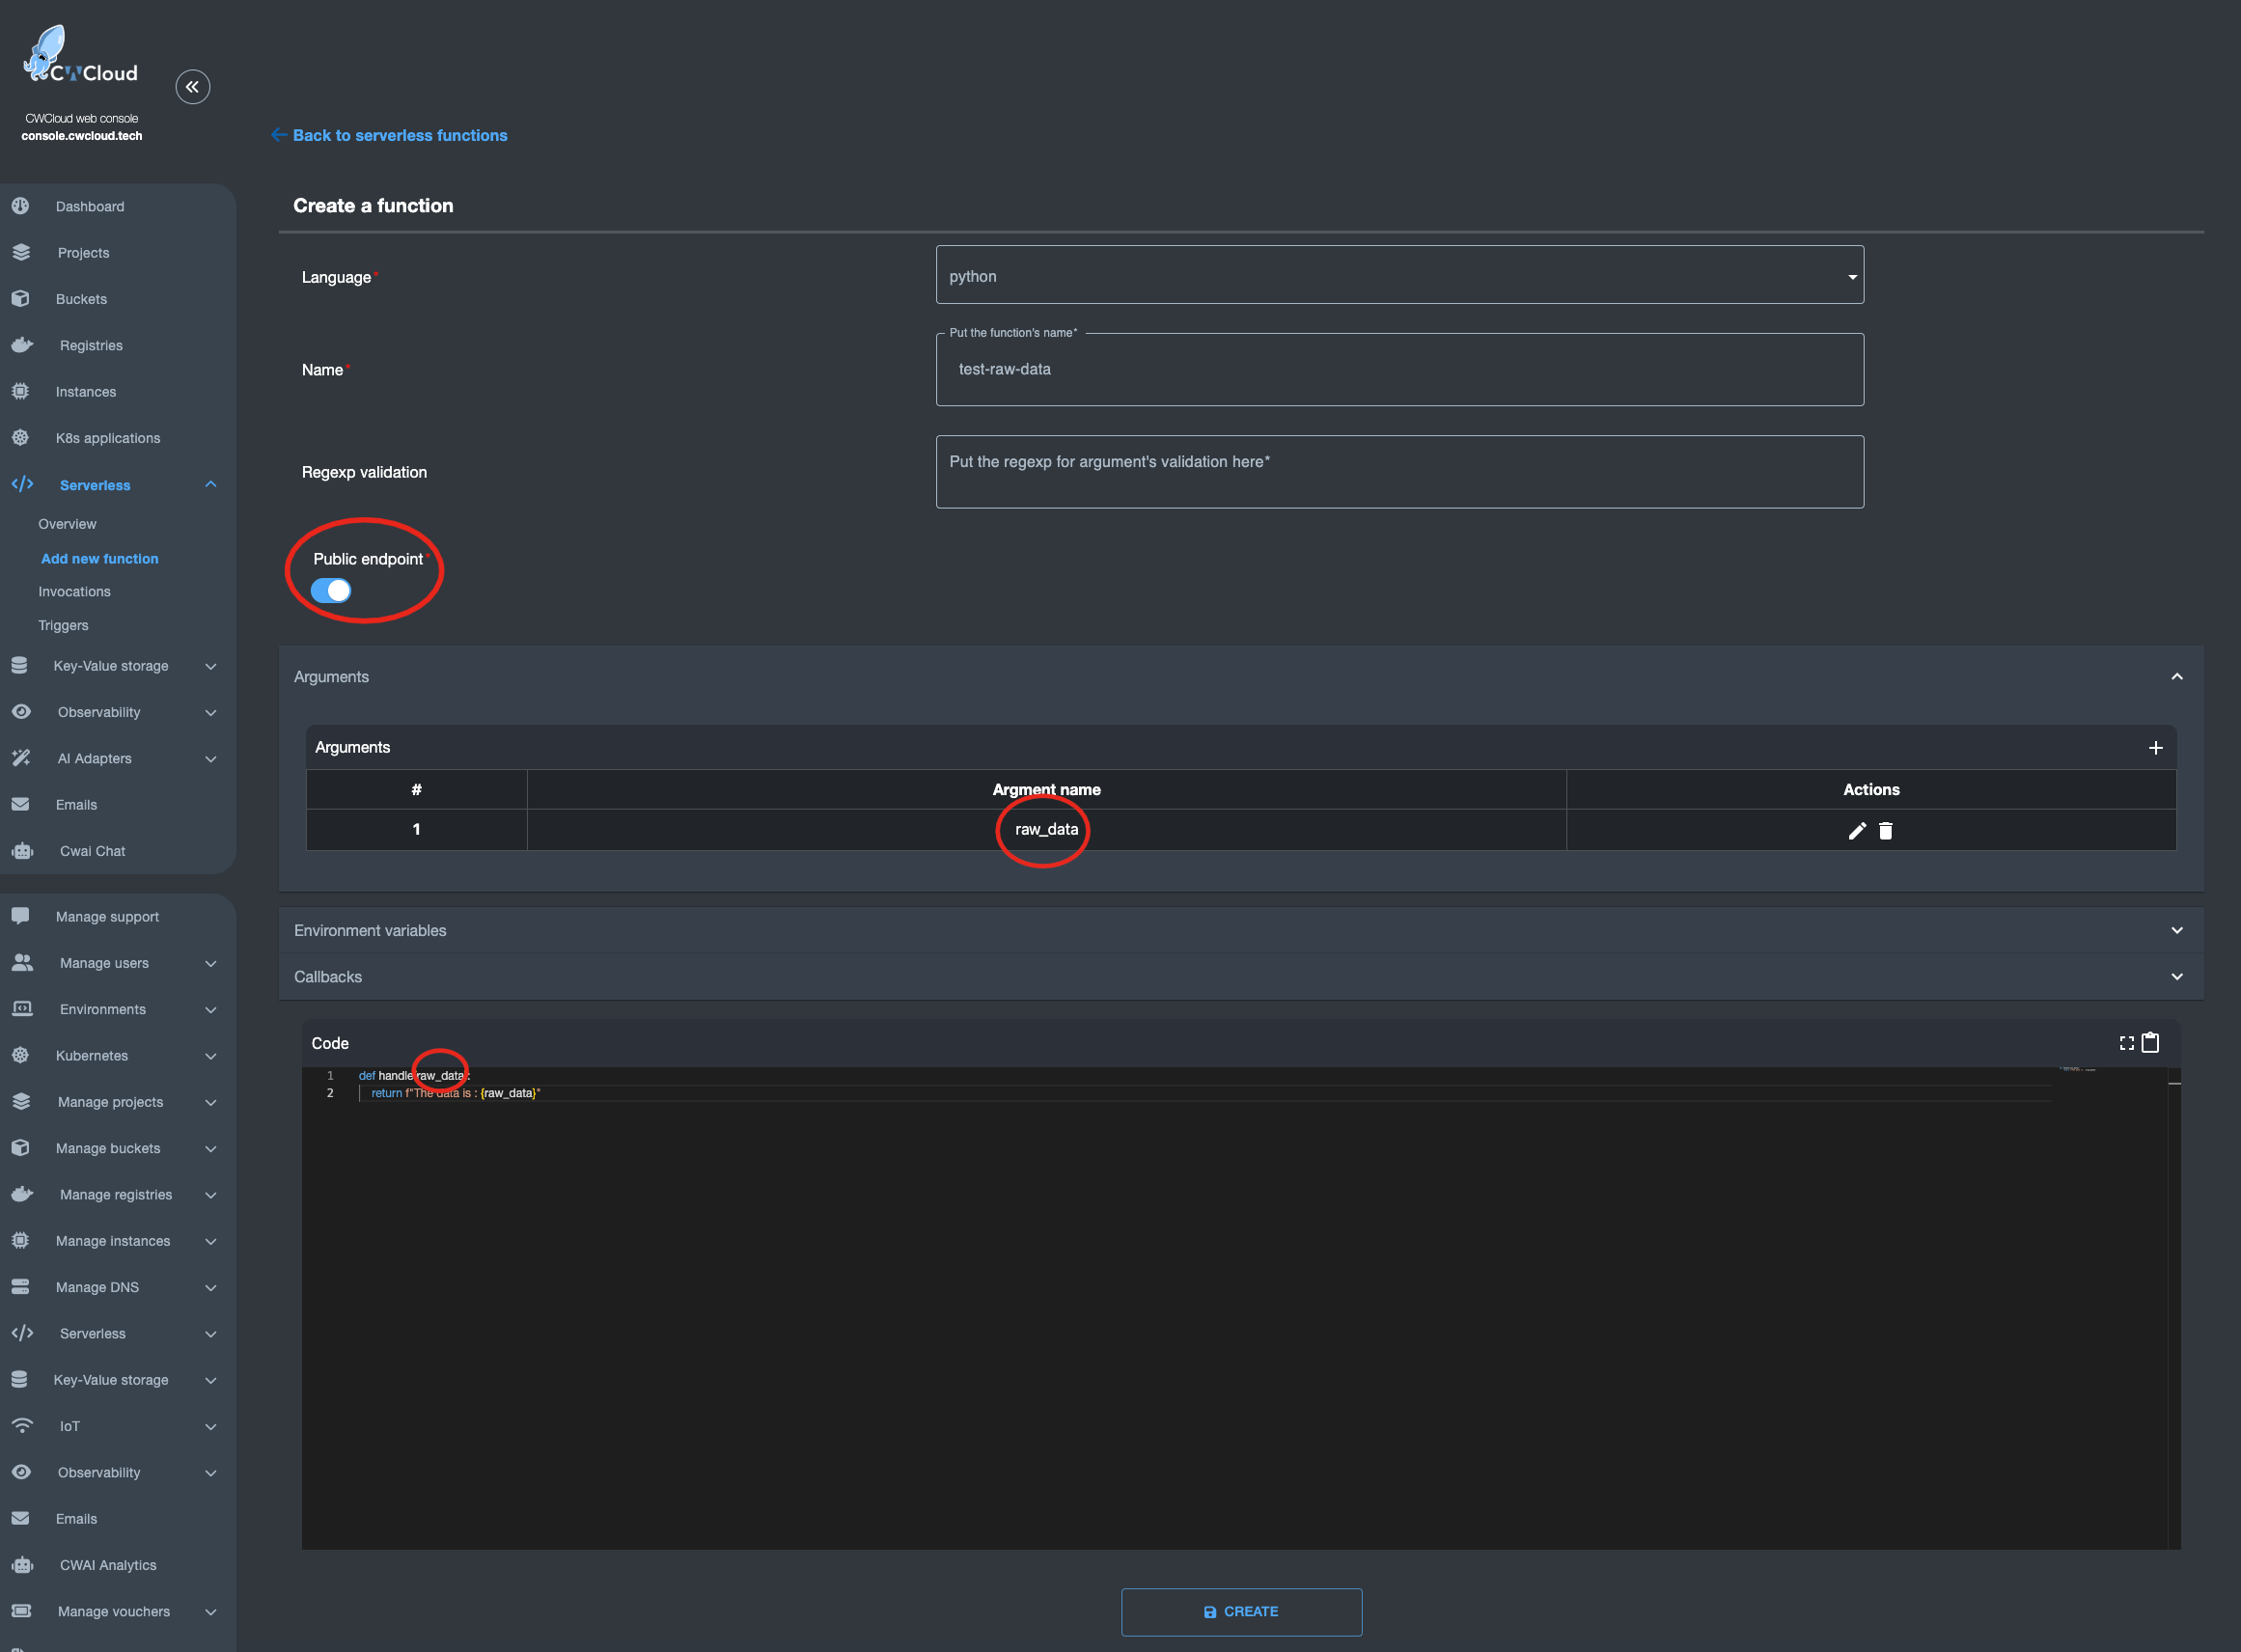
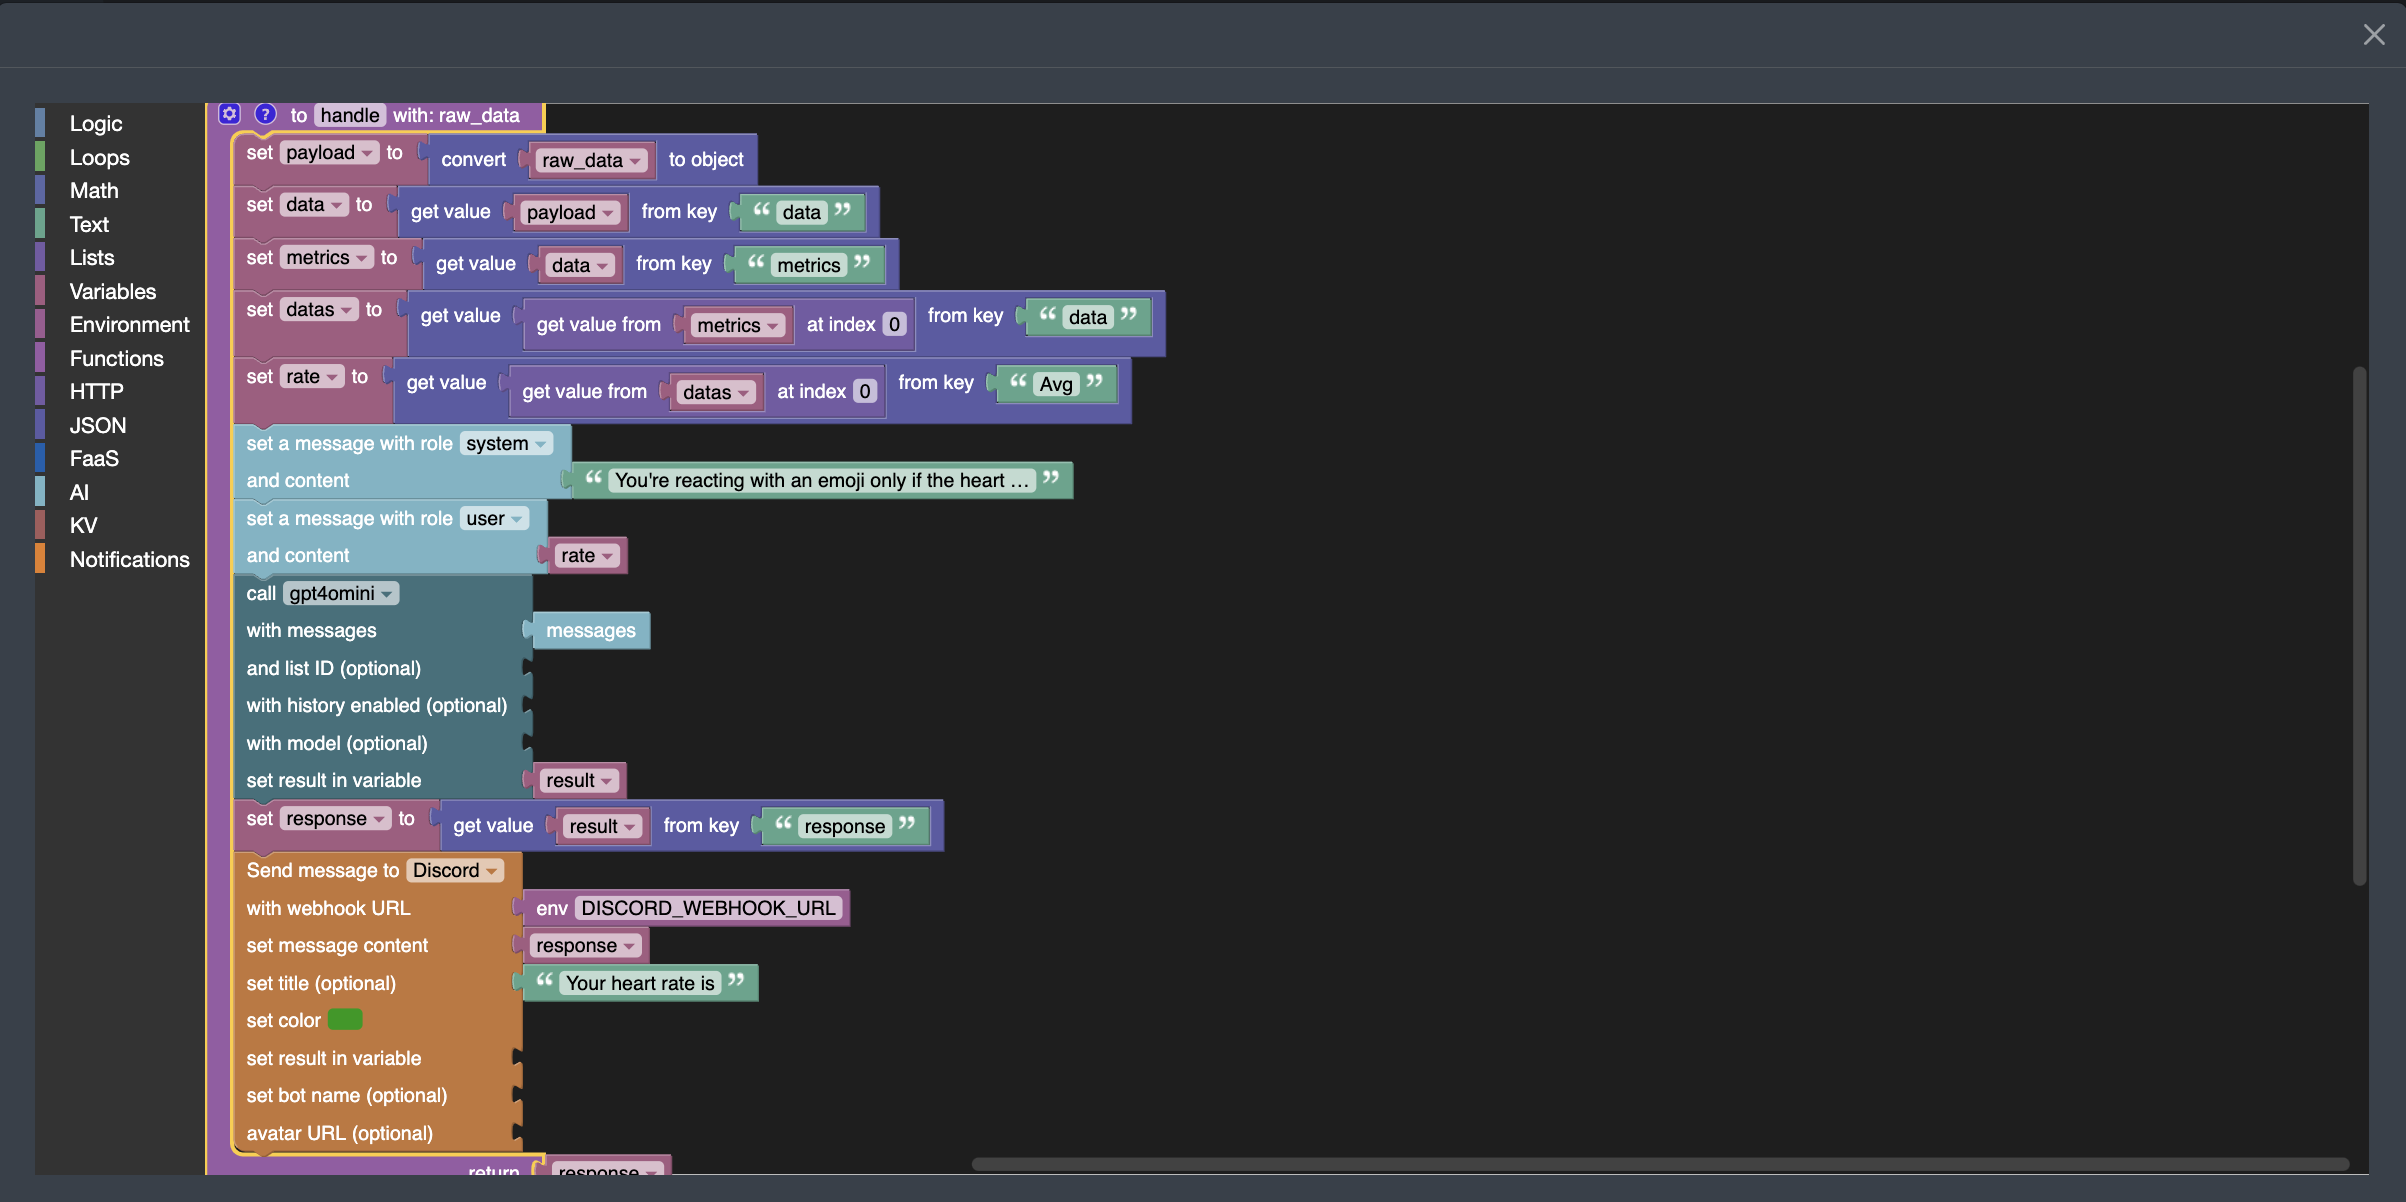
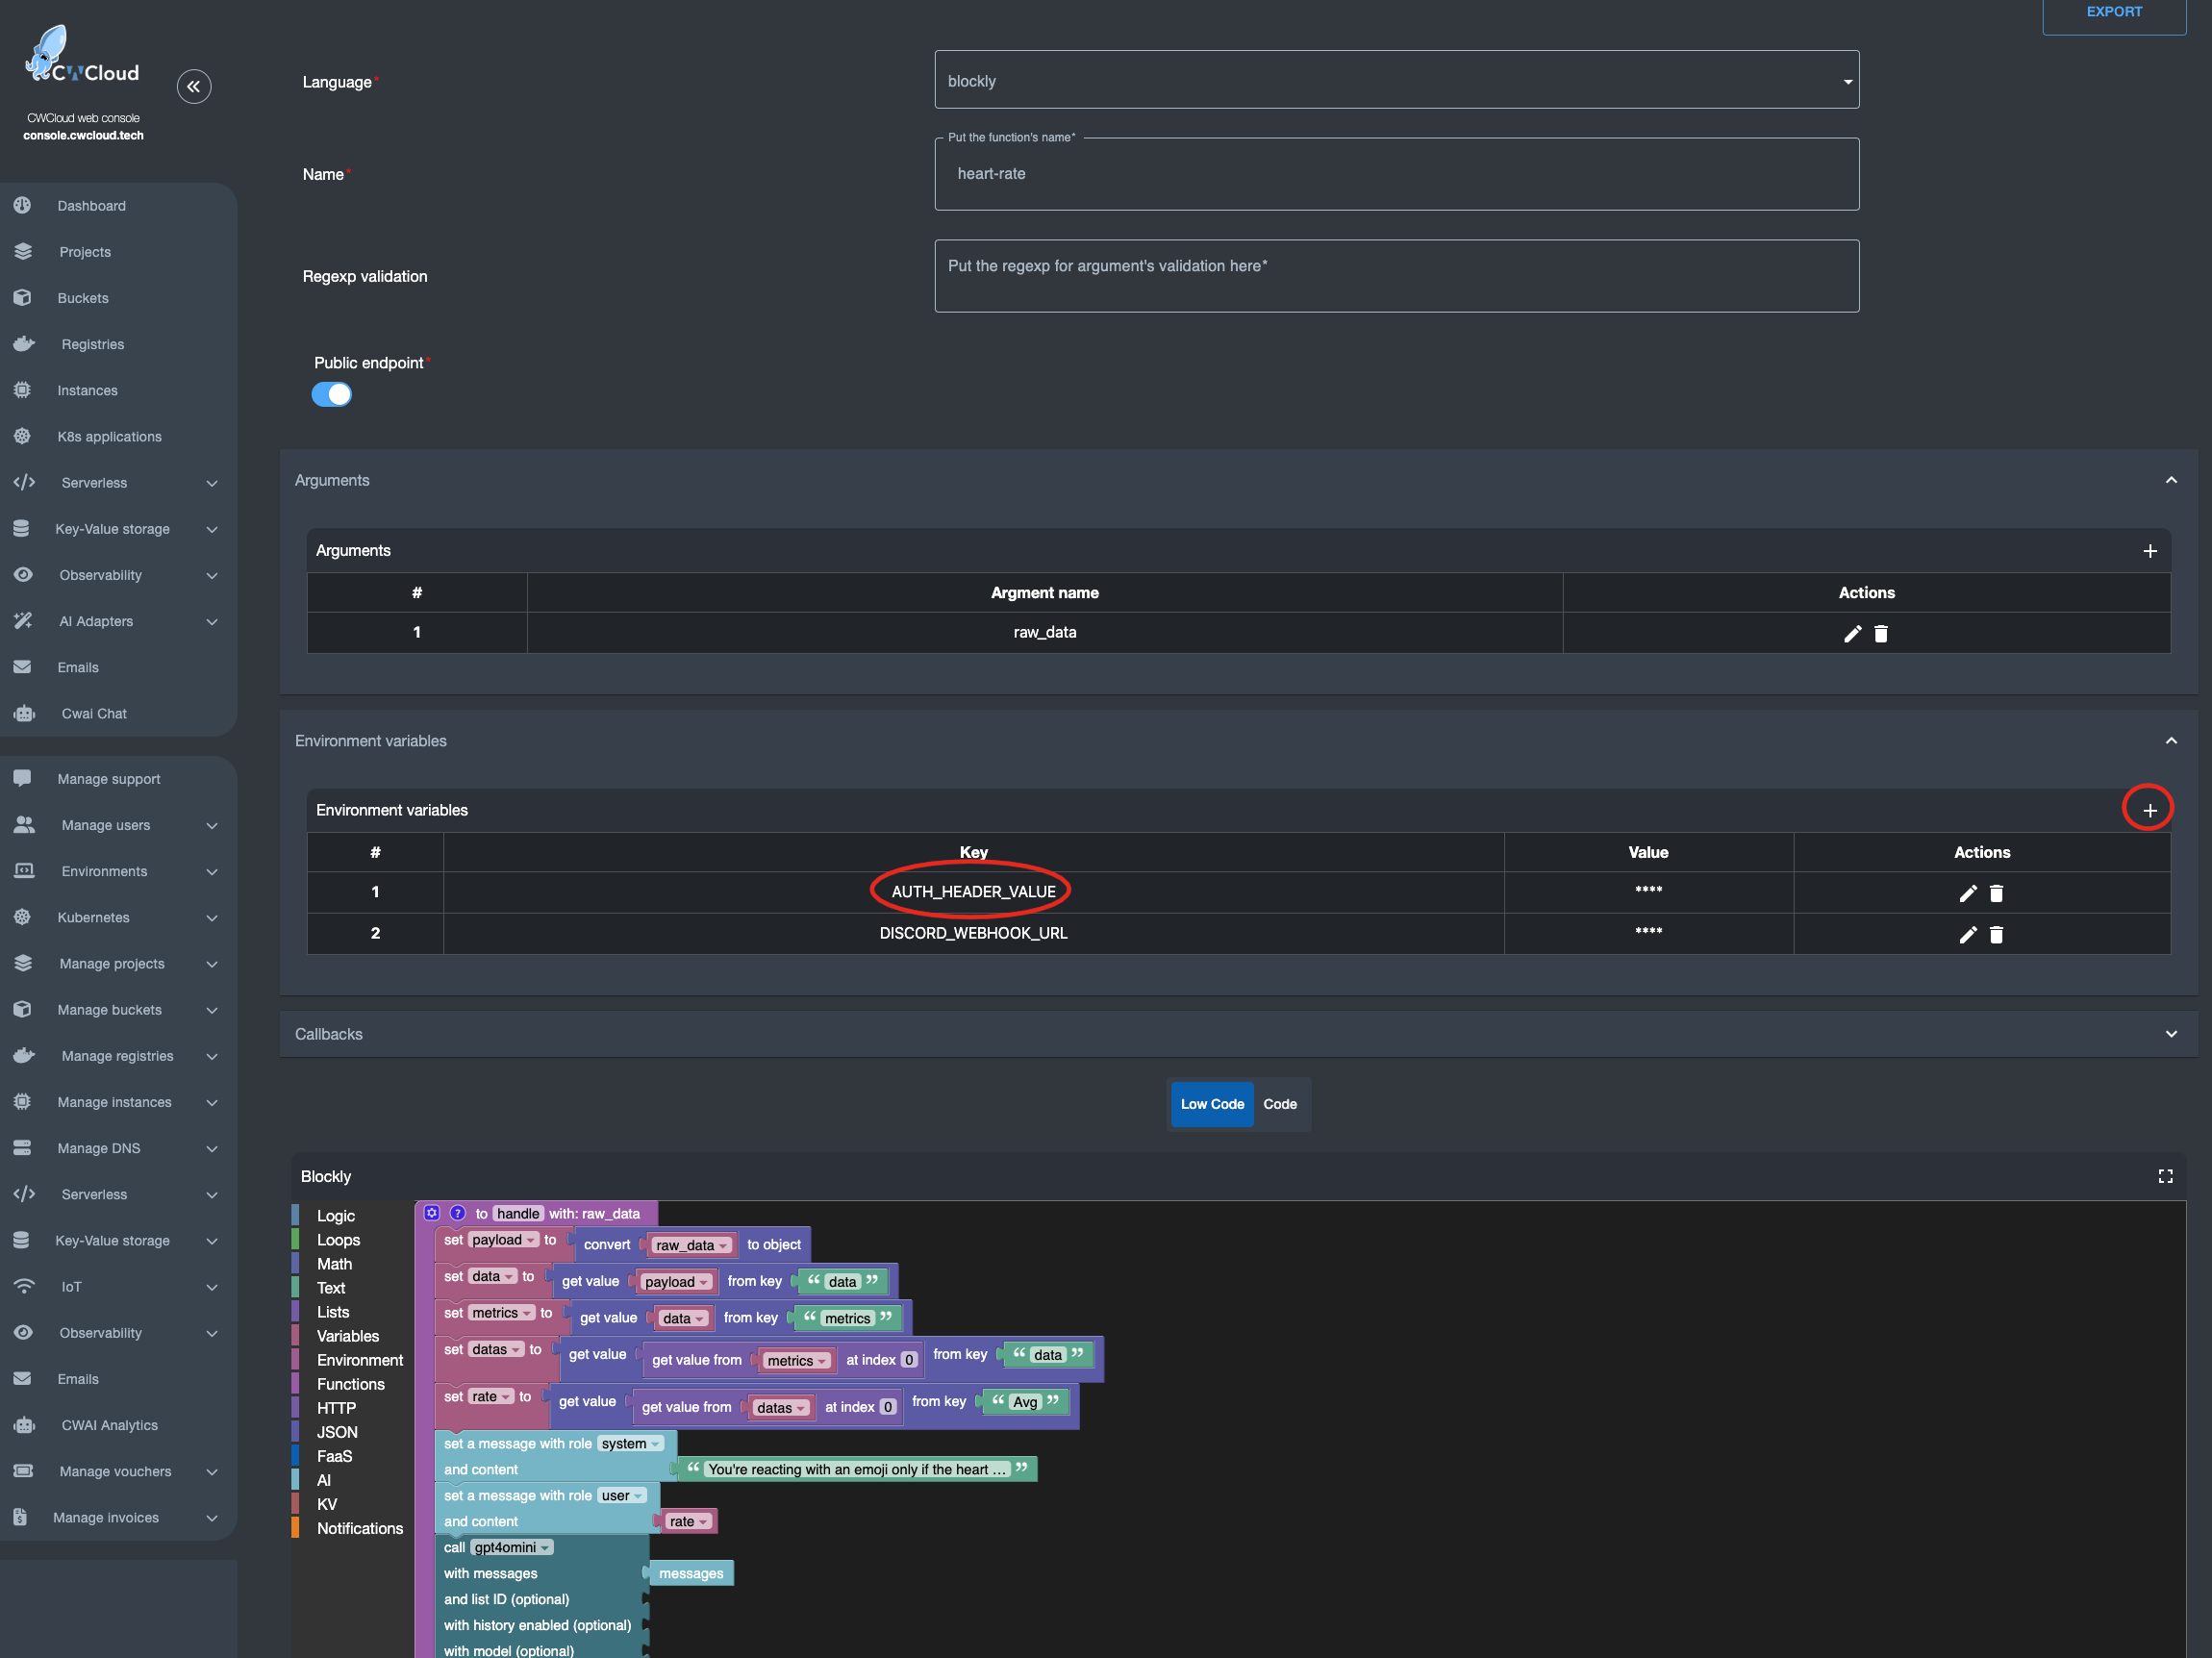
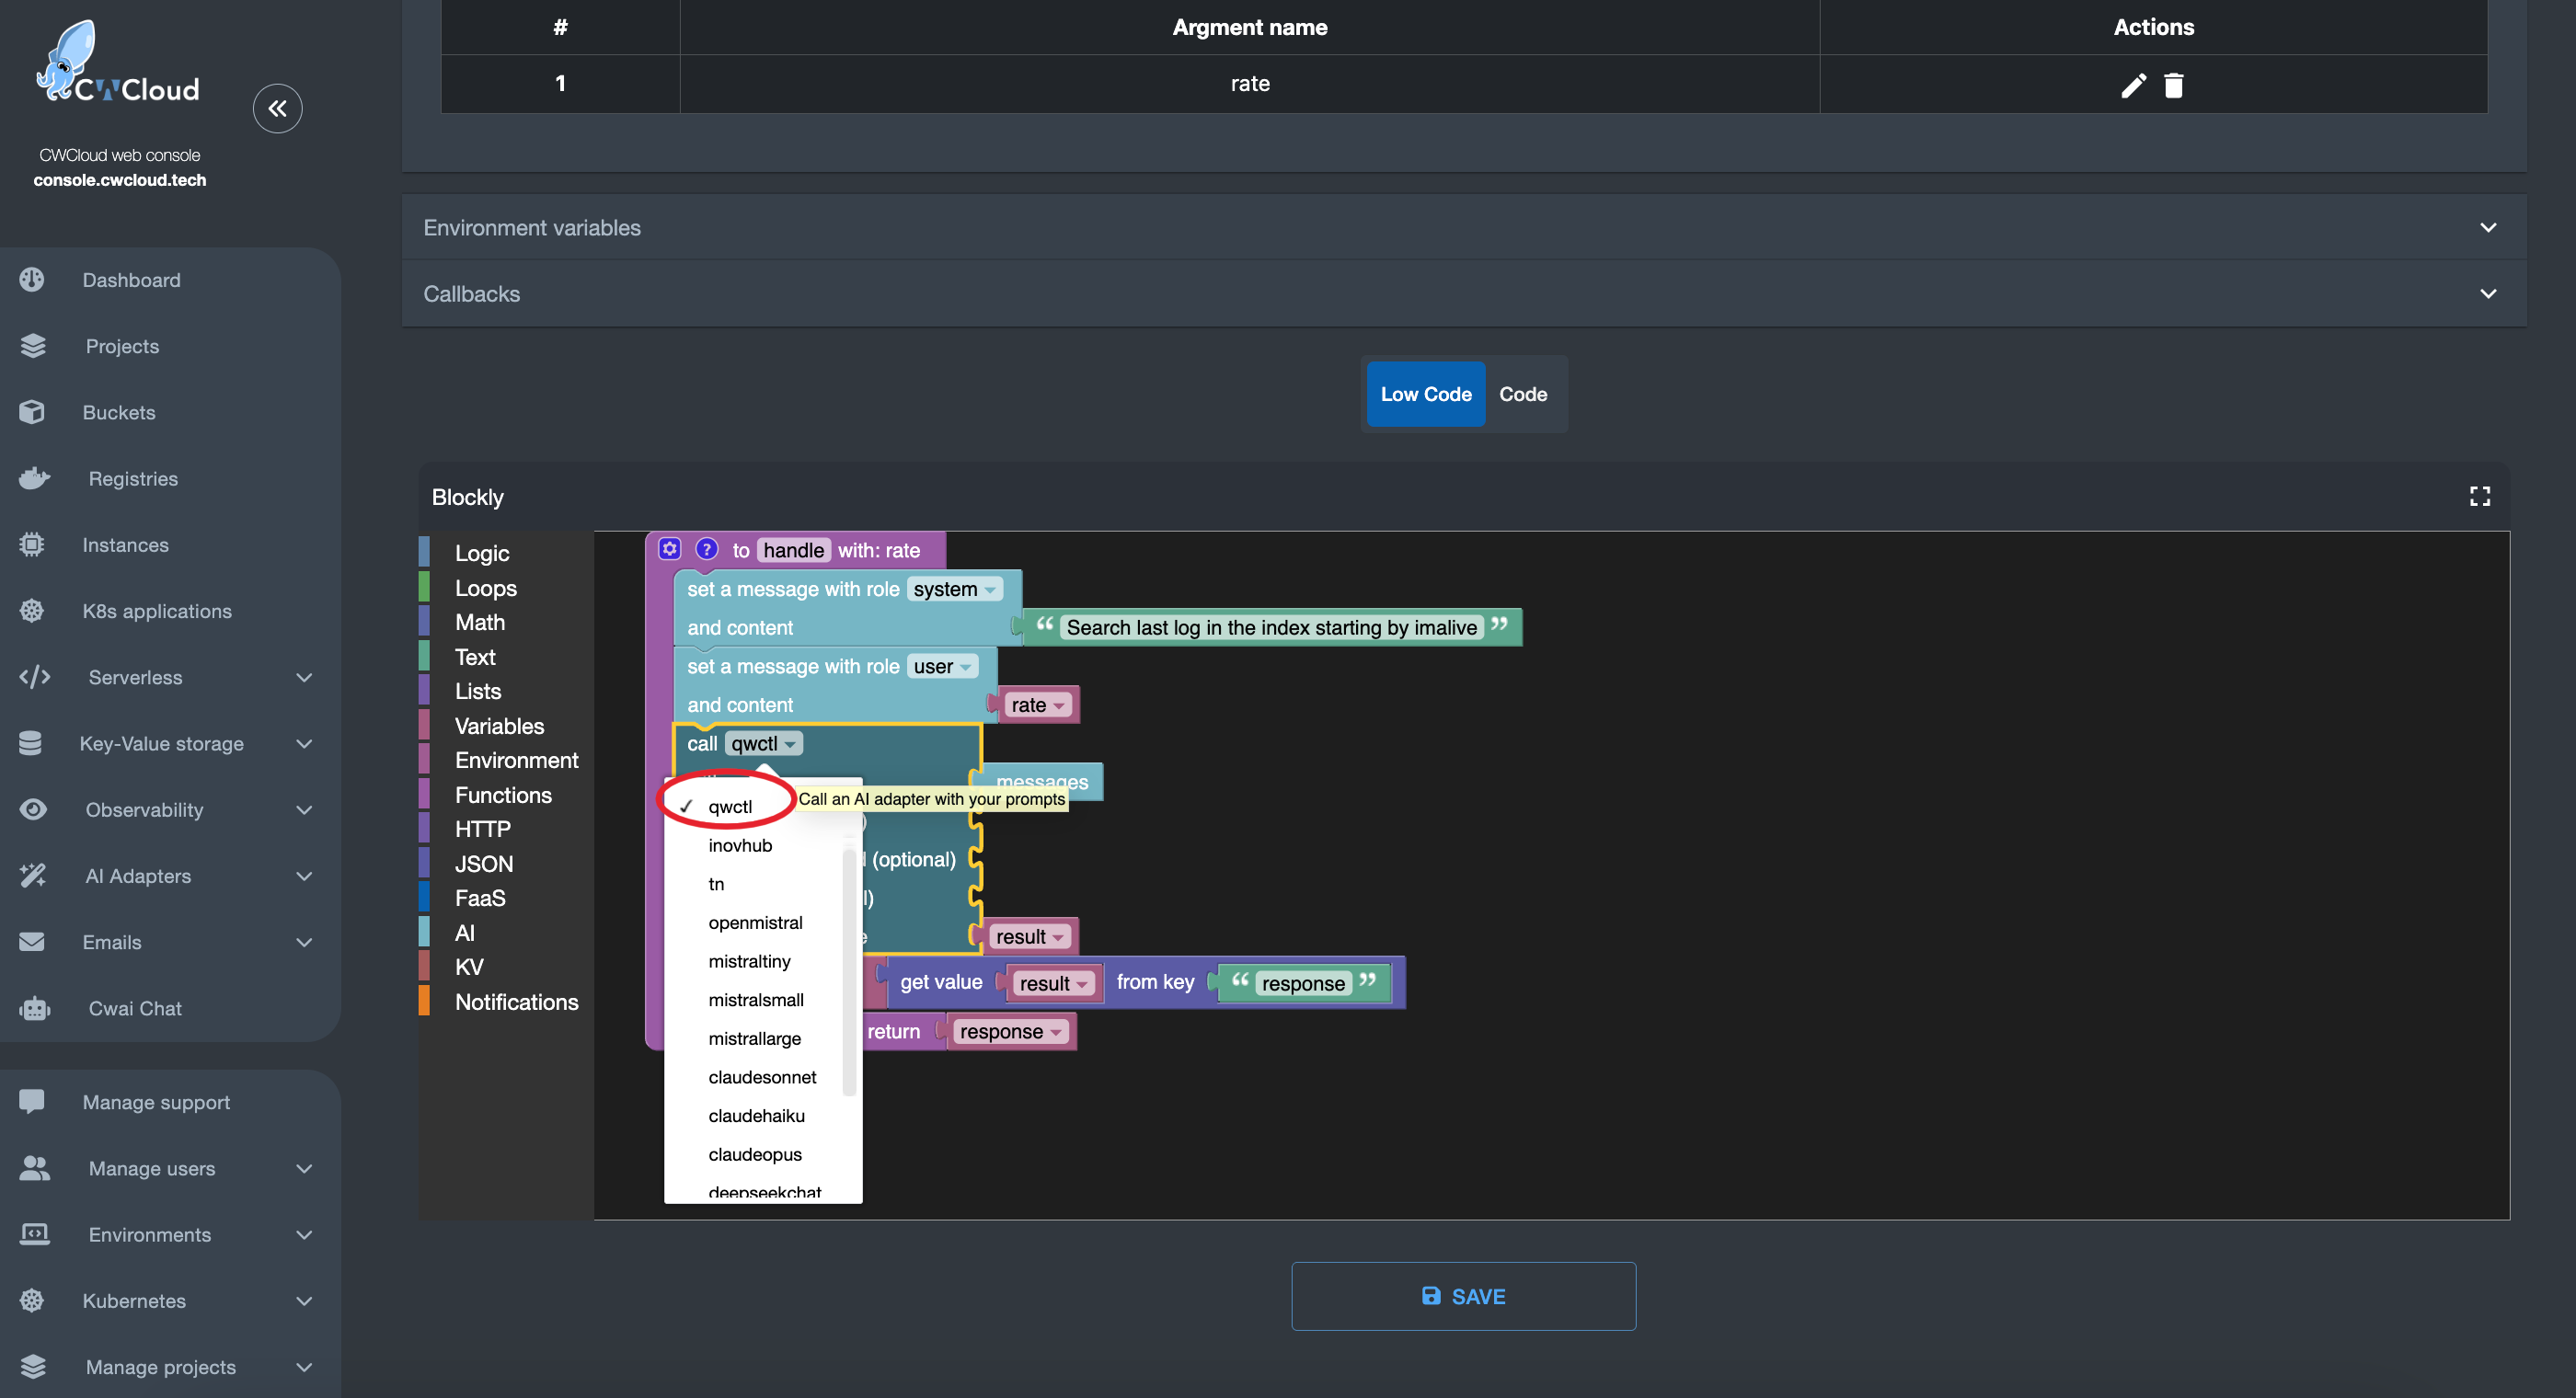
You can also call the agent in serverless function:
Gitlab webhook
first, we need to configure the qwctl with the following environment variables:
QWCTL_AGENT_NAME: the name of the agent which will be used as trigger (e.g:qwctlto be triggered by comments containing!qwctlin Gitlab issues)QWCTL_GITLAB_TOKEN: a Gitlab token with the permission for pushing comments on issuesQWCTL_GITLAB_BASE_URL: the URL of the Gitlab instance (e.g:https://gitlab.cwcloud.tech)
Of course you can also use the CLI configure command like this:
$ qwctl configure set agent_name cwc-prod
$ qwctl configure set gitlab_token <your_gitlab_token>
$ qwctl configure set gitlab_base_url https://gitlab.cwcloud.tech
Then you have to configure the webhook in Gitlab like this:
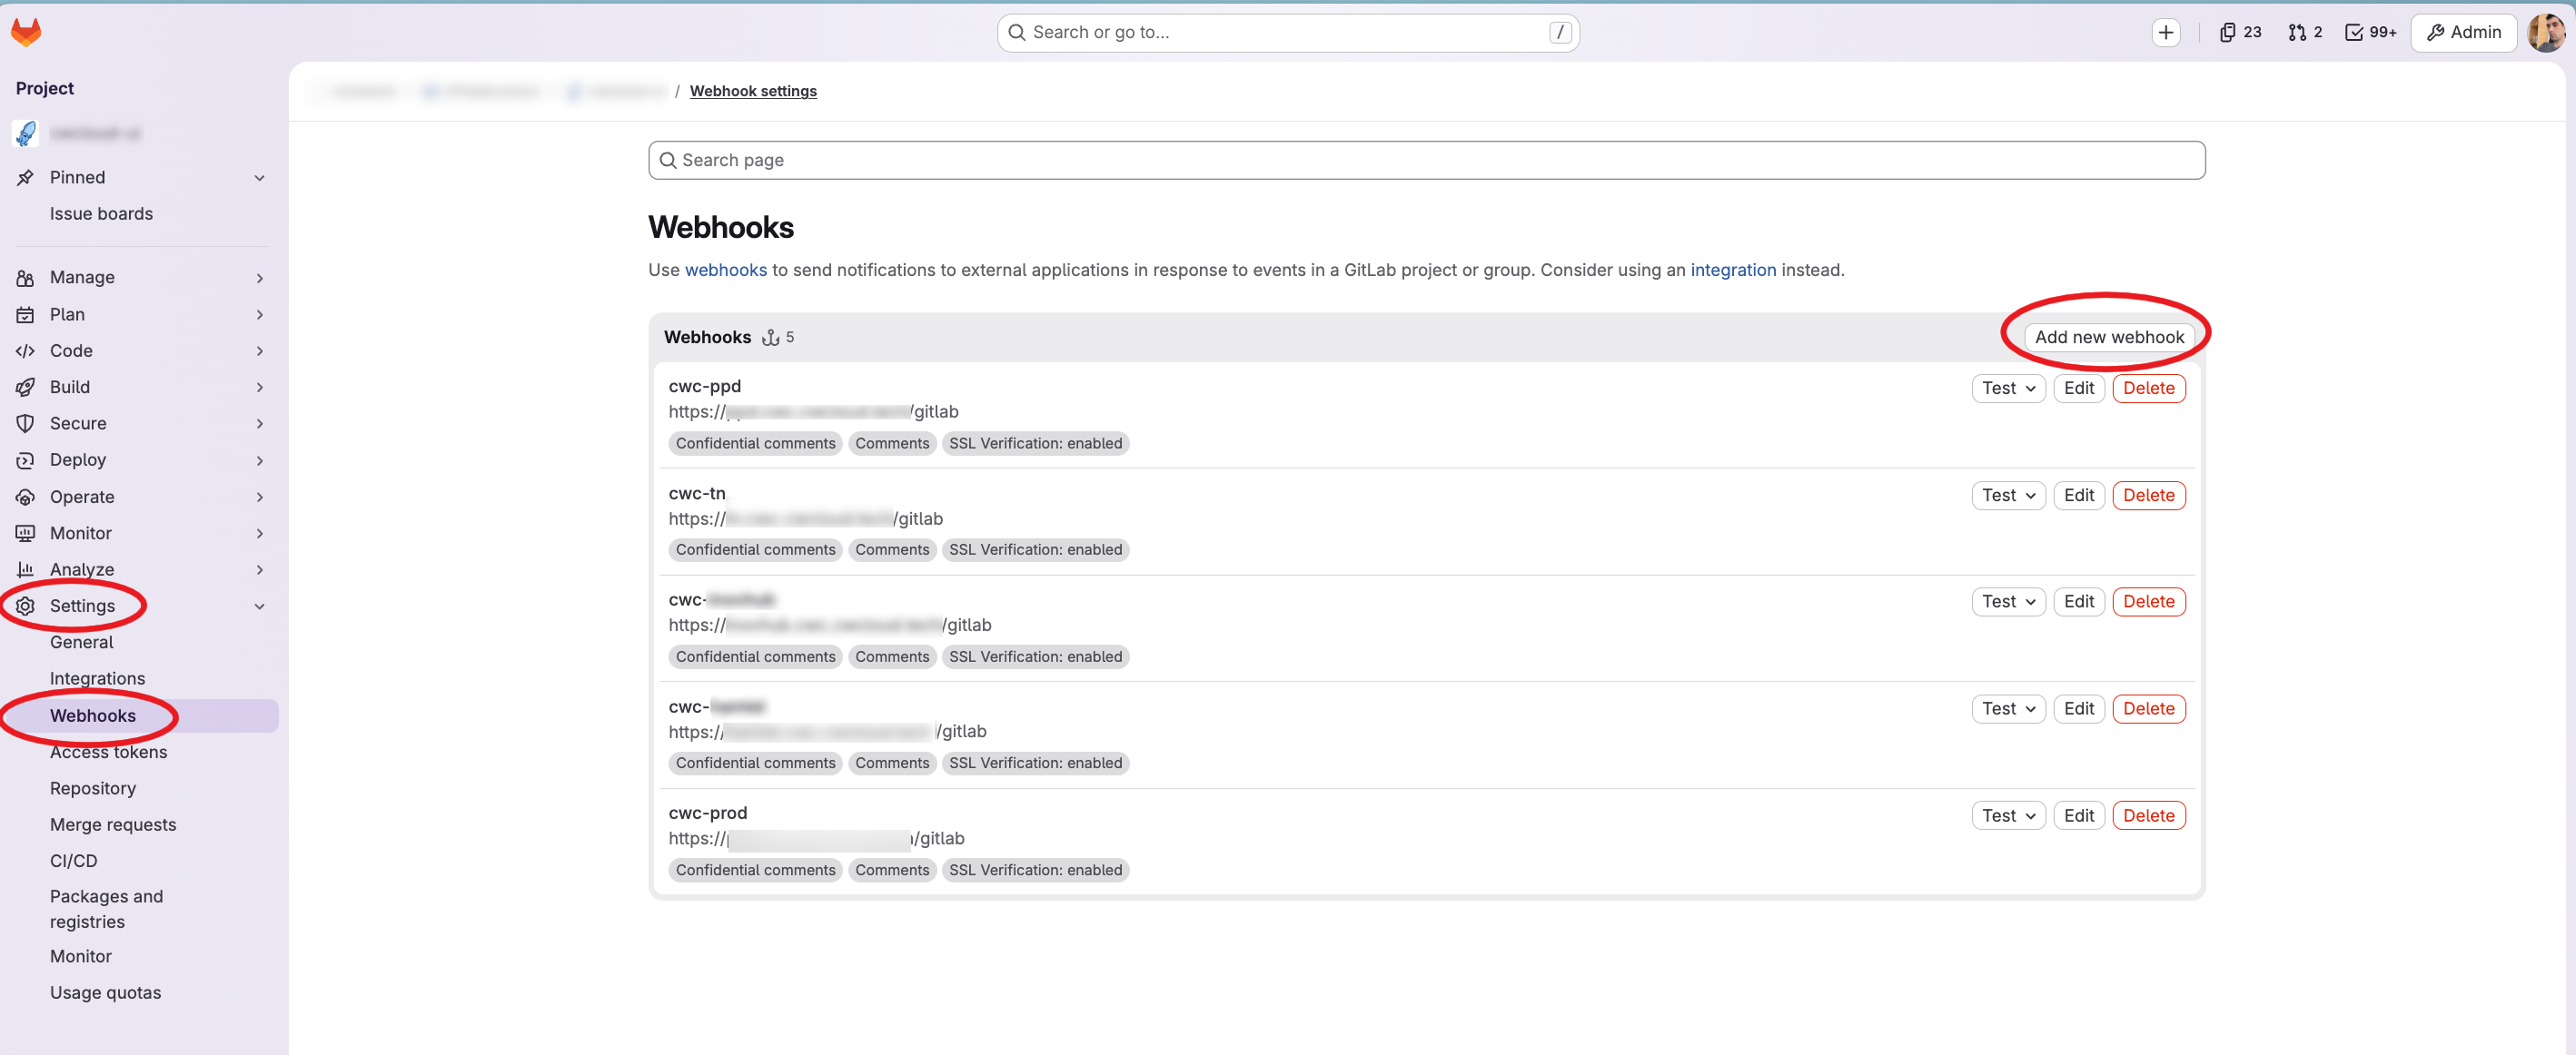
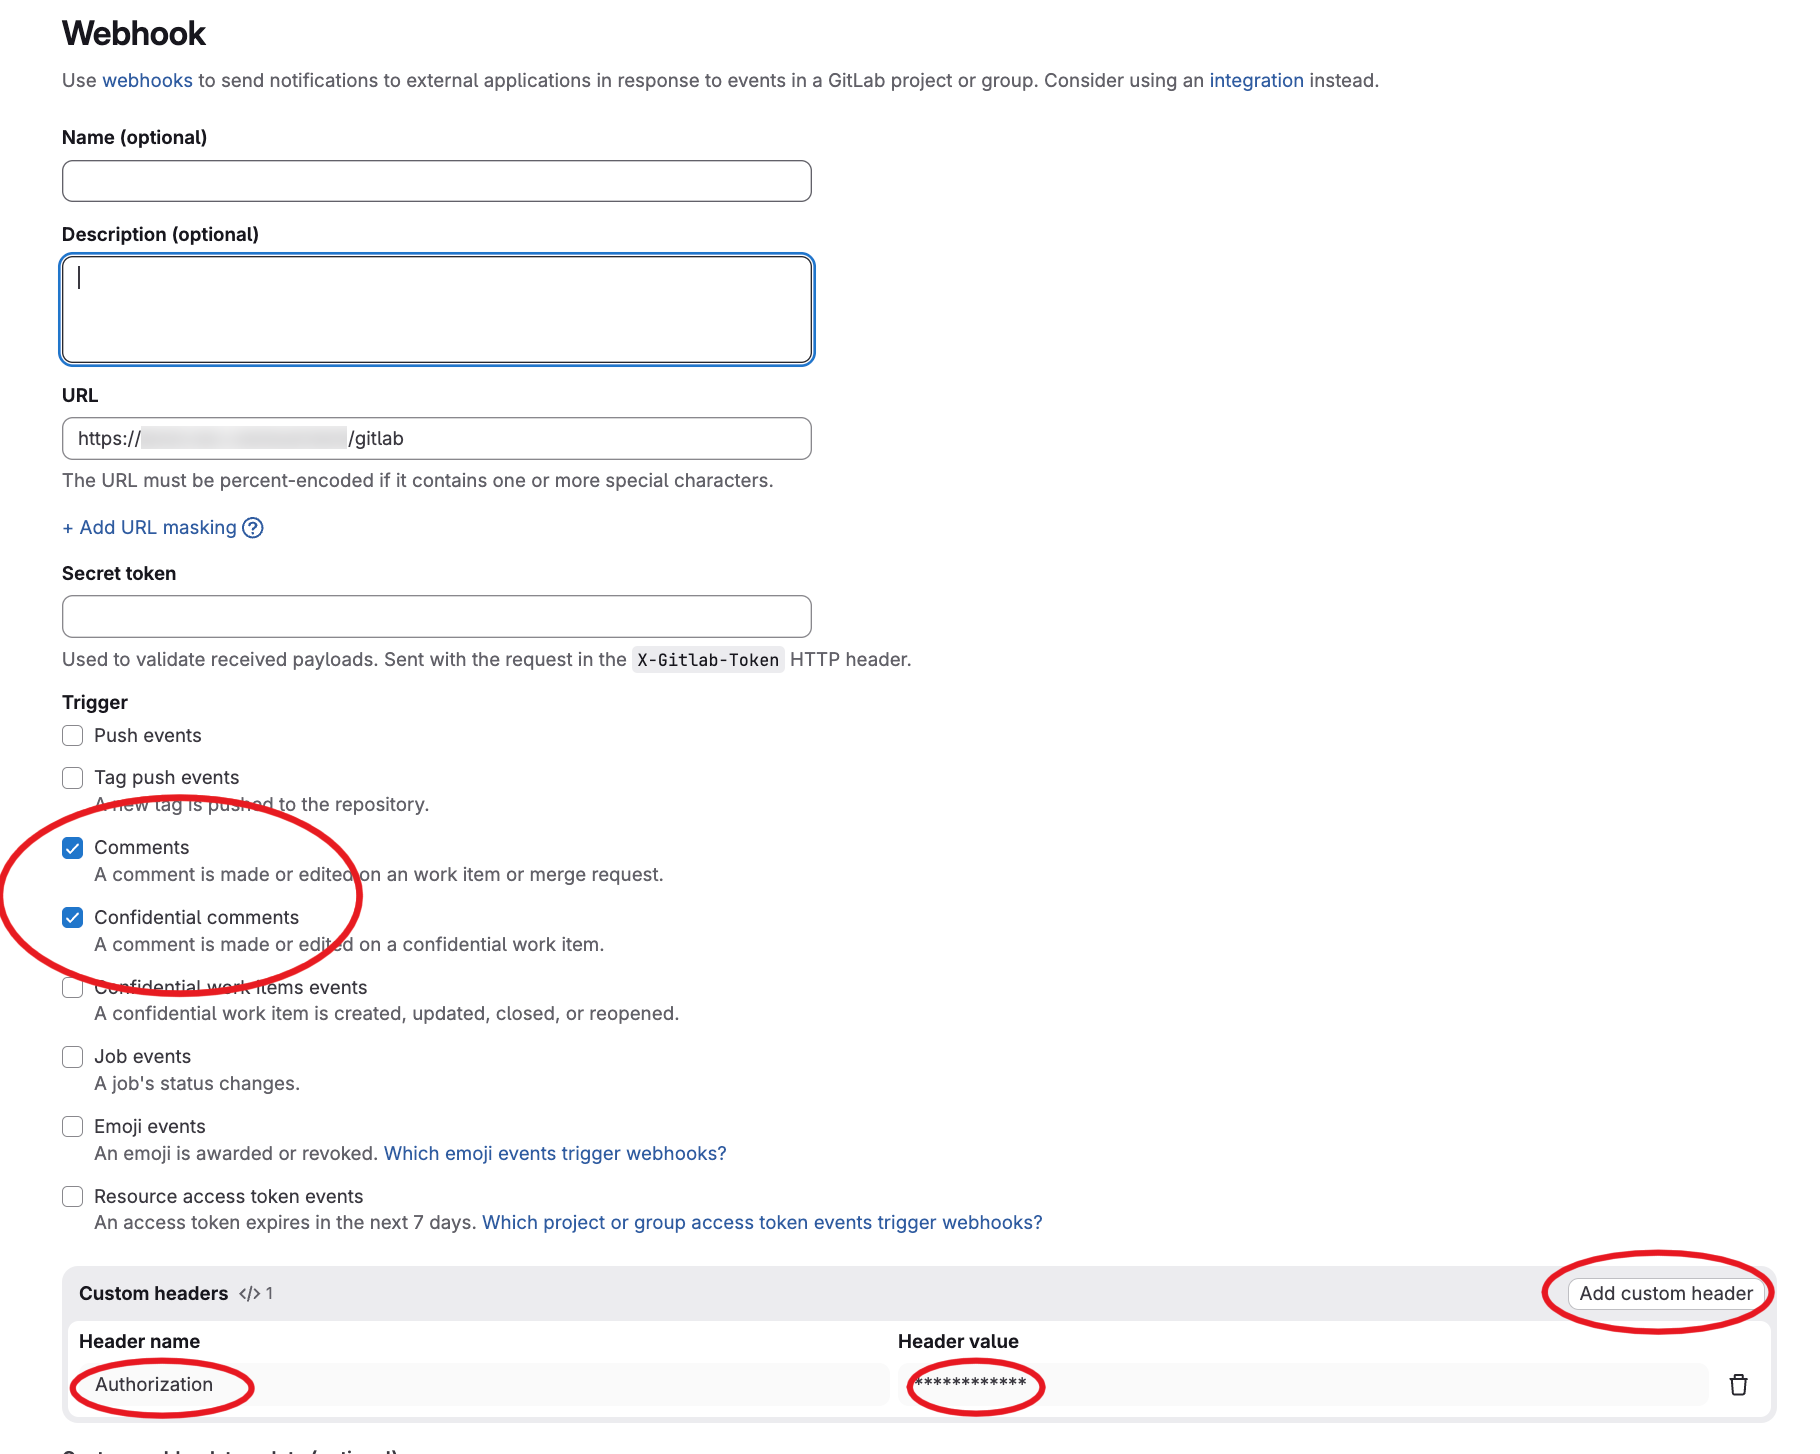
As you can see we configured the /gitlab endpoint path and we set also an Authorization header set with our reverse proxy. However, the web agent is also supporting the gitlab webhook secret for authentication (it's optional but remind that you have to setup an authentication one way or another).
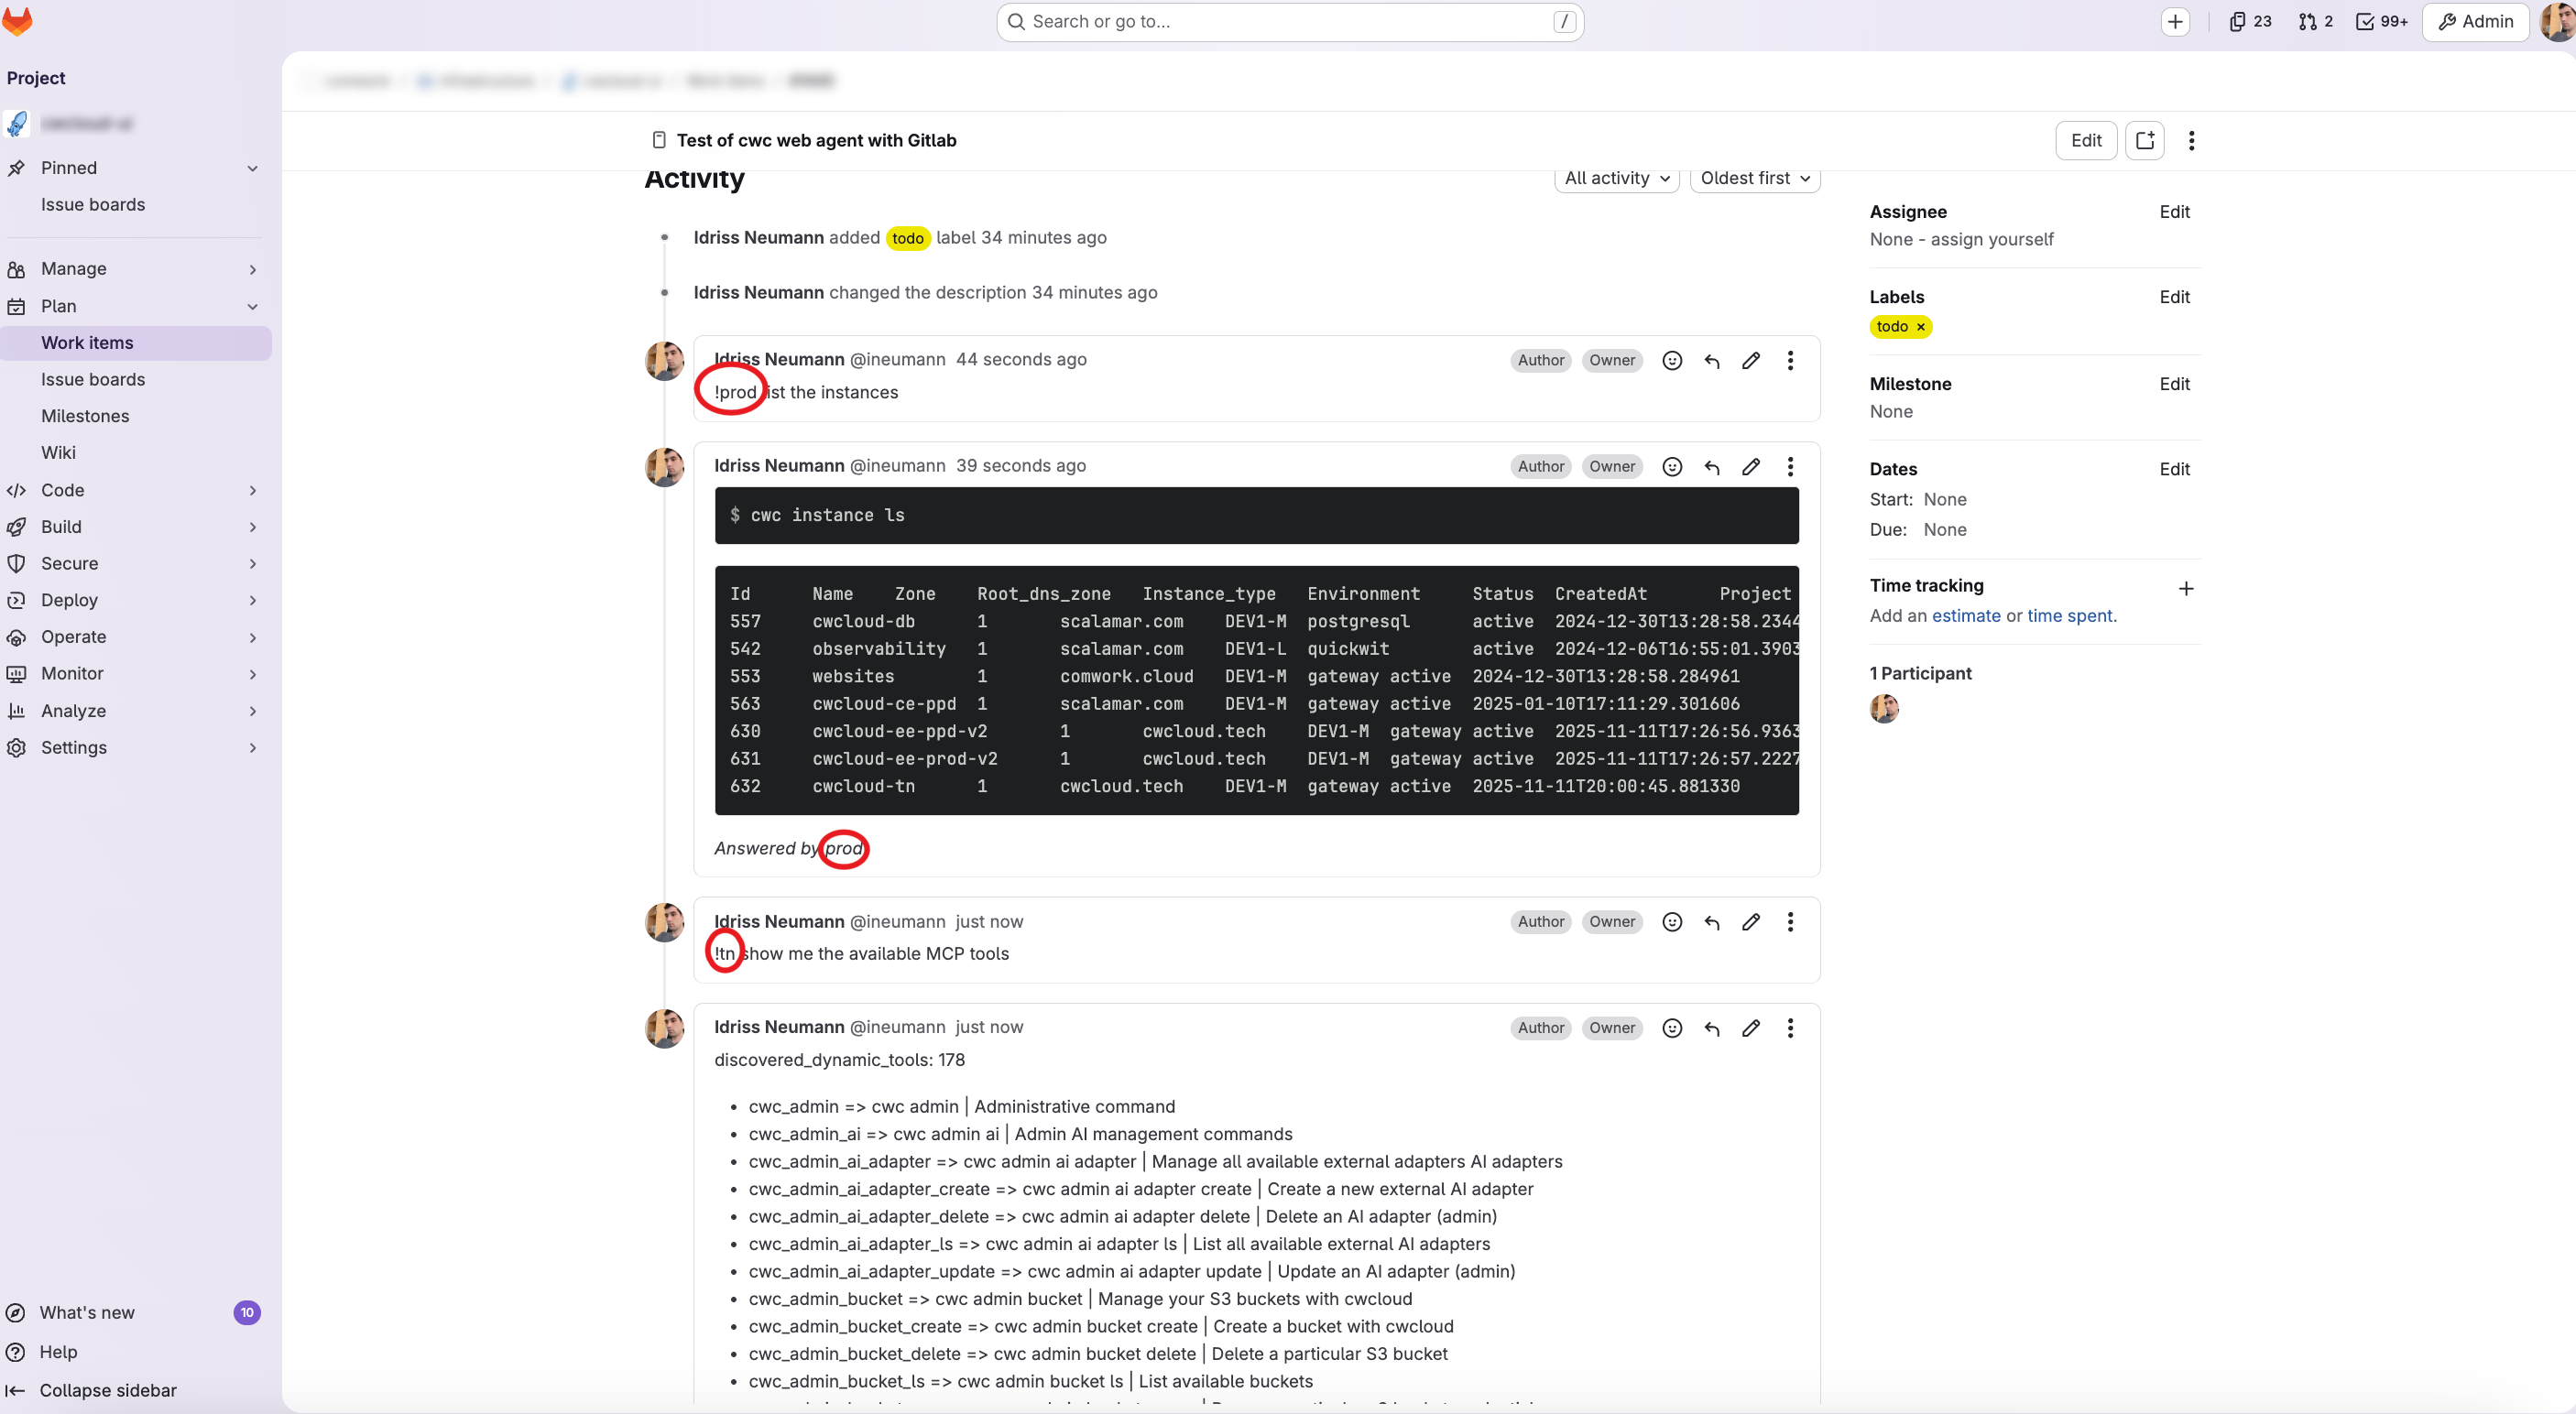
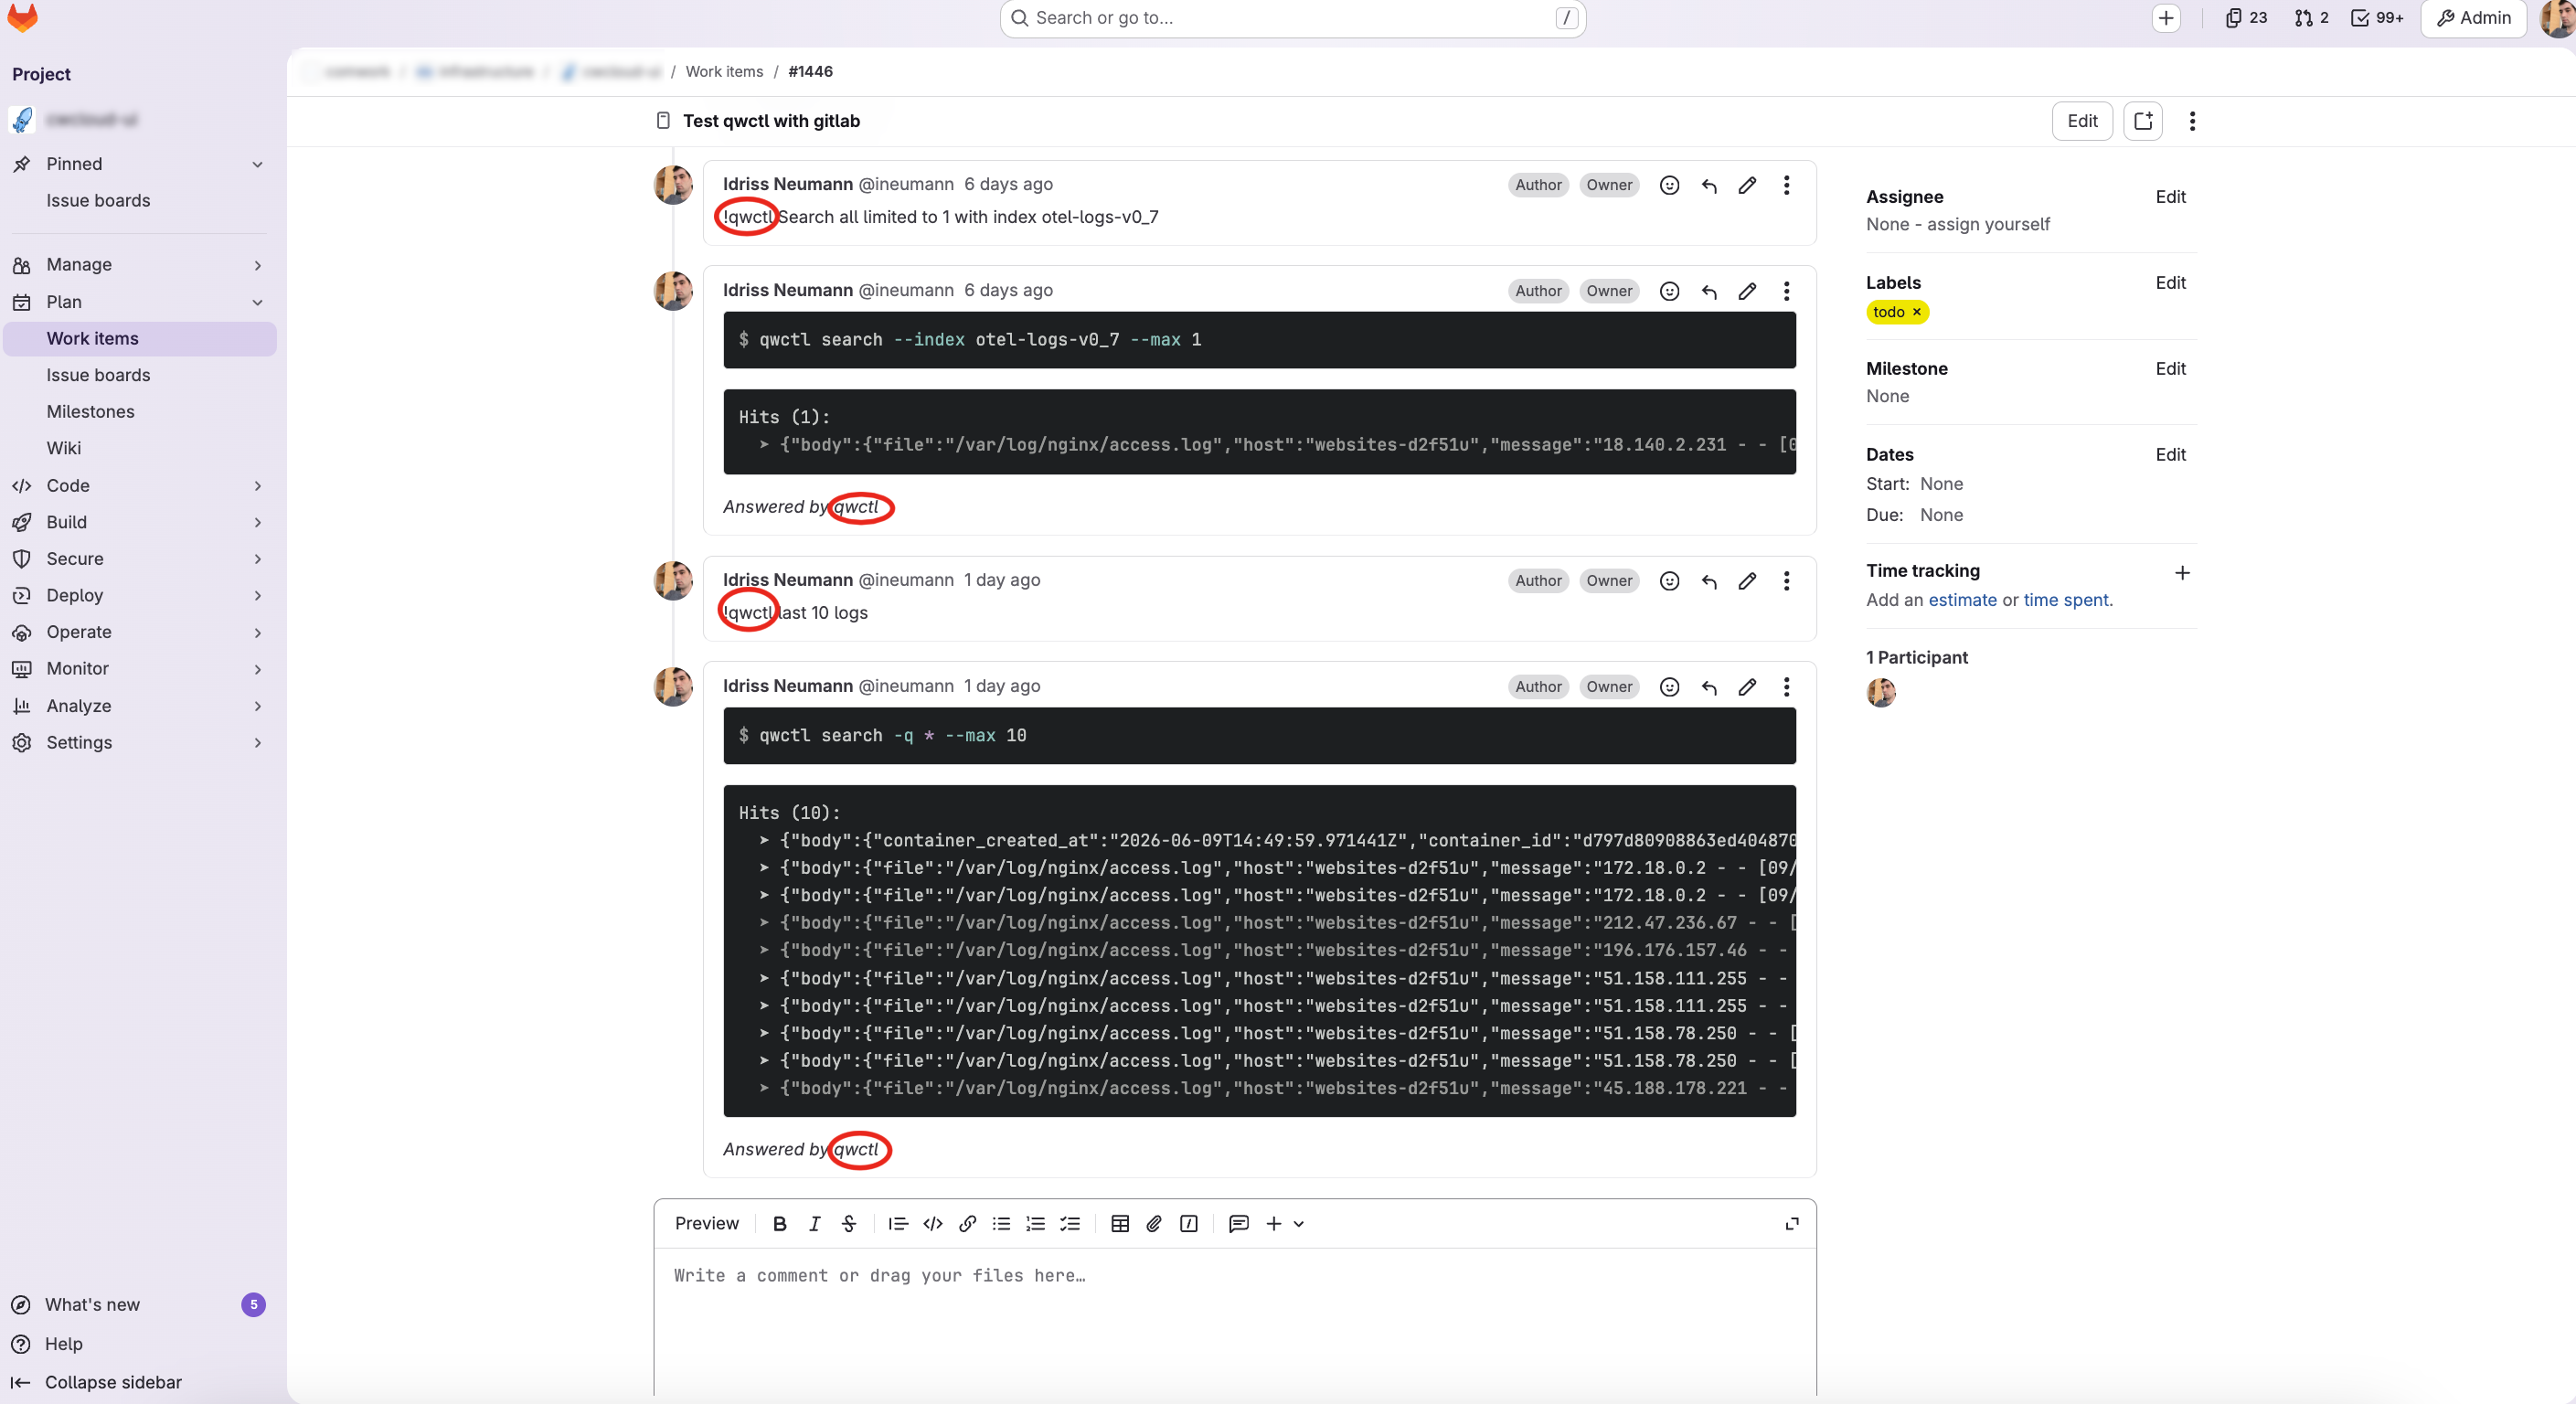
And finally here's what we got in the Gitlab issue's when we comment !qwctl:
Conclusion
This blogpost illustrate how we are viewing the platform engineering in 2026: agents following instructions on ticket system, CI/CD pipelines, serverless functions, etc.
For now our agents are only responding to instructions on ticket, chat or mobile app but the CLI also exposing MCP server will be re-used for more complex agents which will do more complex reasoning and troubleshooting analysis in the future.