Self-Hosted instances of CWClock
Kubernetes
A helmchart is available on this repository (in the folder helm). You can also use the cwclock cli with cwclock bootstrap command.
Trying with docker
On this repository, the whole stack (PostgreSQL, Flyway migrations, backend and the frontend served by nginx) can be started with a single command:
docker compose up --build --force-recreate
This will:
- Start a PostgreSQL database.
- Run the SQL migrations with Flyway.
- Build and start the Go backend, listening on
http://localhost:8080. - Build the React frontend and serve it through nginx on
http://localhost:3000, calling the backend directly at theCWCLOCK_API_URLenvironment variable.
Once it's up, open http://localhost:3000 in your browser.
A public image is available here rg.fr-par.scw.cloud/cwclock-t8d7th/cwclock-api:latest.
Security
You can change the default value of the following variables:
JWT_SECRETwhich ischangemeby defaultCWCLOCK_CONFIRMATION_EMAIL_EXPIRATIONwhich is24hby default (expiration of the confirmation's email link of reset password link)
Confirmation mode
There's an environment variable CWCLOCK_ACTIVATION_MODE which is set to admin by default.
It's requiring to activate the new registred account by an administrators withour sending confirmation's emails.
Otherwise you can set this variable to email and it will send confirmation emails through the CWCloud's email API.
OIDC configuration
CWClock supports OIDC configuration for Google OIDC, Github and Keycloak.
You have to setup the following variables on the API:
CWCLOCK_UI_URL=https://{your frontend domain}
CWCLOCK_OIDC_GOOGLE_CLIENT_ID=
CWCLOCK_OIDC_GOOGLE_CLIENT_SECRET=
CWCLOCK_OIDC_GITHUB_CLIENT_ID=
CWCLOCK_OIDC_GITHUB_CLIENT_SECRET=
CWCLOCK_OIDC_KEYCLOAK_BASE_URL=
CWCLOCK_OIDC_KEYCLOAK_CLIENT_ID=
CWCLOCK_OIDC_KEYCLOAK_CLIENT_SECRET=
CWCLOCK_OIDC_KEYCLOAK_GROUPS=
Here's the redirect/callback URL for the frontend: https://{your api domain}/oidc/callback
And here`s the redirect/callback URL for each provider for API authentication:
- Google OIDC:
https://{your api domain}/v1/oidc/google/callback - Github:
https://{your api domain}/v1/oidc/github/callback - Keycloak:
https://{your api domain}/v1/oidc/keycloak/callback
Getting client id and secret from Google OIDC
1/ Go on GCP console and search for "OIDC":
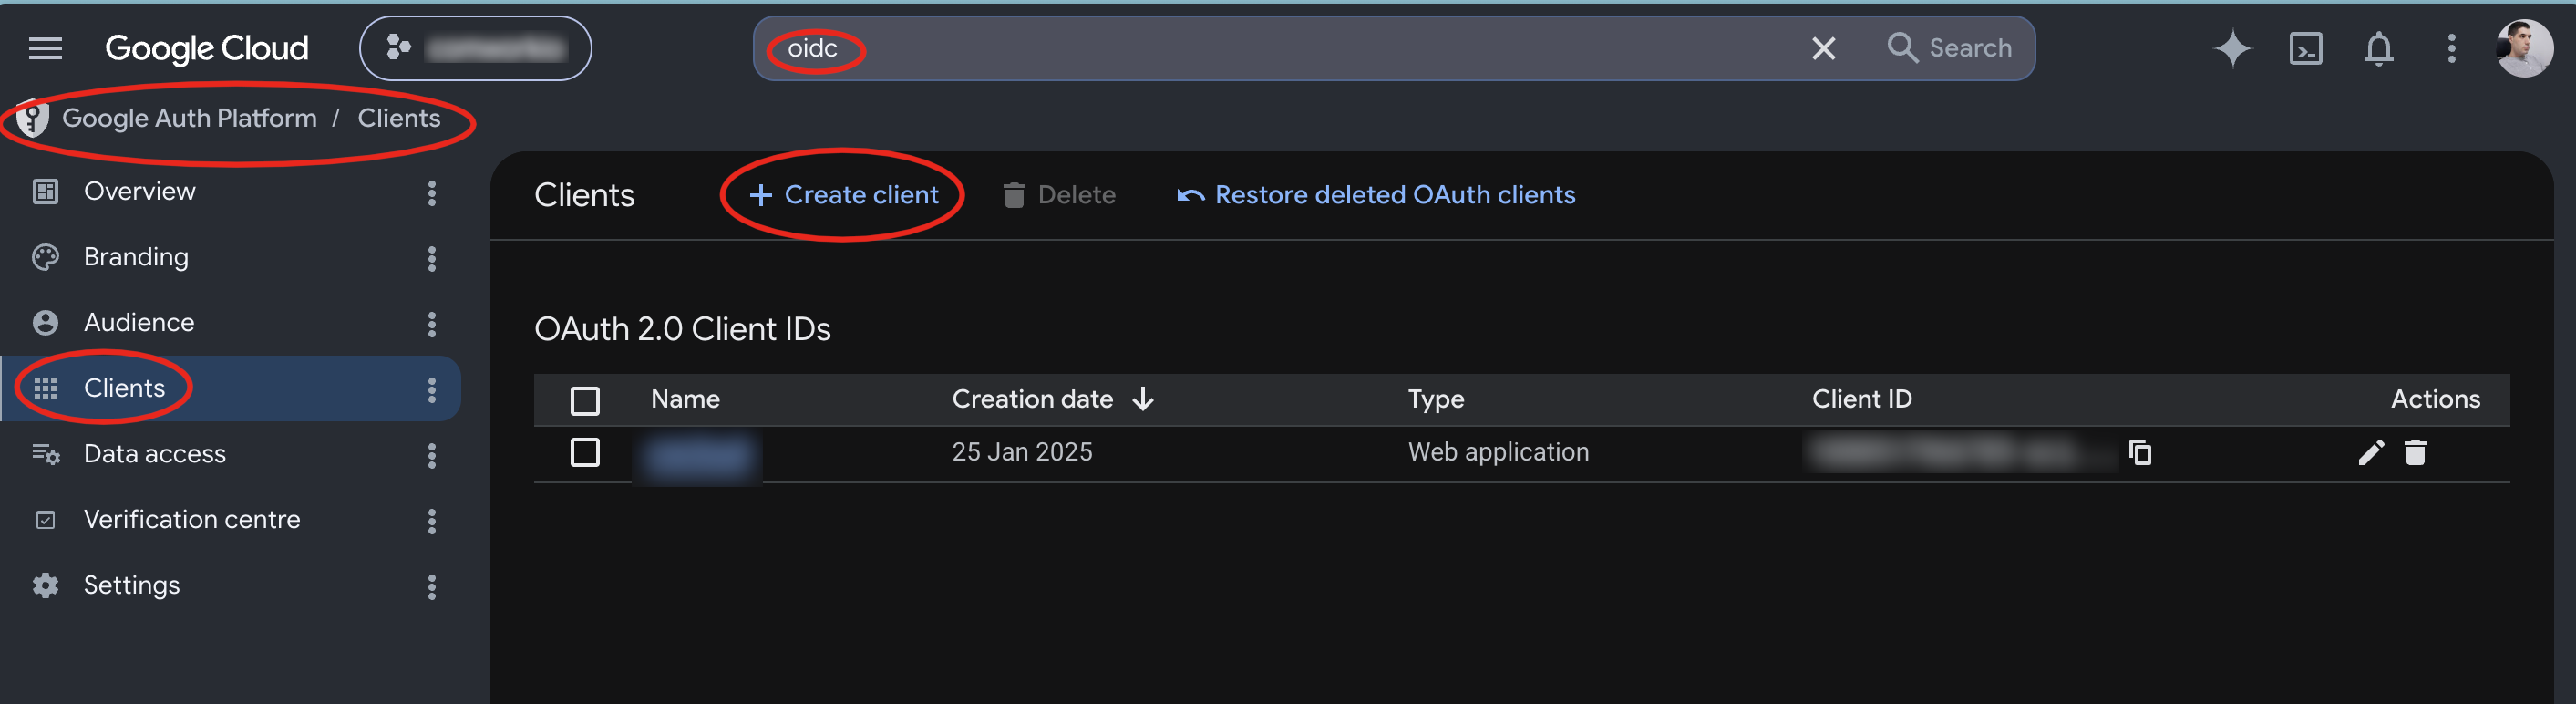
You'll land to "Google Auth Platform"
2/ Create a new client app:
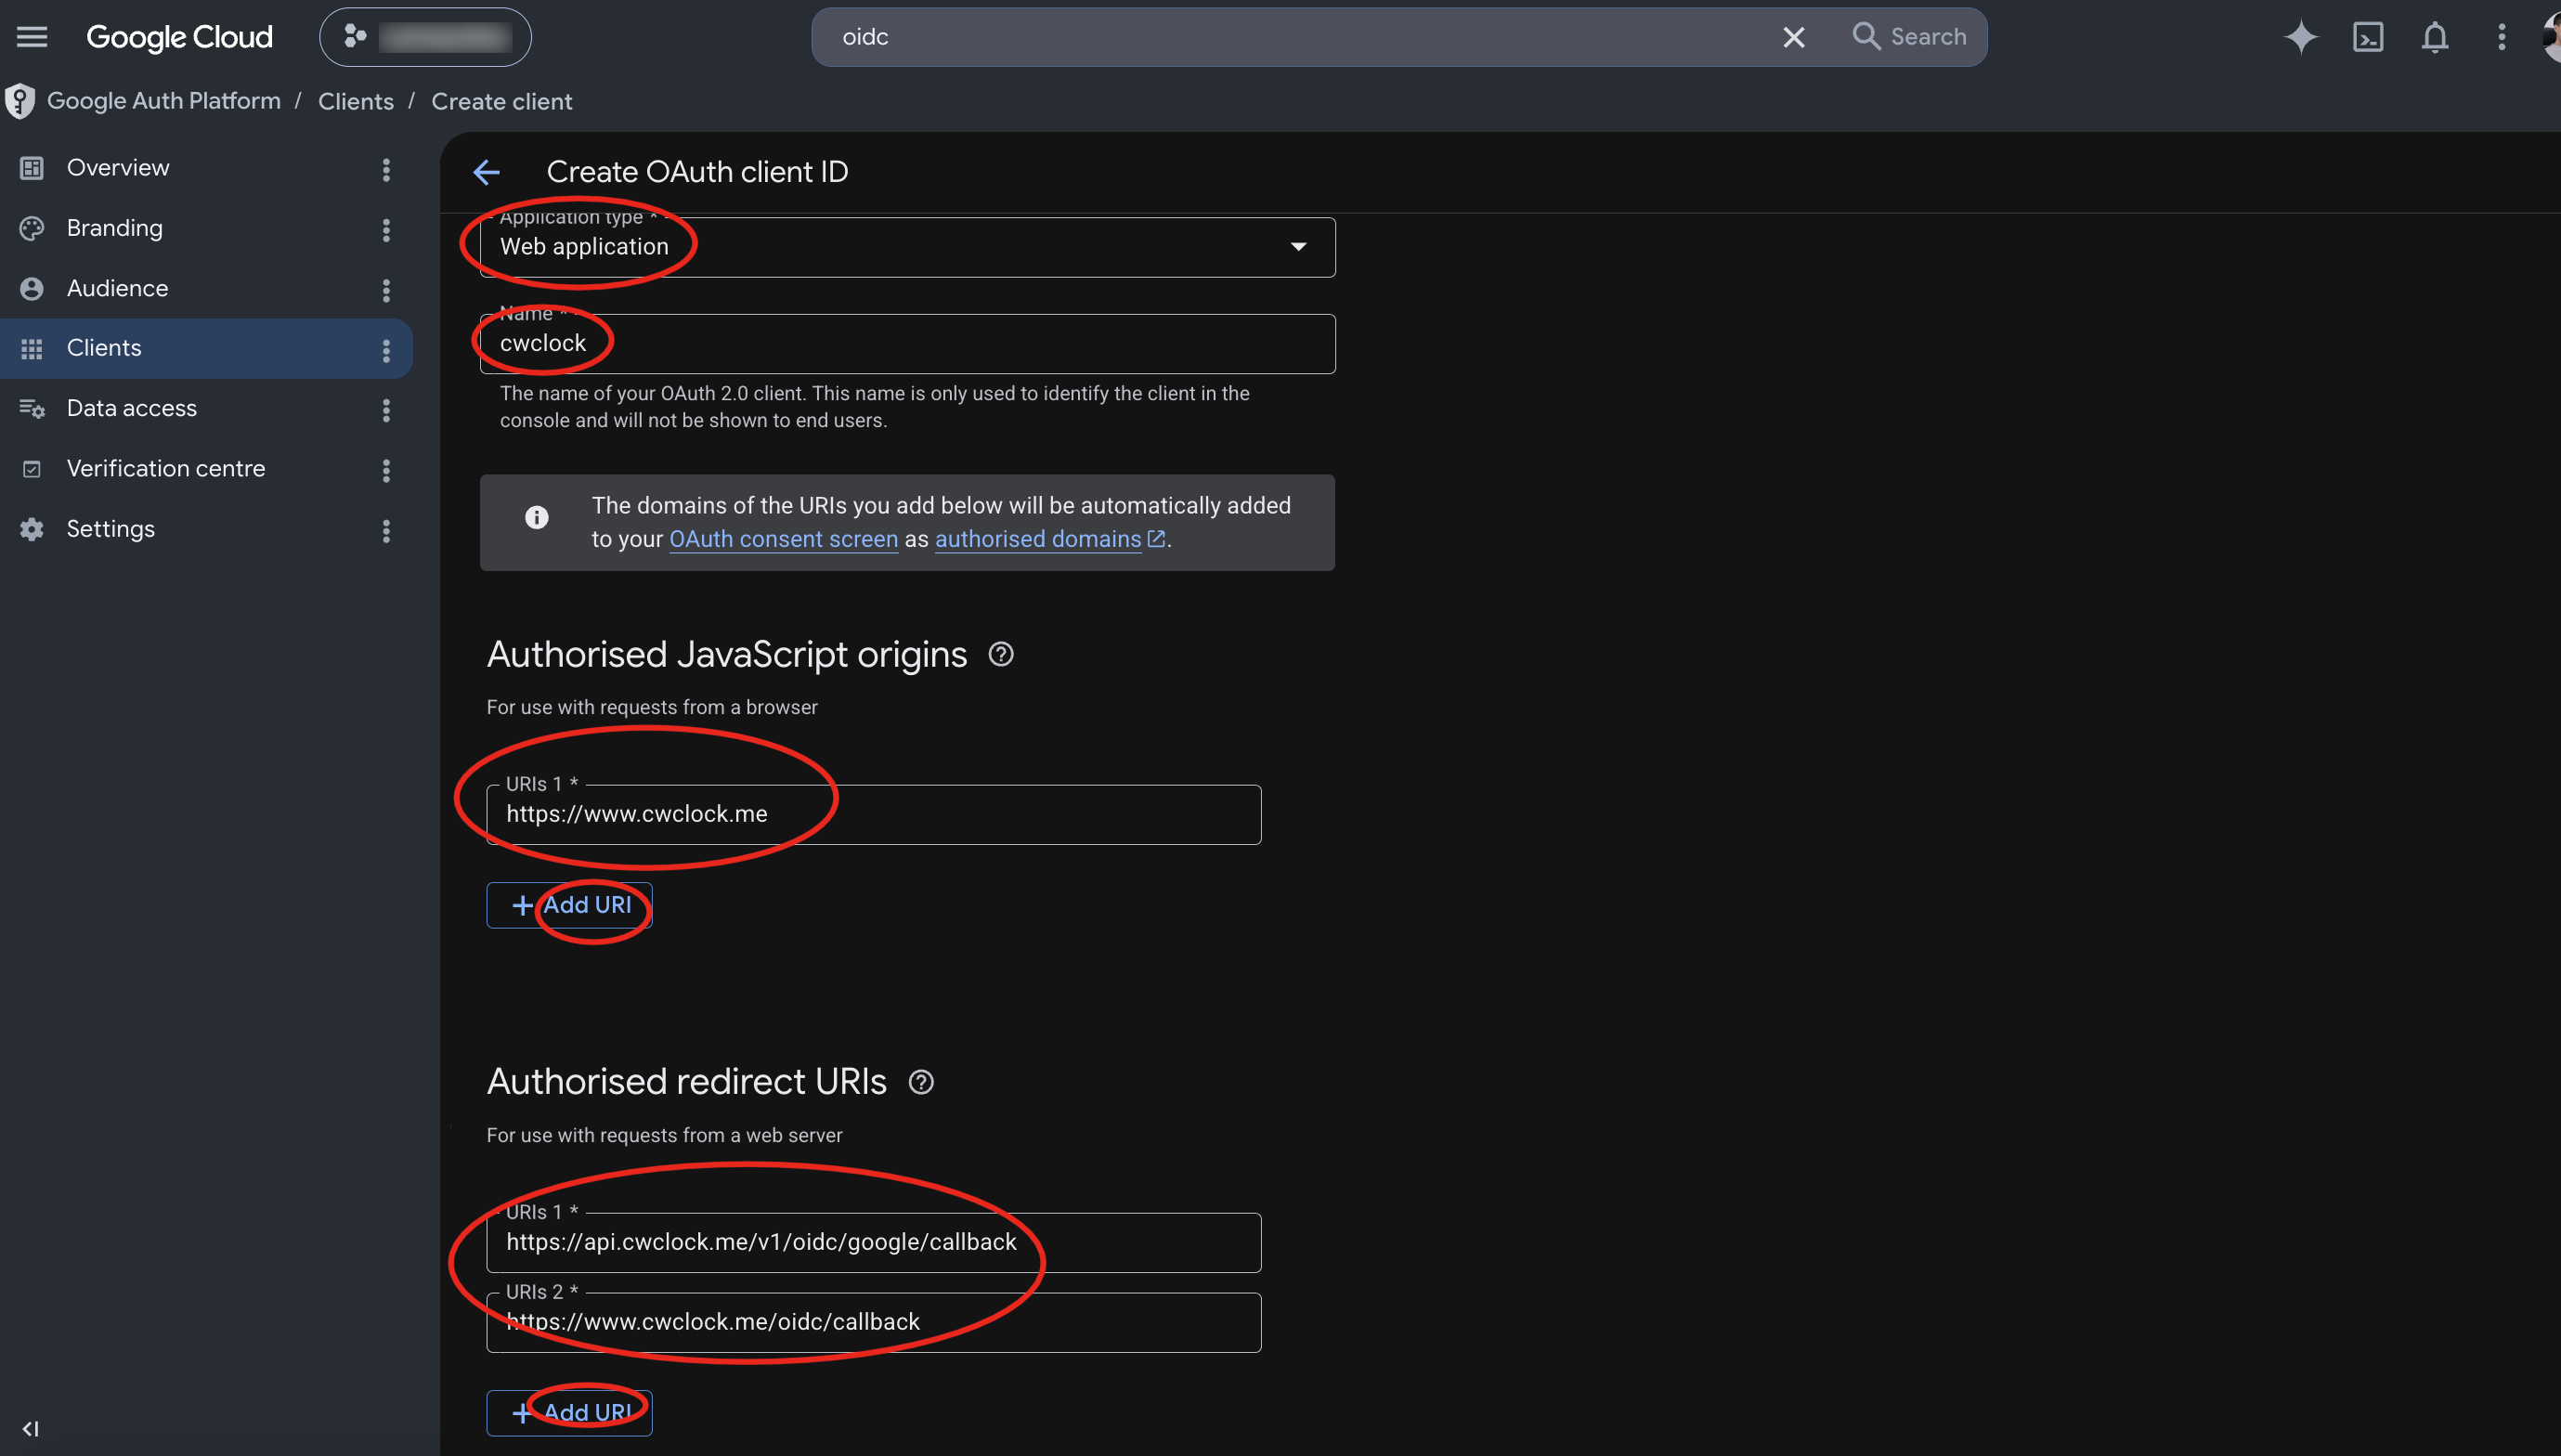
Fill the redirects URI with the following URLs:
https://{your api domain}/v1/oidc/google/callbackhttps://{your frontend domain}/oidc/callback
Fill also the Authorised JavaScript origins with https://{your frontend domain}
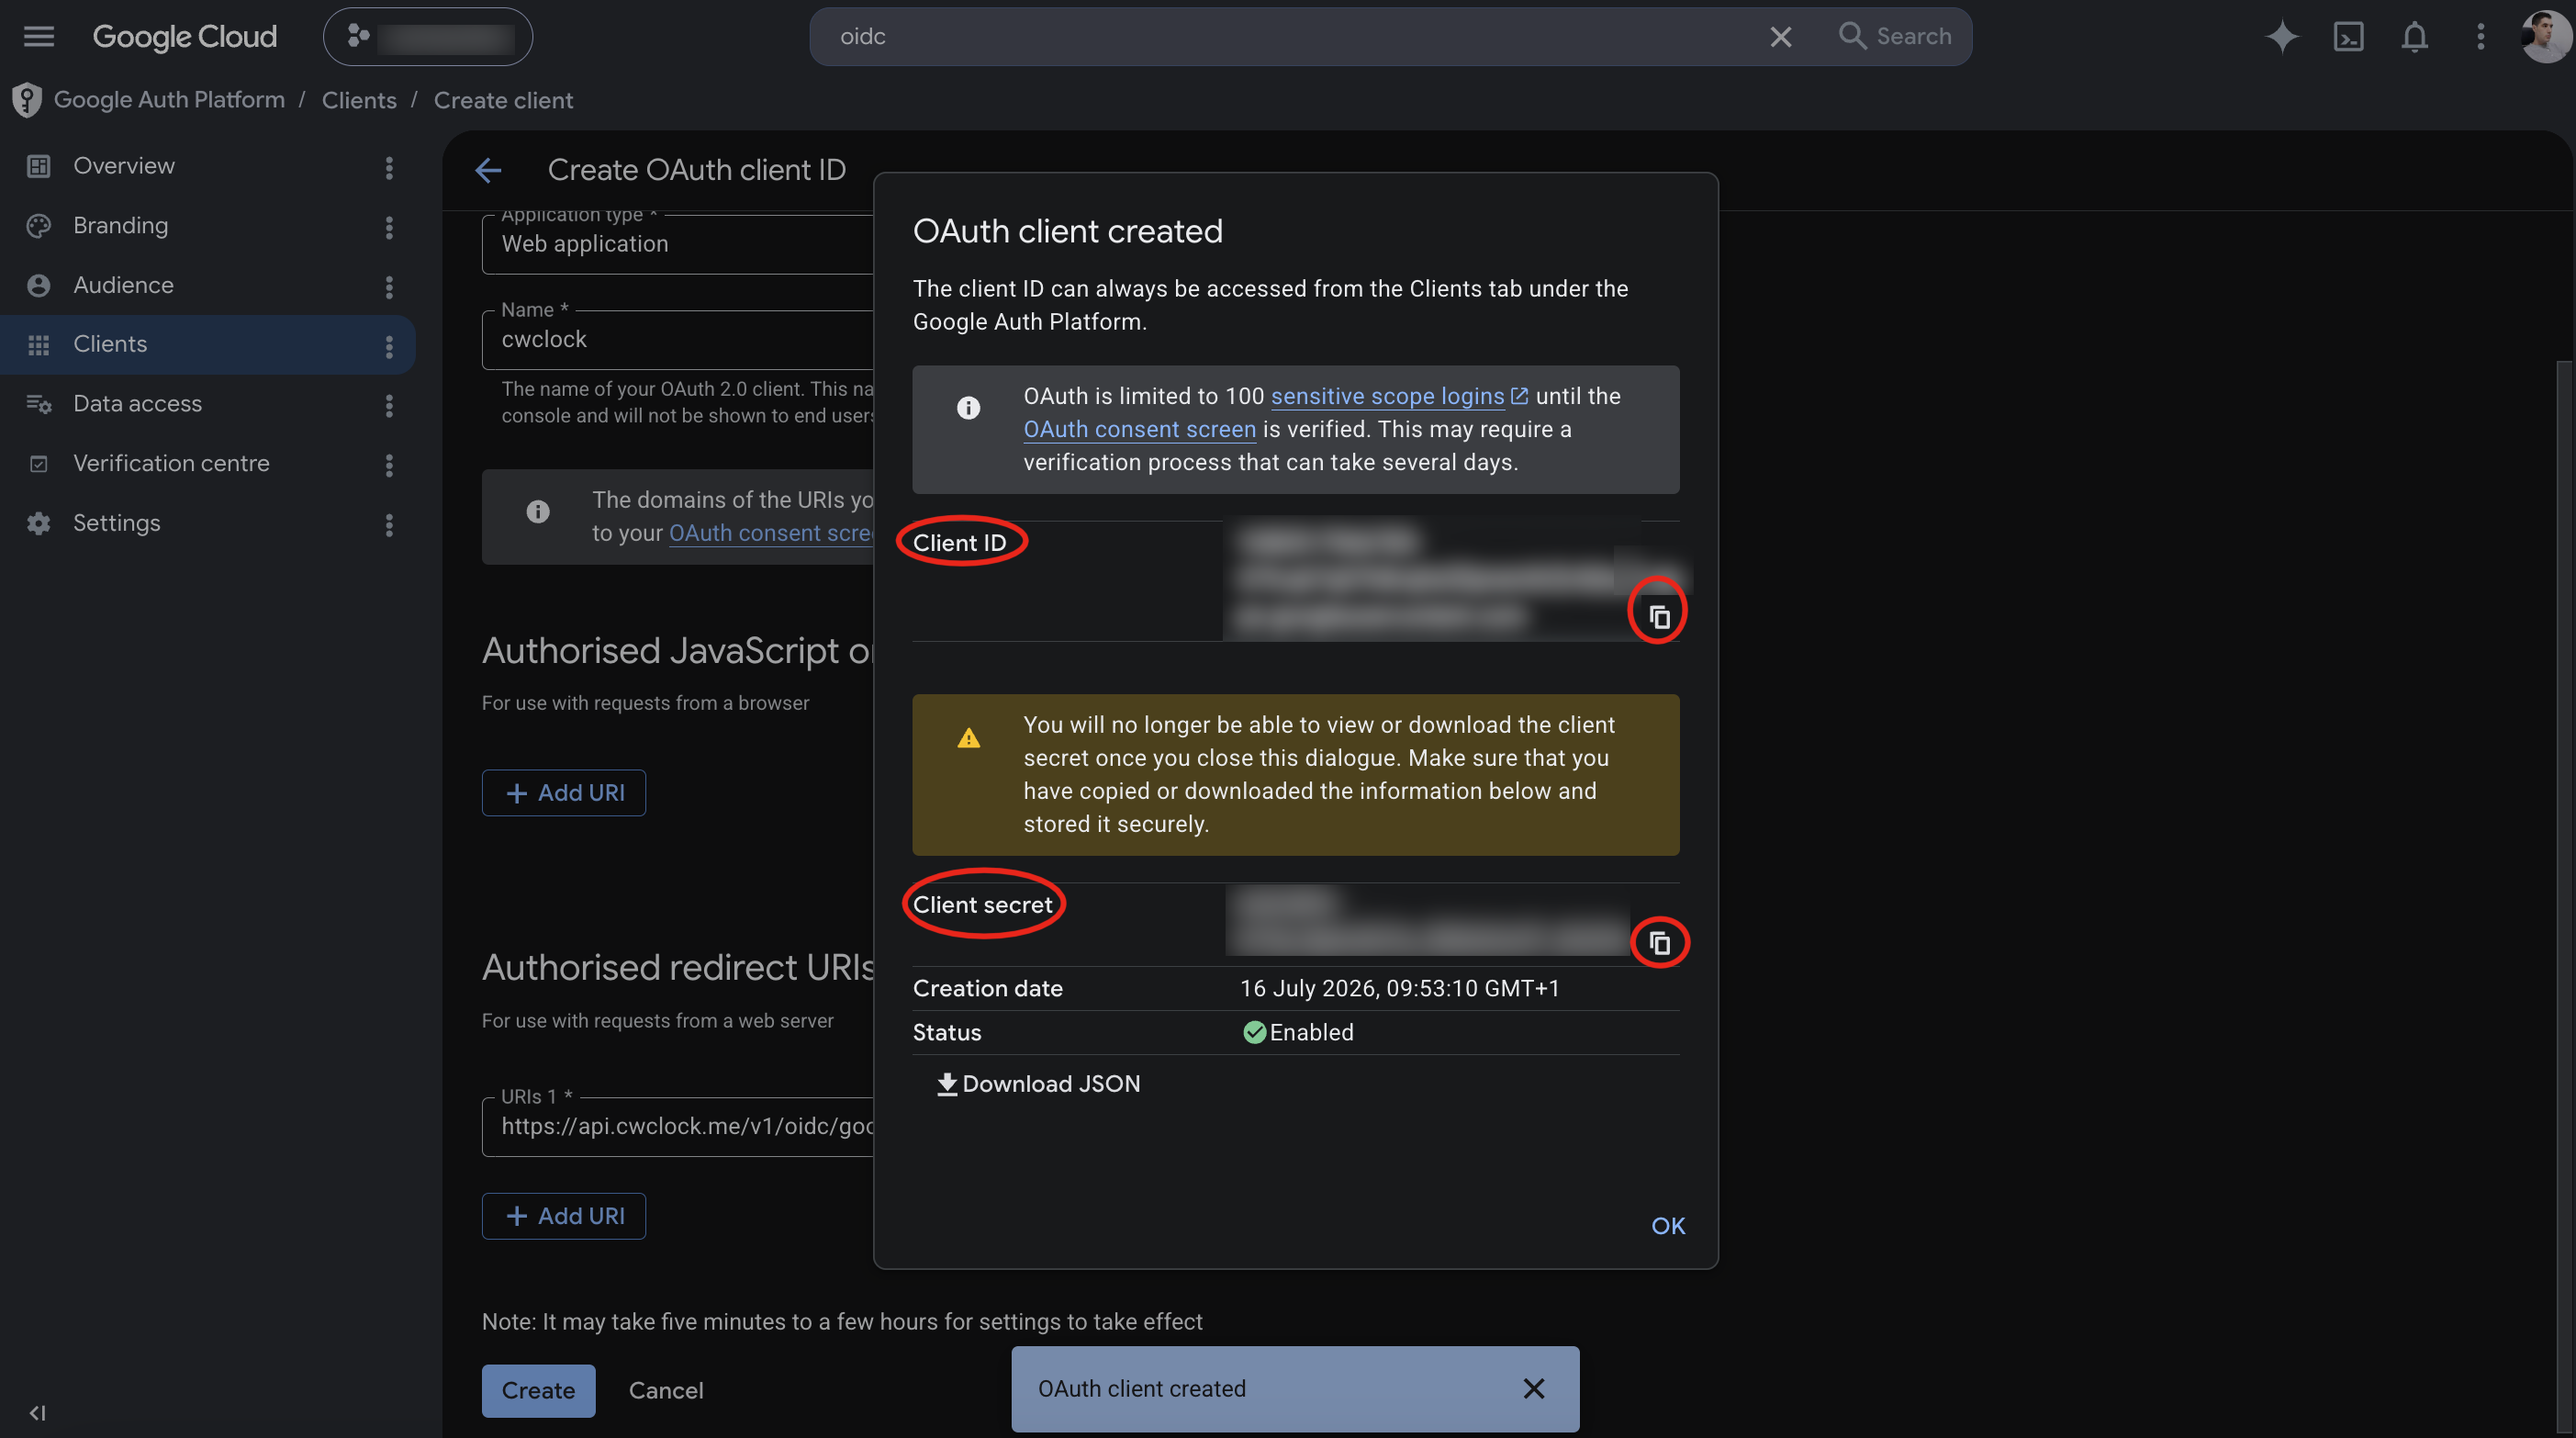
3/ Copy/paste the client id and client secret (in the environment variables CWCLOCK_OIDC_GOOGLE_CLIENT_ID and CWCLOCK_OIDC_GOOGLE_CLIENT_SECRET):
Getting client id and secret from Github
1/ Go on developers settings:
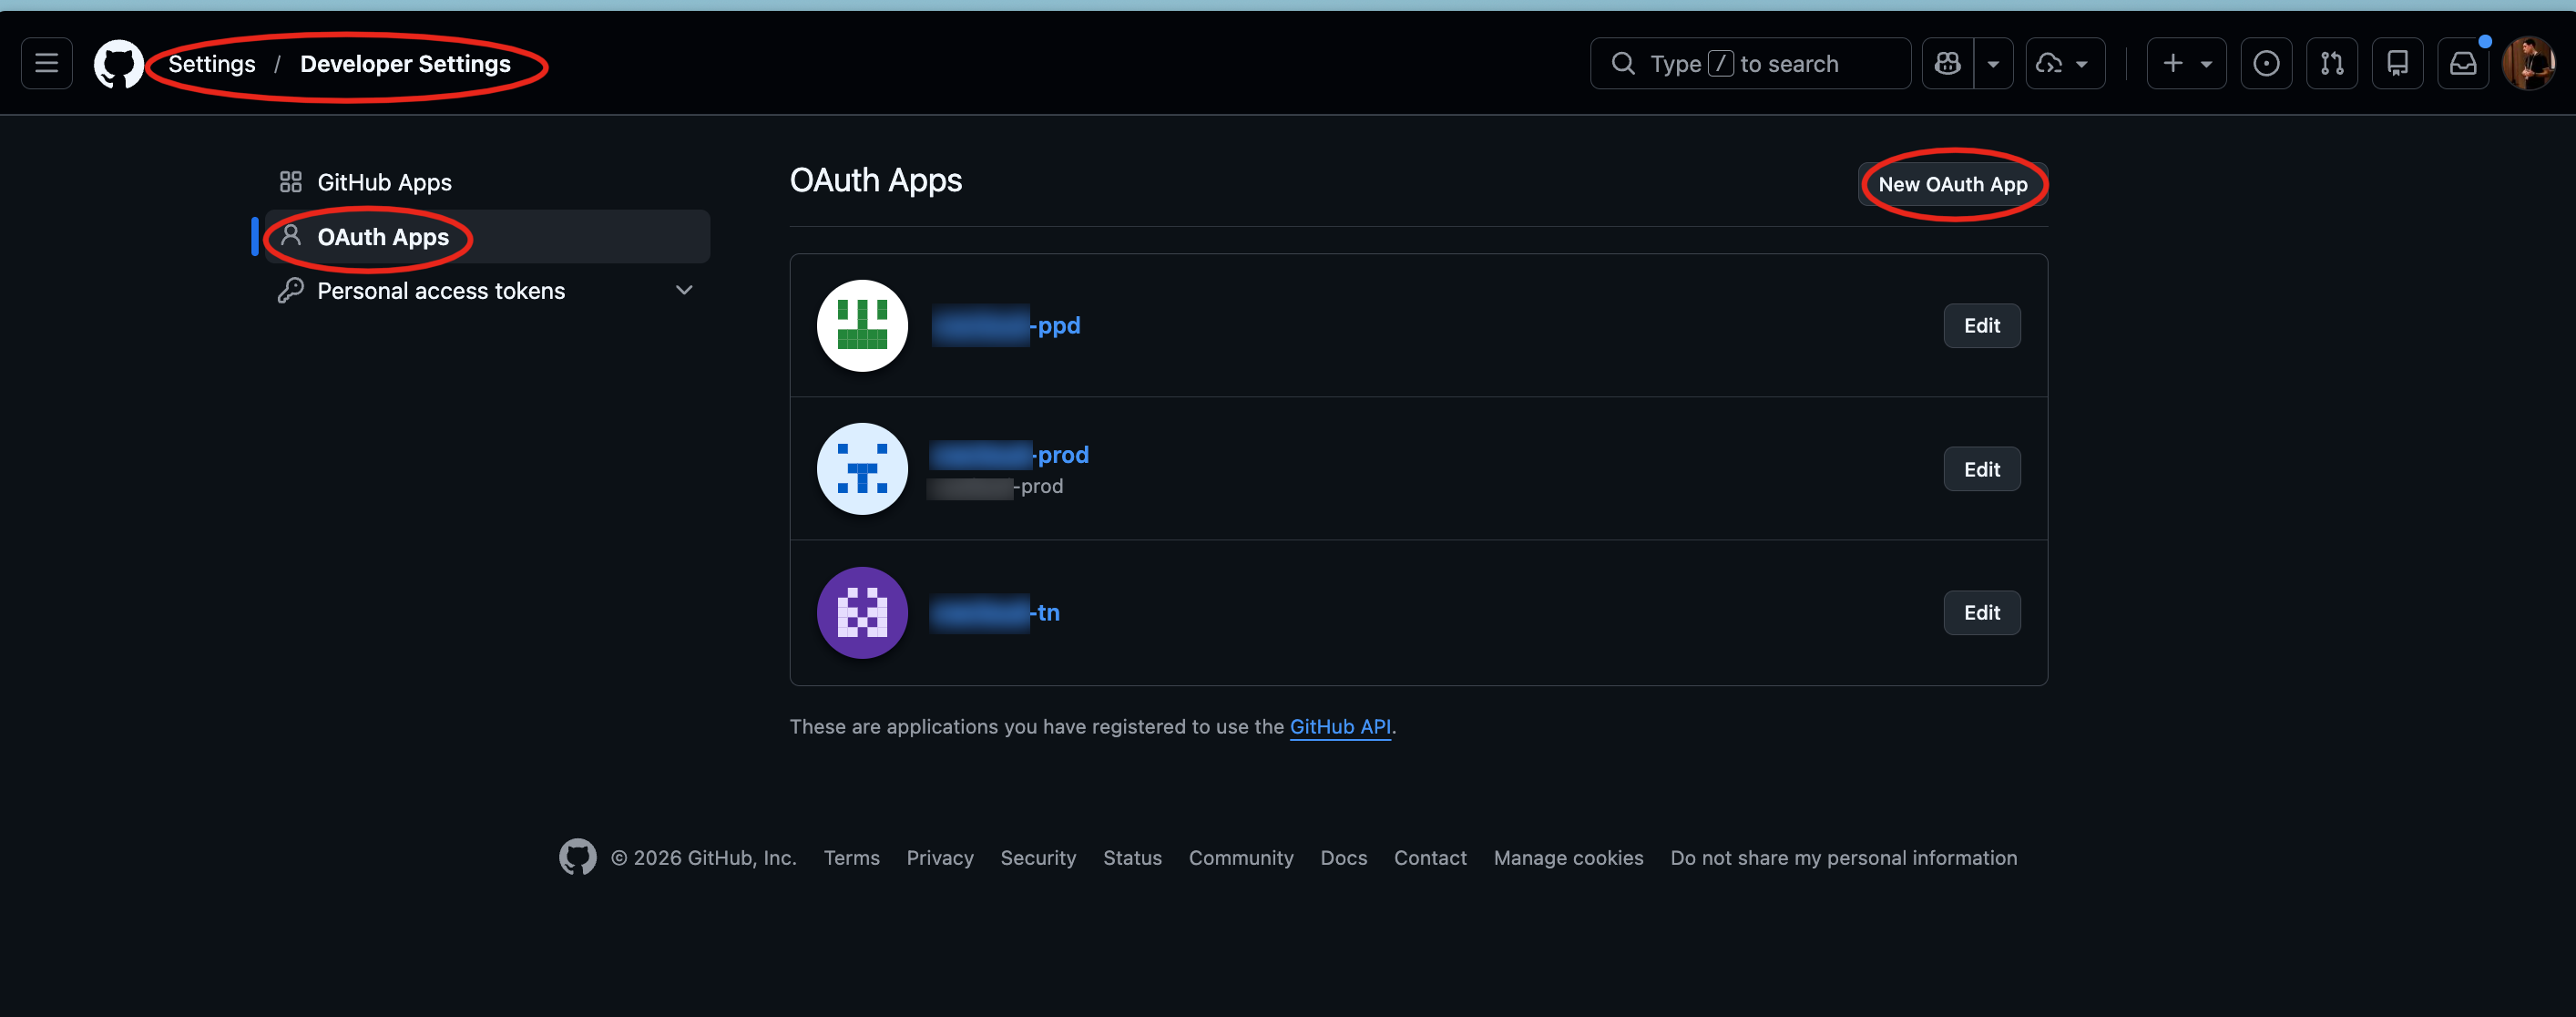
2/ Create a new "OAuth App"
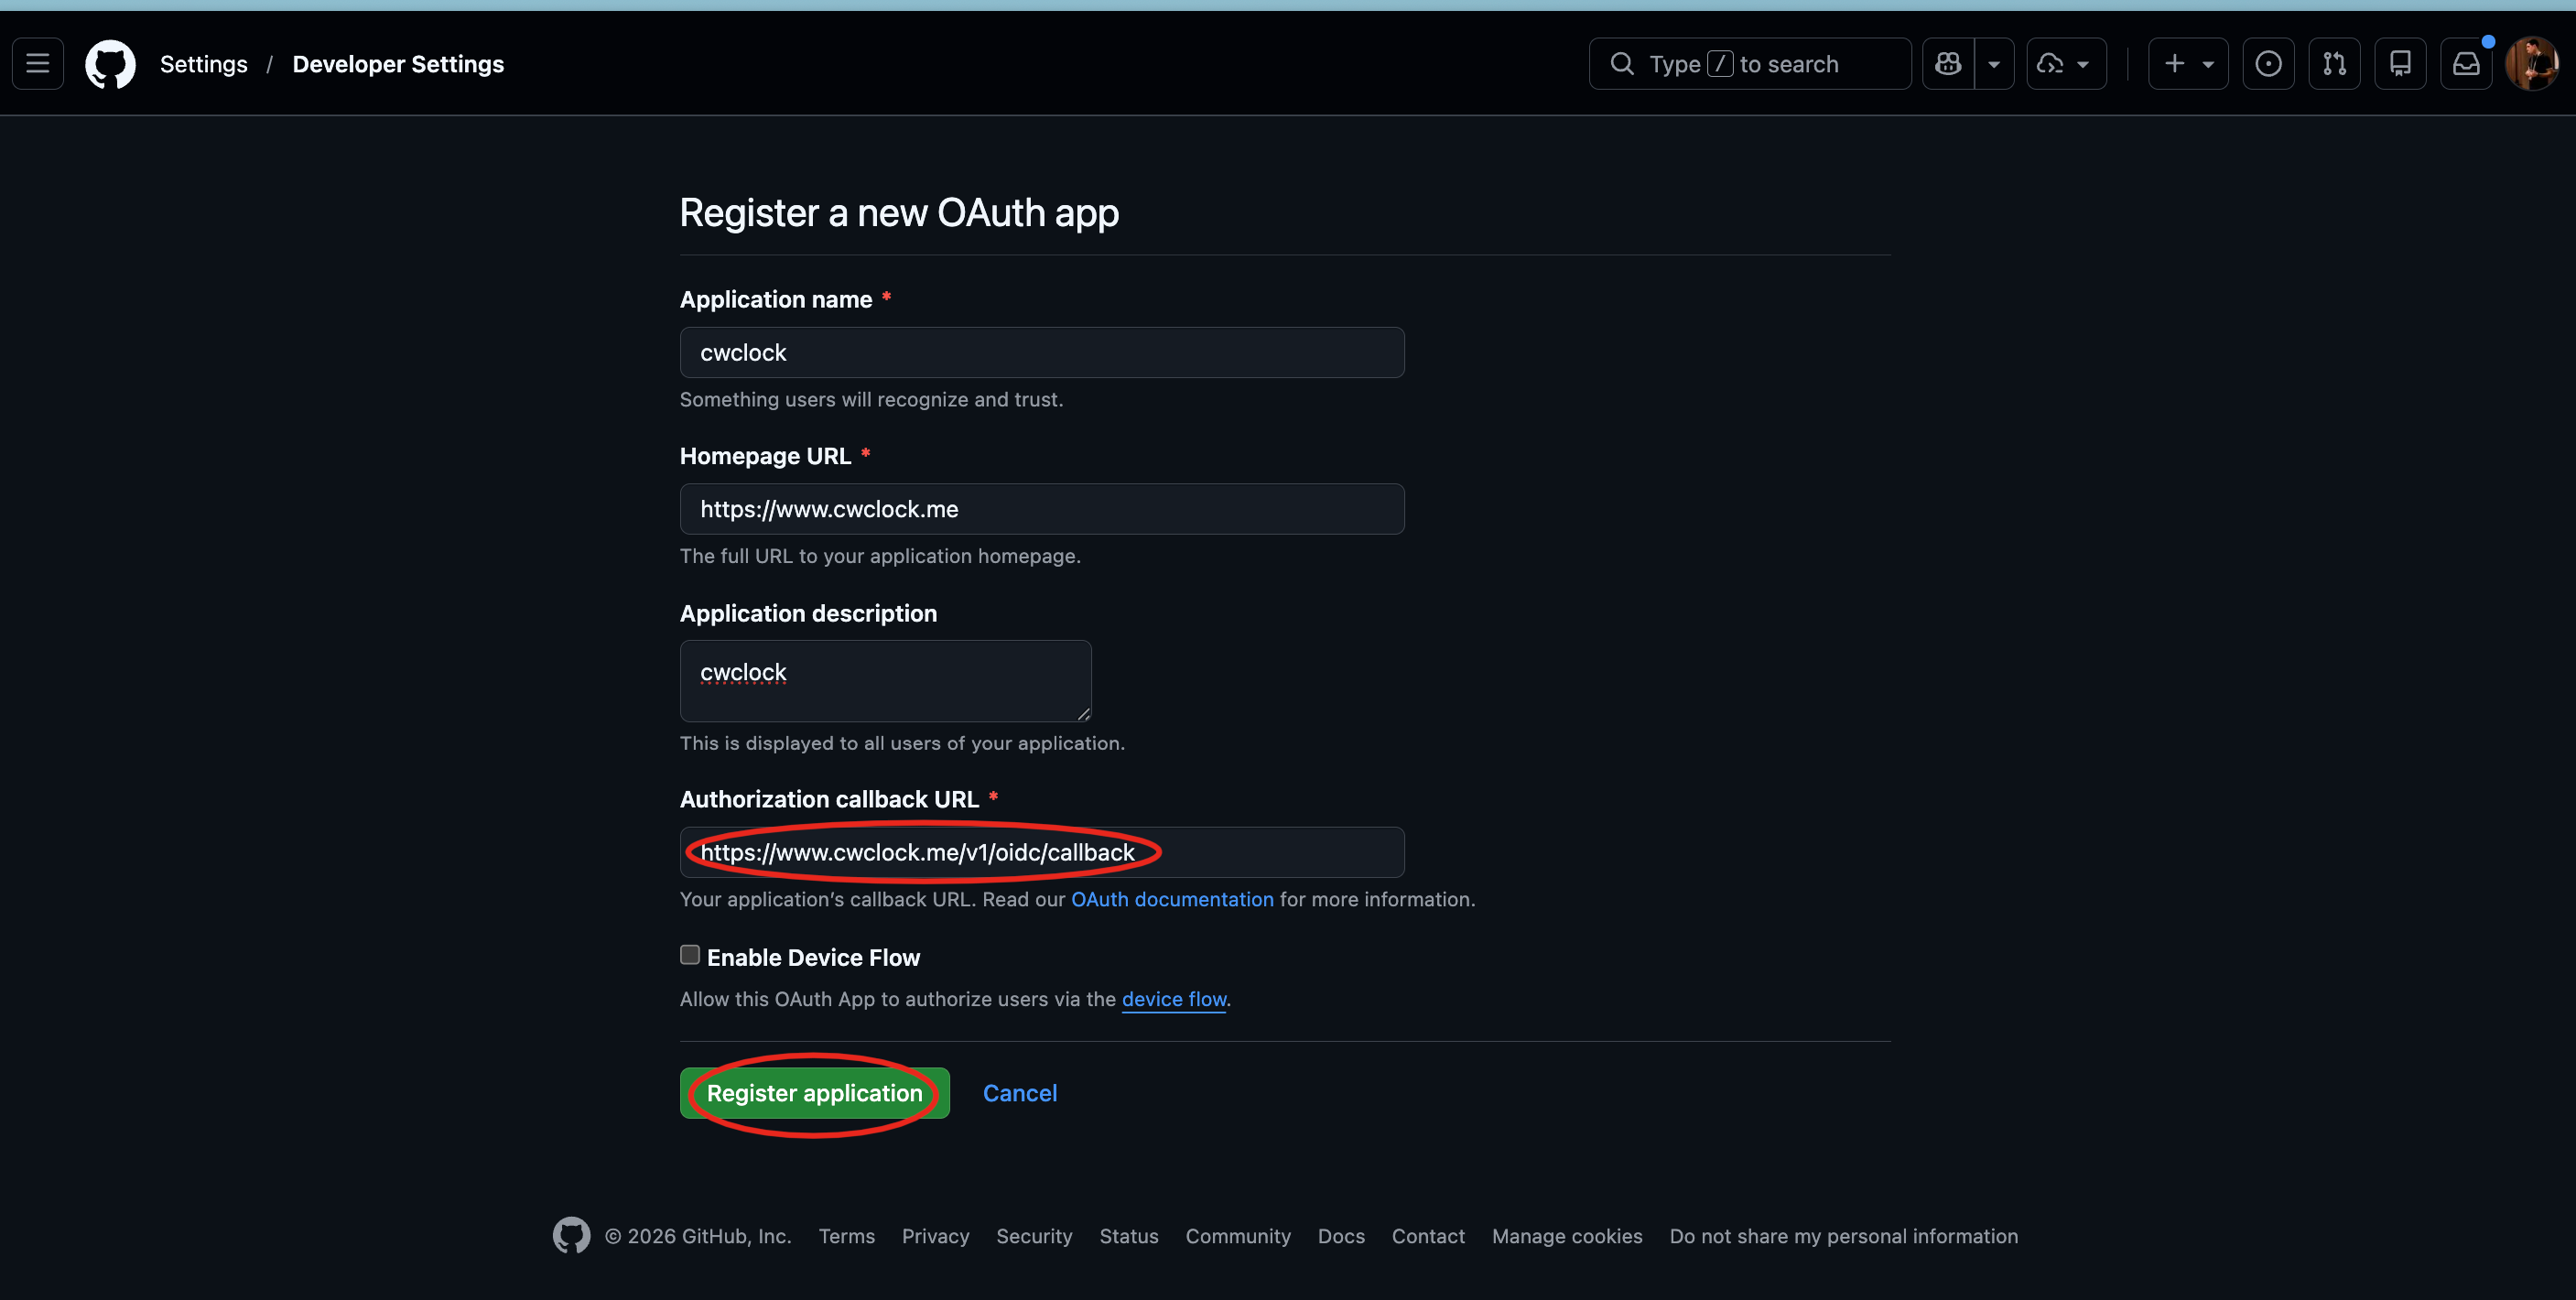
Fill the redirects URI with the following URL: https://{your api domain}/oidc/callback
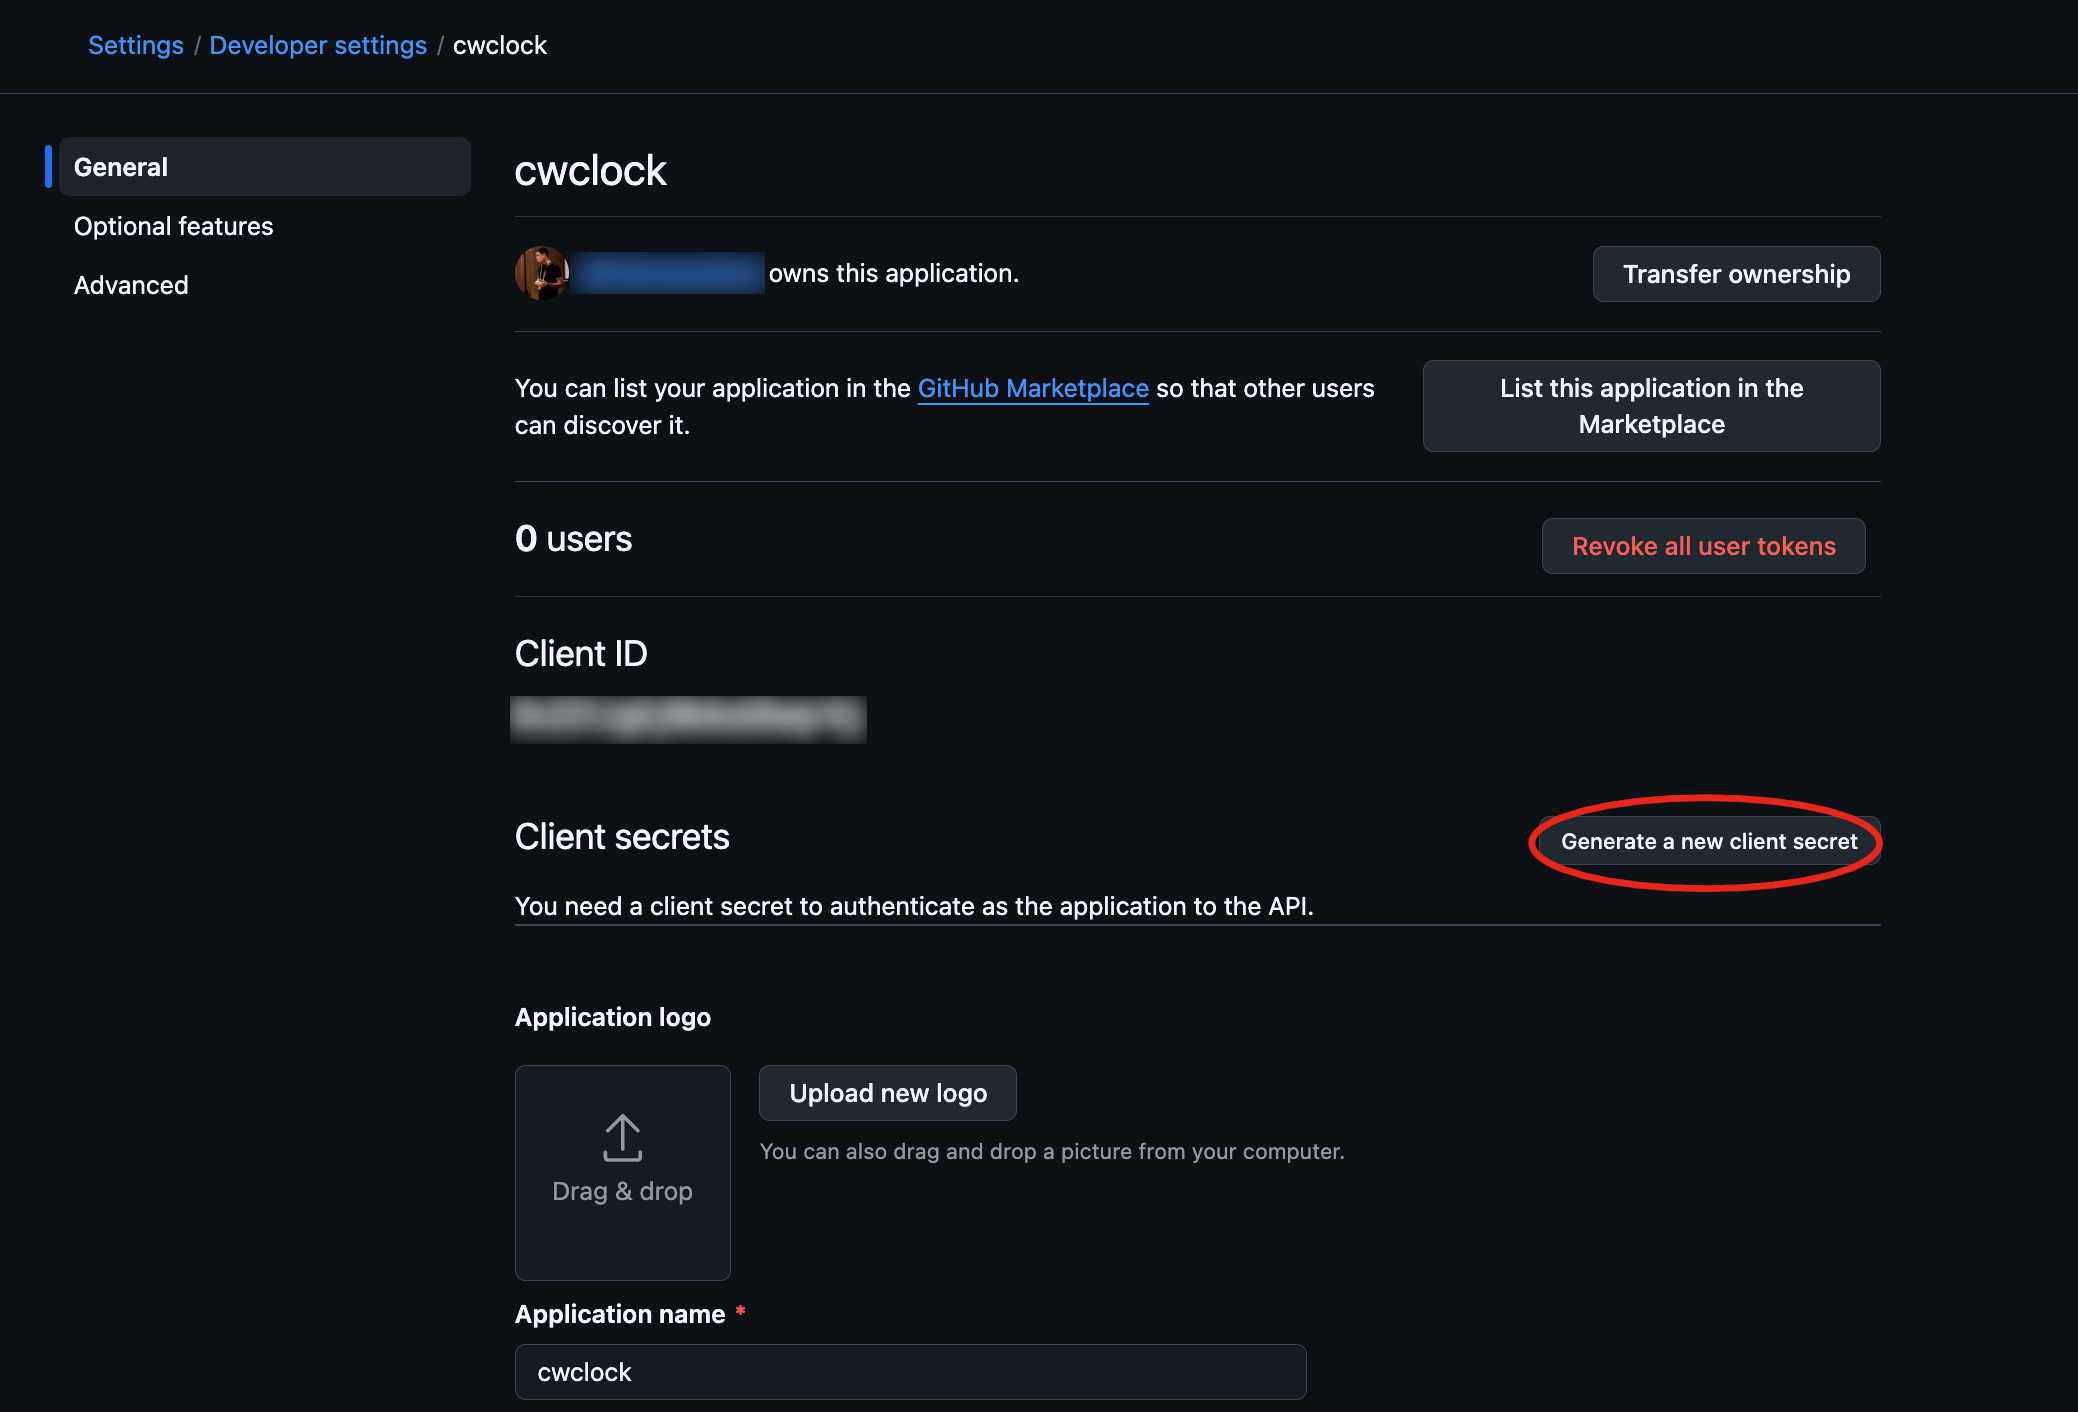
3/ Generate a new client secret:
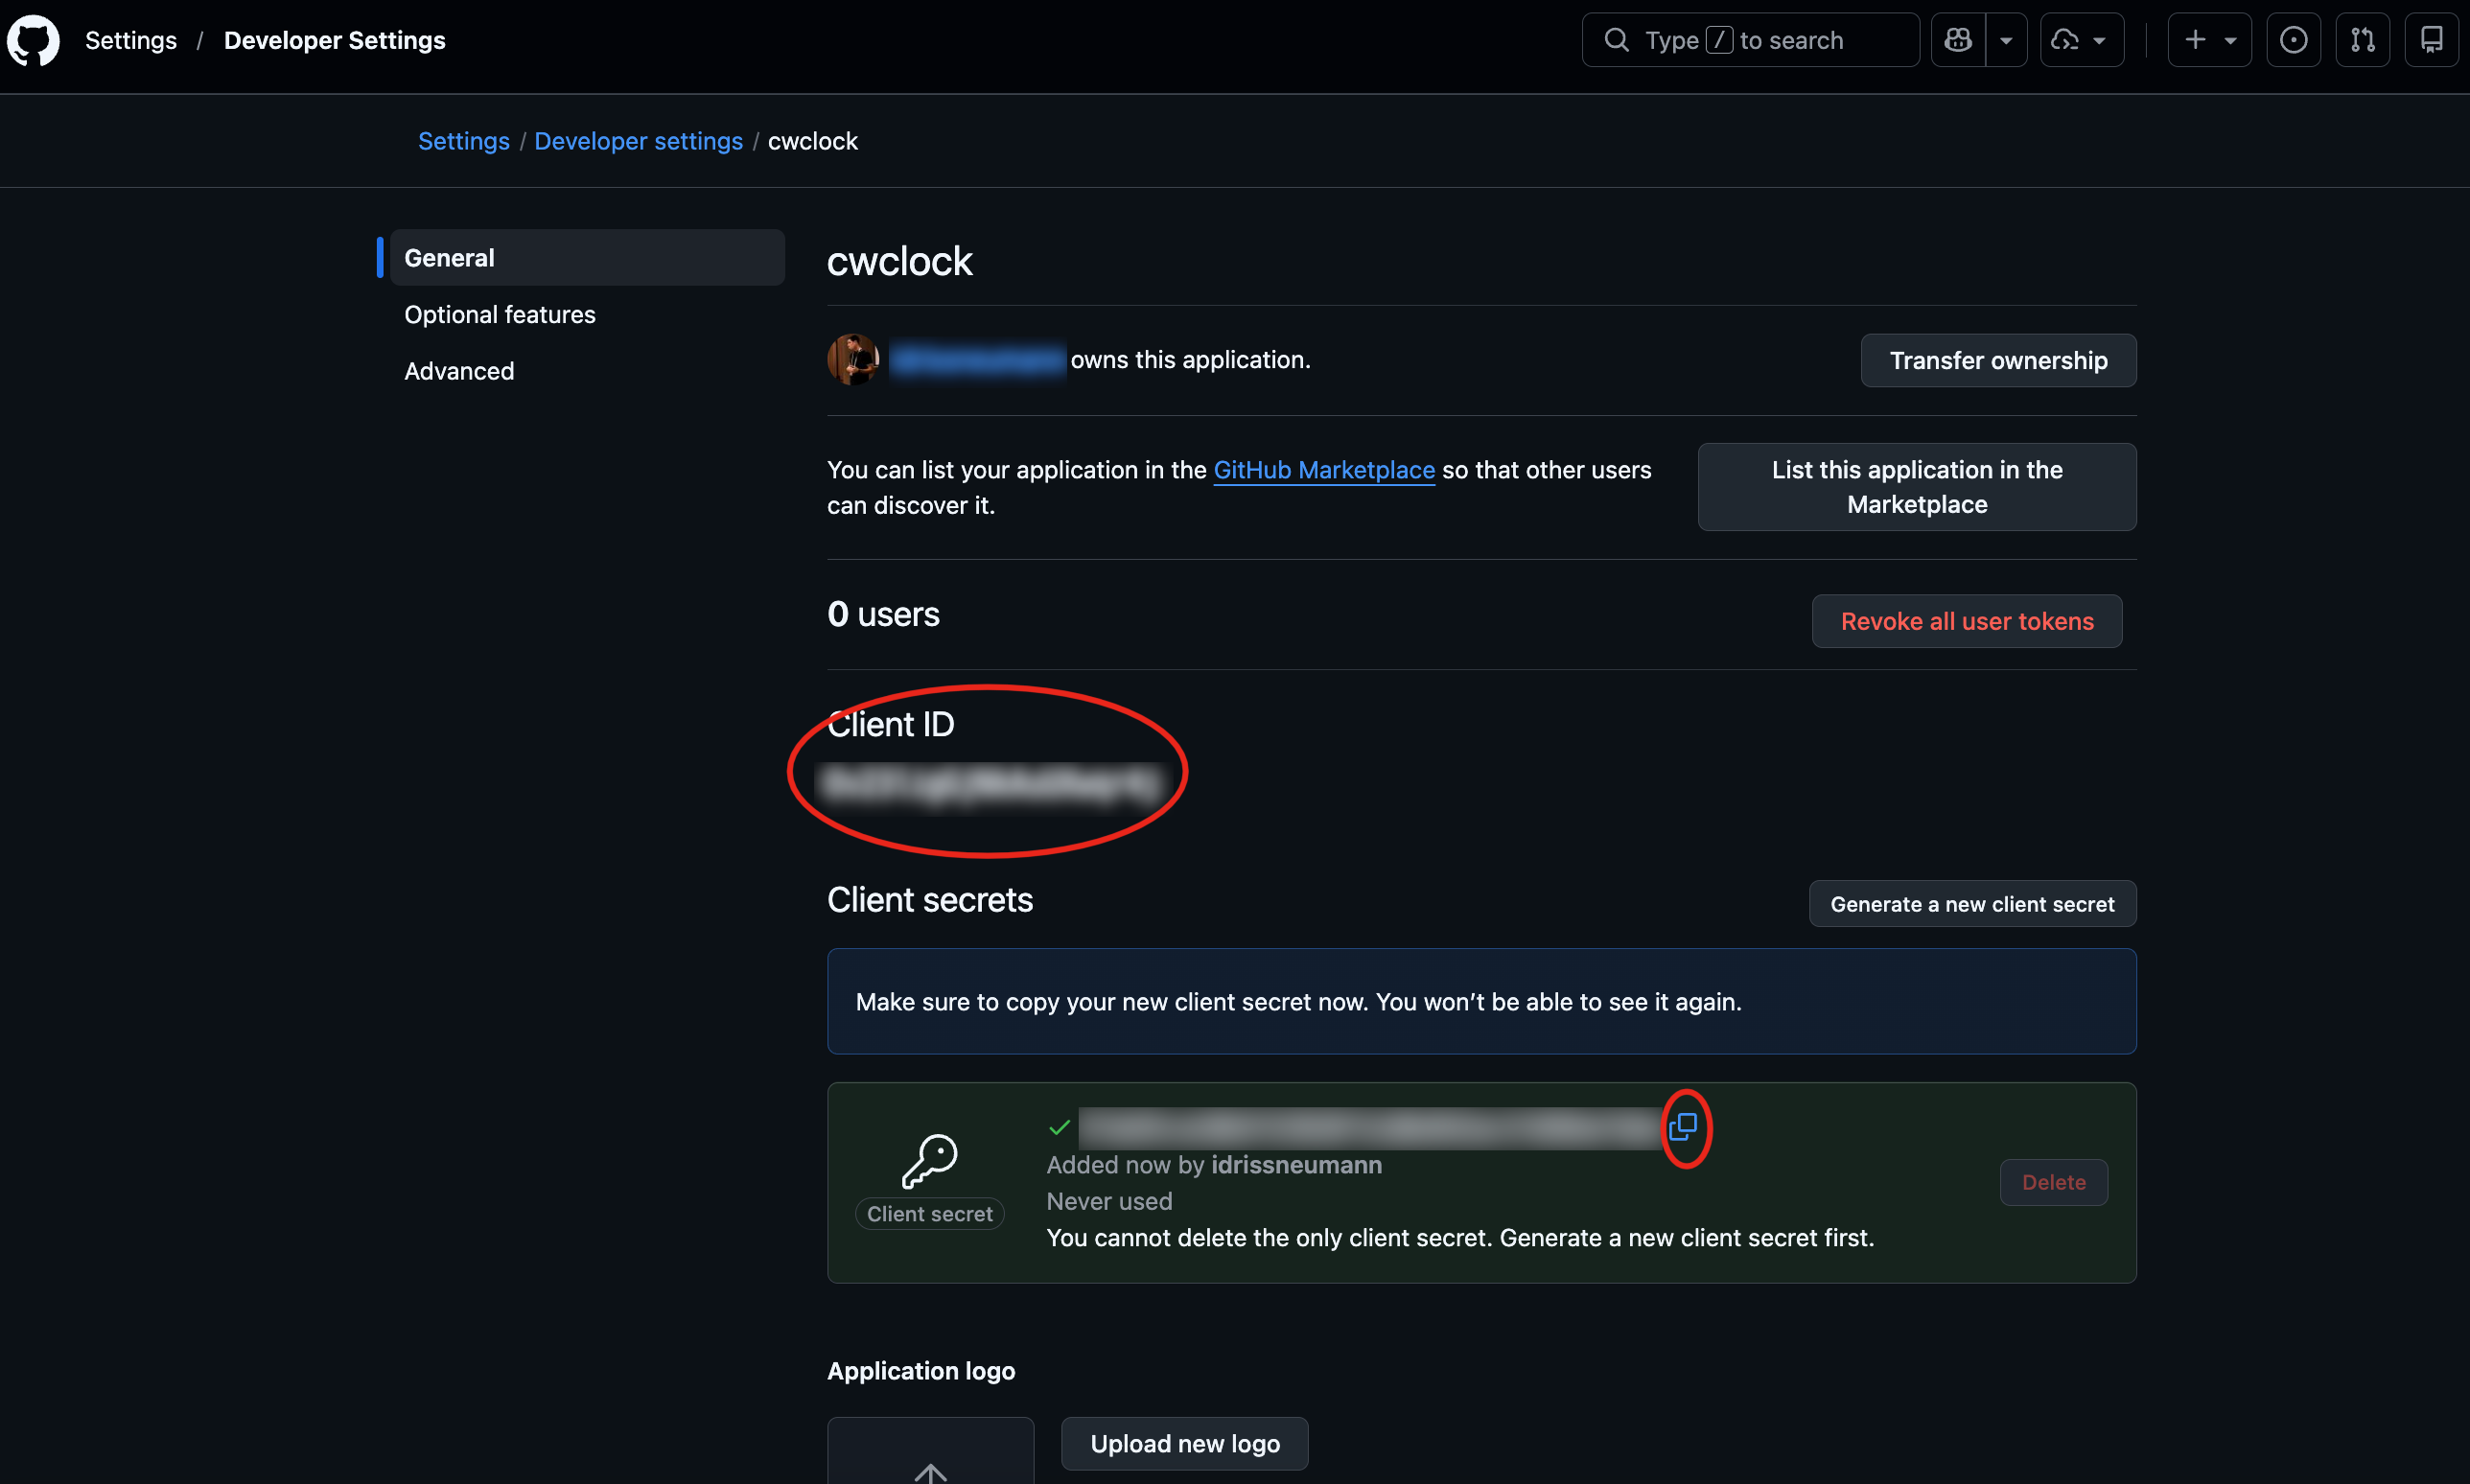
4/ Copy/paste the client id and client secret (in the environment variables CWCLOCK_OIDC_GITHUB_CLIENT_ID and CWCLOCK_OIDC_GITHUB_CLIENT_SECRET):
Email API
CWClock can send emails (for confirmation links, regenerating password, sending invoices) through the CWCloud's email API.
You have to configure the following environment's variables:
CWCLOUD_API_URL(which is set by default tohttps://api.cwcloud.techbut if you're using a separated tenant of CWCloud you can override this value)CWCLOUD_API_KEYwhich is expecting an API keyCWCLOUD_CONTACT_FORM_IDthe CWCloud's contact form idCWCLOCK_MAIL_FROMwhich is the sender of the emailsCWCLOCK_LIMIT_MAILwhich is a monthly limit of emails sent by an organizations (by default it's 100)
If it's not configured, CWClock will work anyway but it won't send emails.
Note: if you don't want to use CWCloud emails or contact form api, you'll just have to create endpoints compliant which will do whatever you want.